
Understand the Syntax and Coding Process of Smart Contracts
This simulation introduces the Solidity compiler through guided tasks designed to teach fundamental programming concepts, including conditional statements (if-else), looping structures, and data organization using structs (which provide object-like behavior in Solidity). Participants will also complete a practical Hands-On Exercise based on a Car Rental Smart Contract.
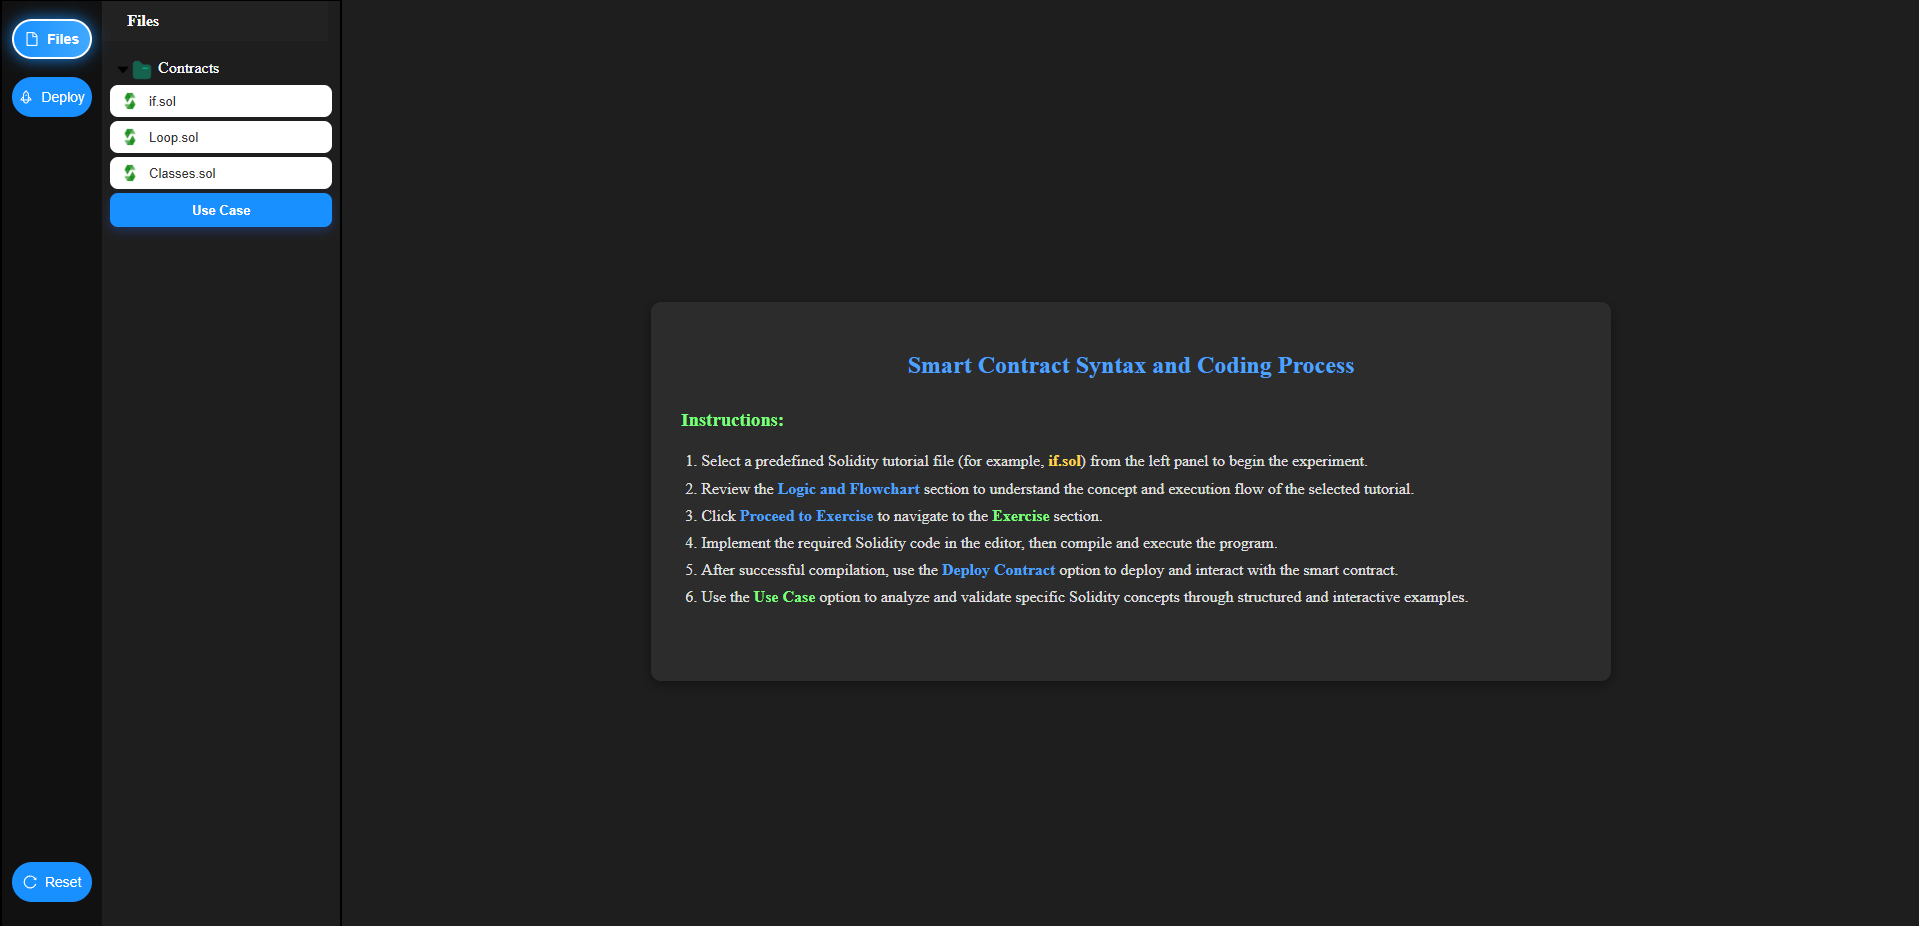
Step 1: Select a Tutorial
From the left sidebar, click the Files button and select one of the predefined Solidity tutorial files from the Contracts list, such as:
if.solloop.solclasses.sol
Selecting a tutorial file automatically loads the Smart Contract Syntax and Coding Process page, where you can review the instructions and logic for the selected tutorial.
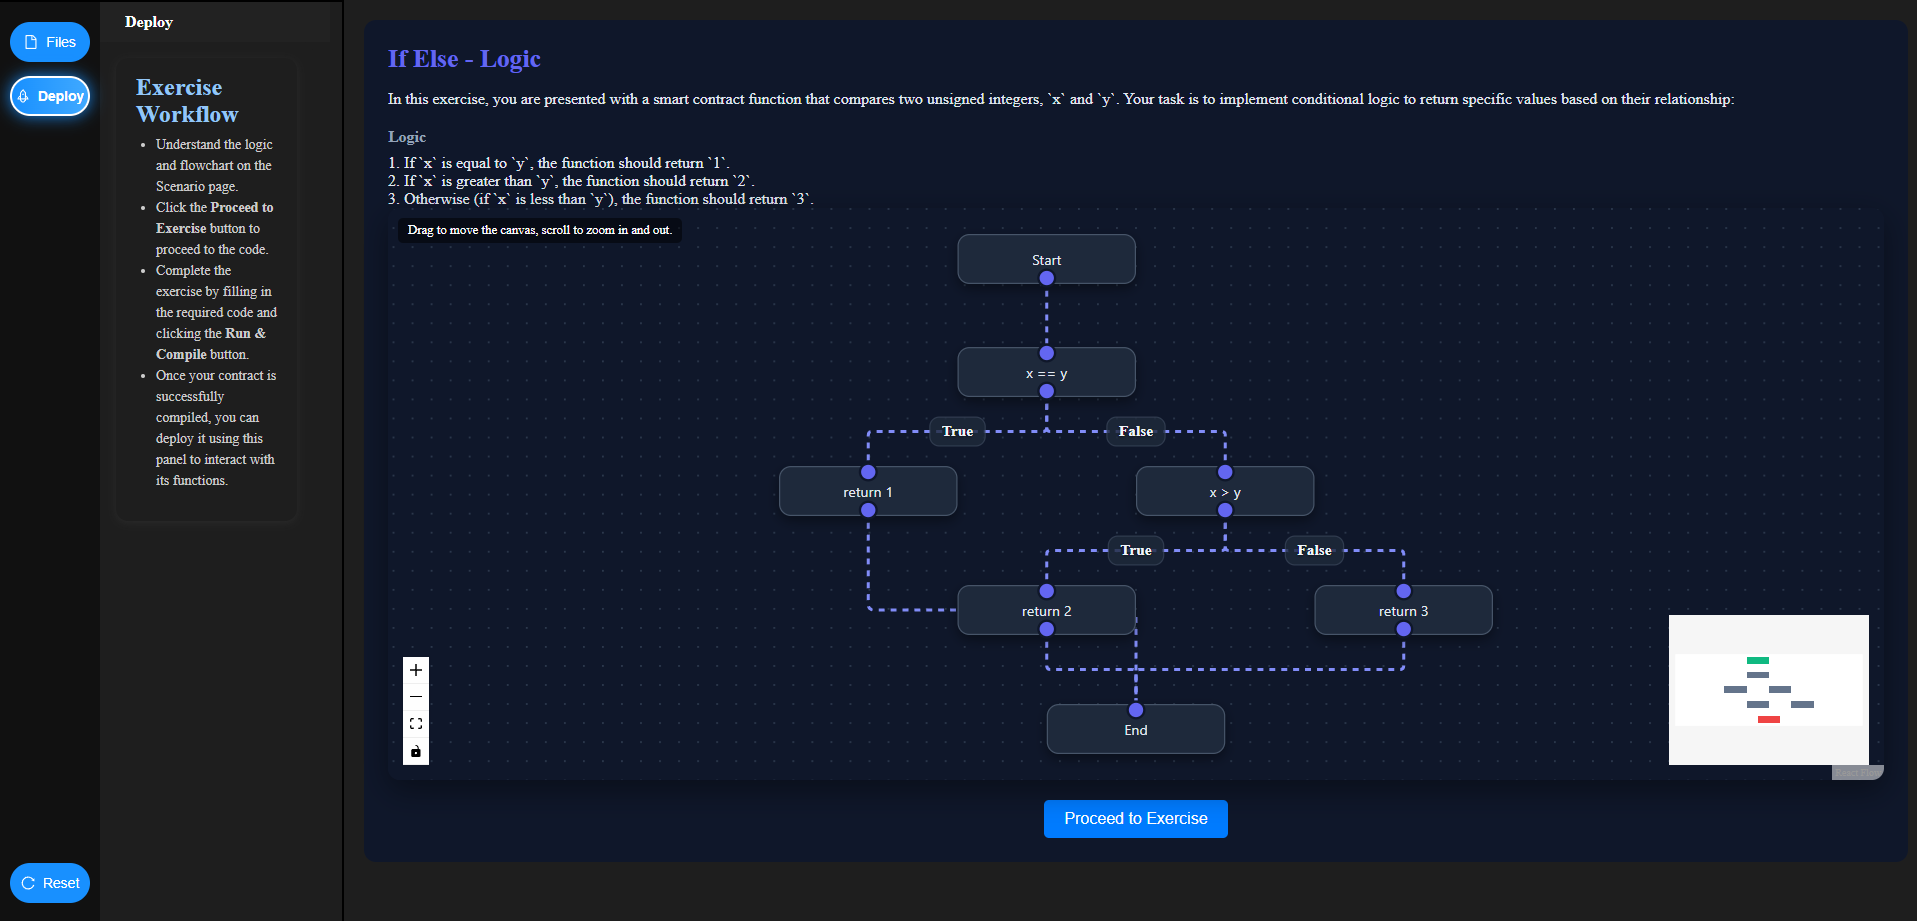
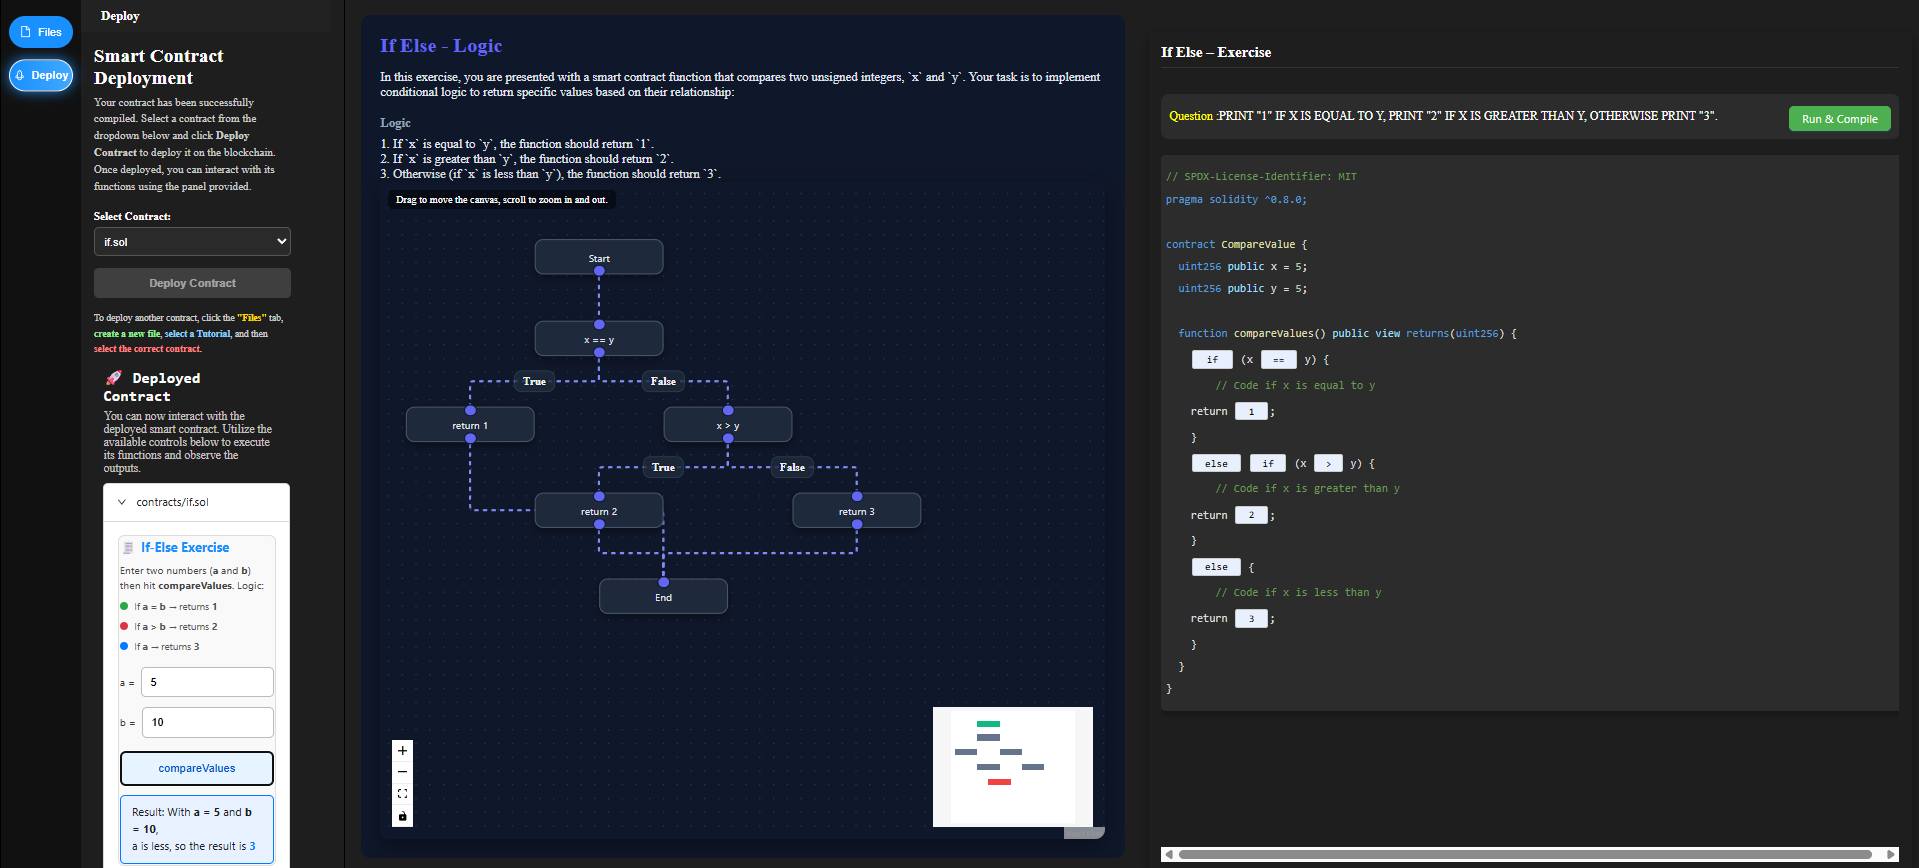
Step 2: Review Logic and Flowchart
After selecting the tutorial file, the corresponding Logic page (e.g., If Else – Logic) is displayed.
Carefully read the problem description and logic rules shown at the top.
Observe the interactive flowchart that visually represents the conditional execution flow:
- You can drag the canvas to move the flowchart.
- Scroll to zoom in or out for better visibility.
Once you fully understand the logic and execution flow, click the Proceed to Exercise button to move to the coding section.
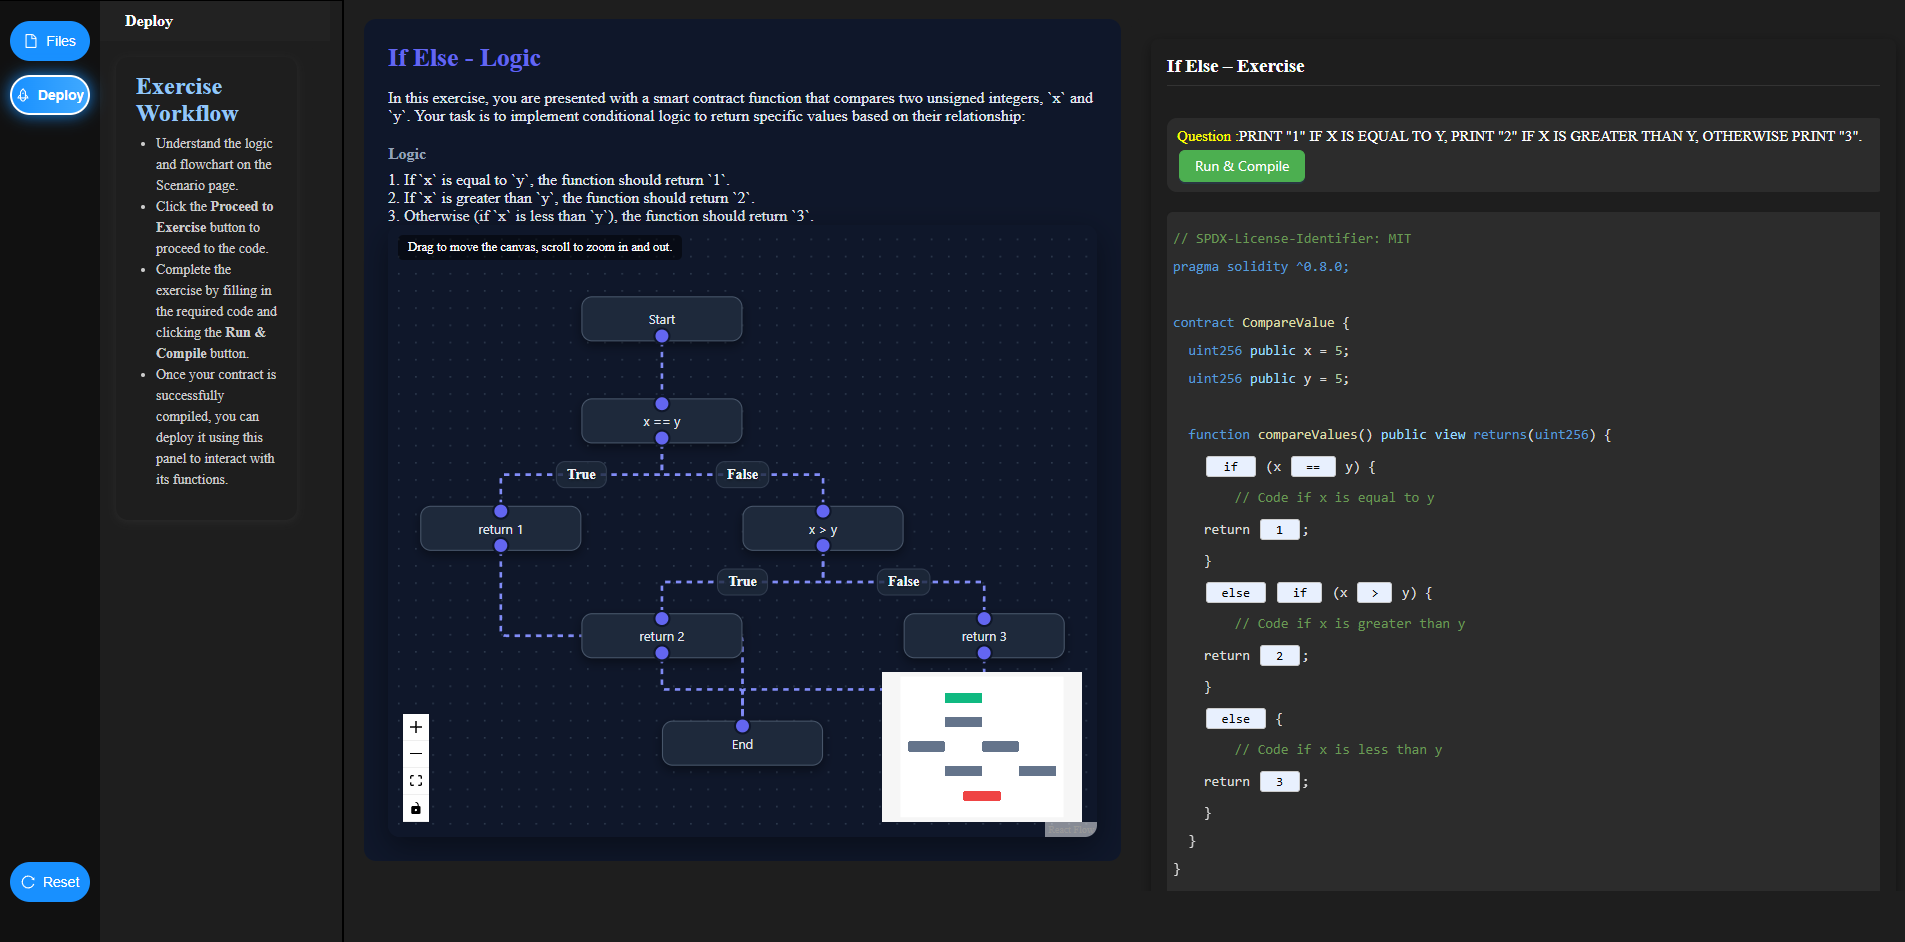
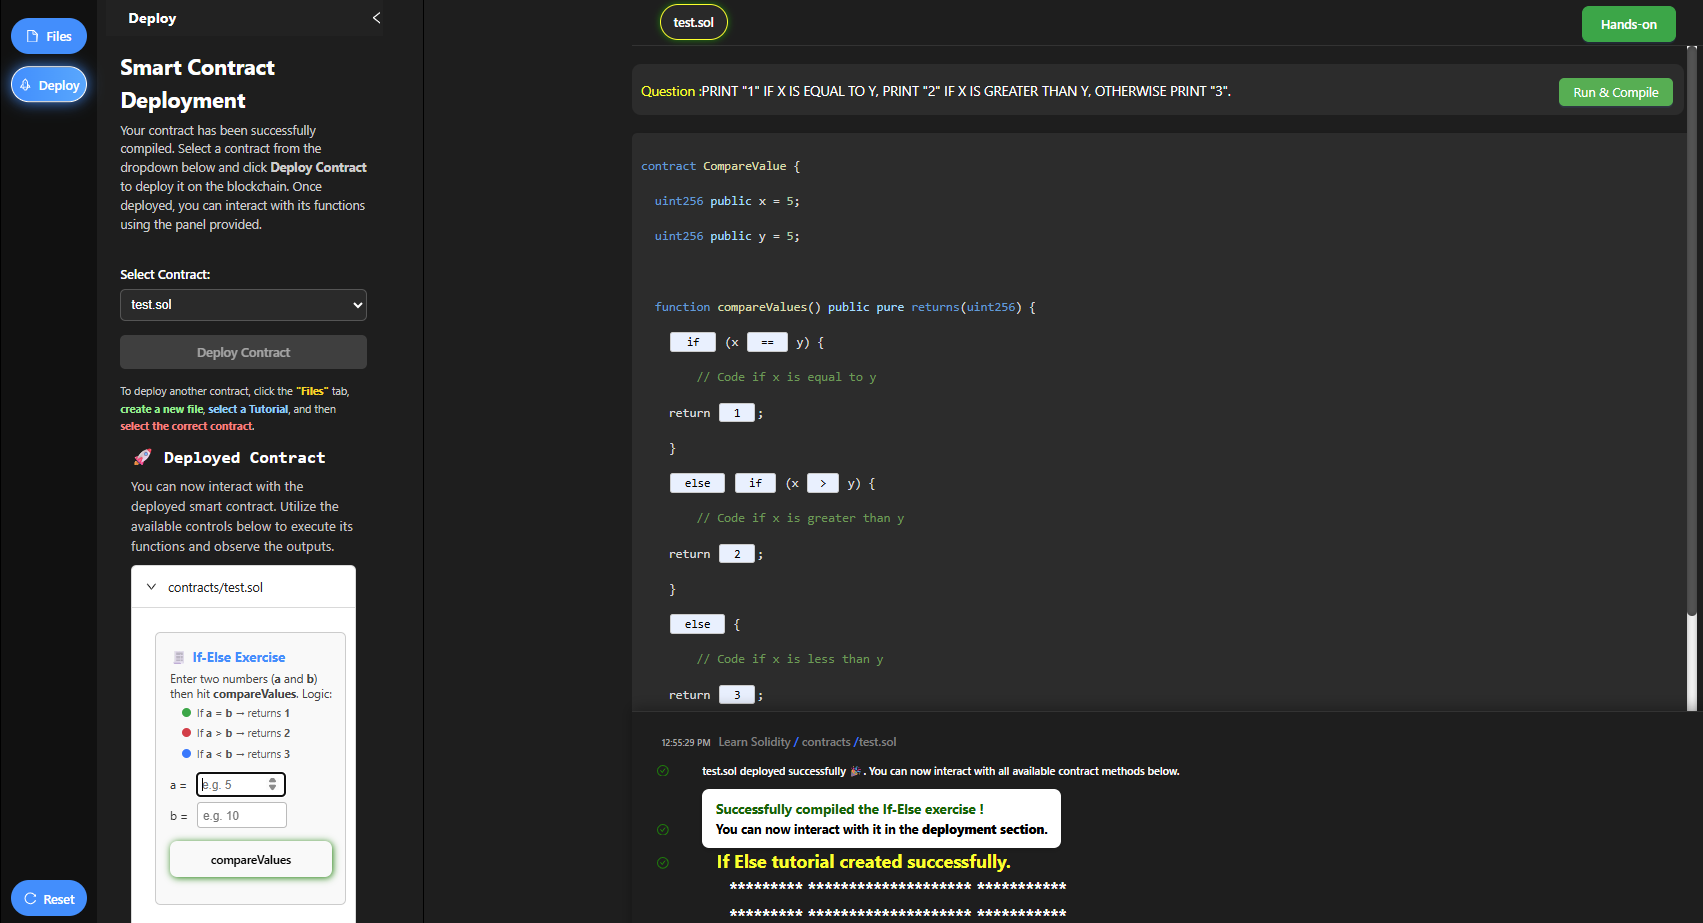
Step 3: Complete the Exercise and Compile
In the Exercise panel (e.g., If Else – Exercise):
- Carefully read the question.
- Fill in the missing
if,else if, andelseconditions. - Click the Run & Compile button.
If the code is correct, the compilation will succeed.
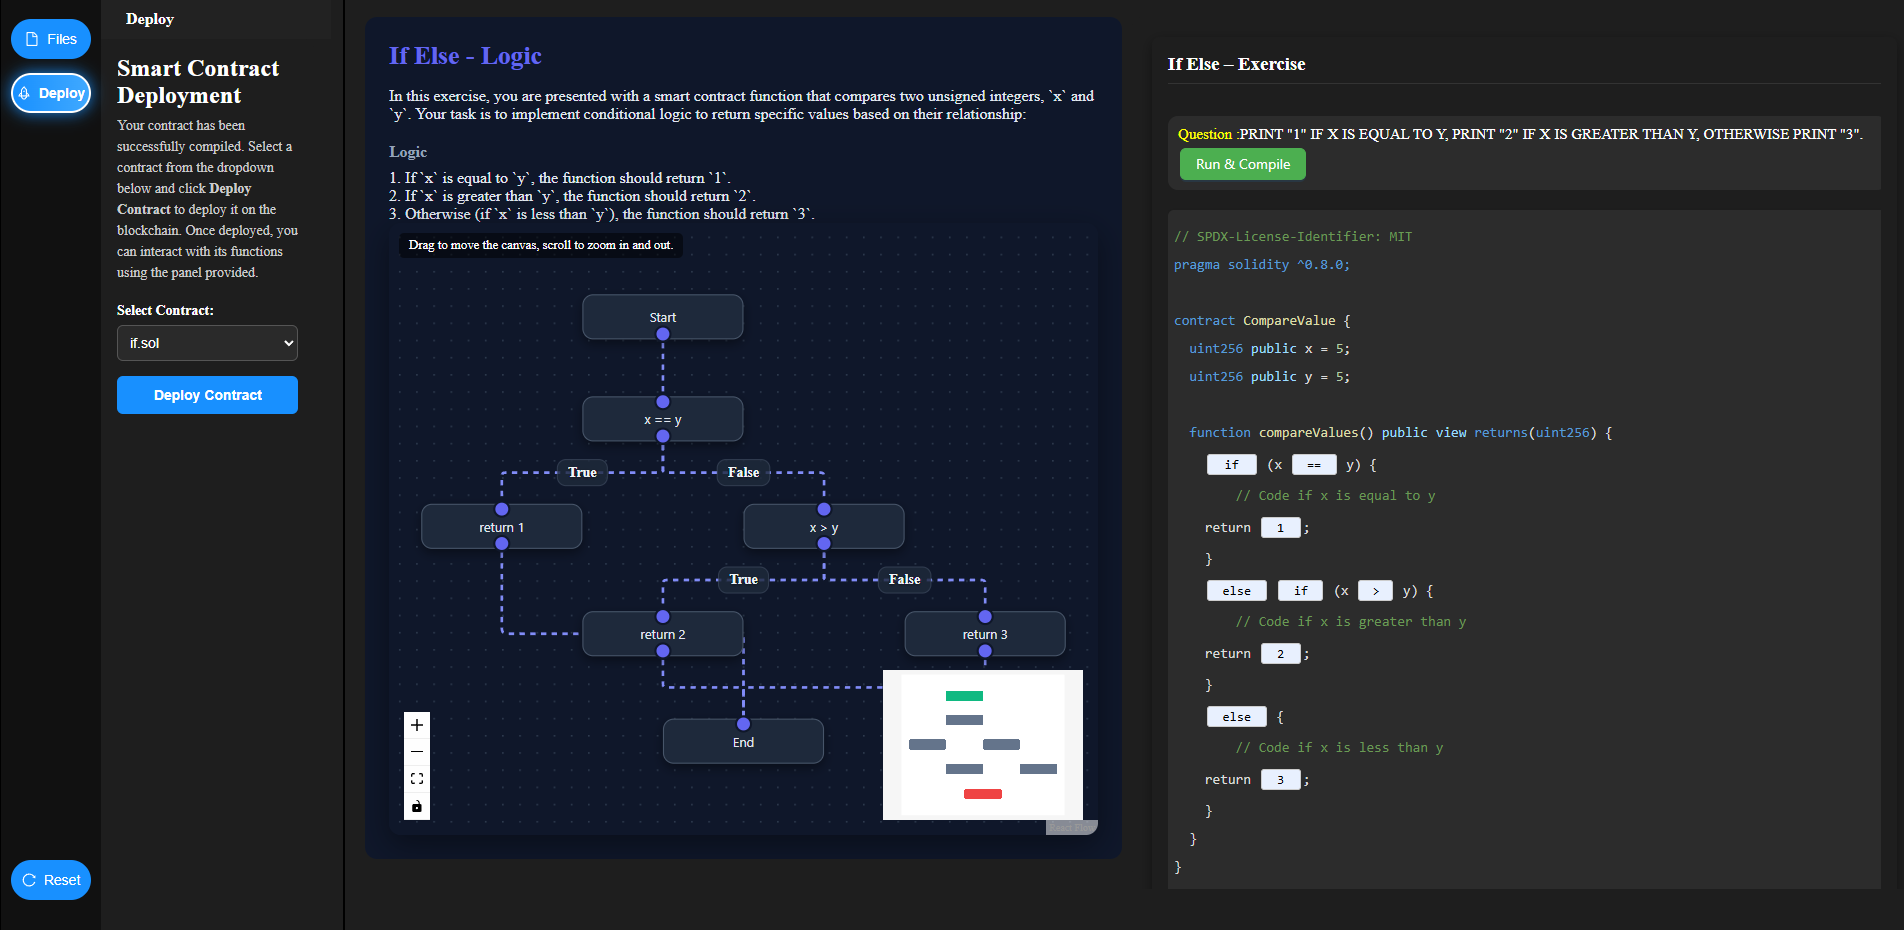
Step 4: Deploy the Smart Contract
Once compilation is successful:
- The Deployment Panel becomes active on the left.
- Select the contract (e.g.,
if.sol) from the dropdown. - Click Deploy Contract.
You will see a confirmation message and a Deployed Contract section.
Step 5: Interact with the Deployed Contract
After deployment:
- The exercise interface appears inside the Deployed Contract panel.
- Enter values for
aandb. - Click the compareValues button.
The contract executes on the deployed instance and returns the result.
Step 6: View the Result
The result is displayed clearly below the button.
This confirms that the if–else logic works correctly.
Continuing with the Remaining Tutorials
After successfully completing the If Else exercise, repeat the same procedure for the remaining tutorials:
Select
loop.solto practice looping constructs such asforandwhile.Select
classes.solto understand Solidity structures, classes, and object-like behavior.
Use-case Exercise (Car Rental Contract)
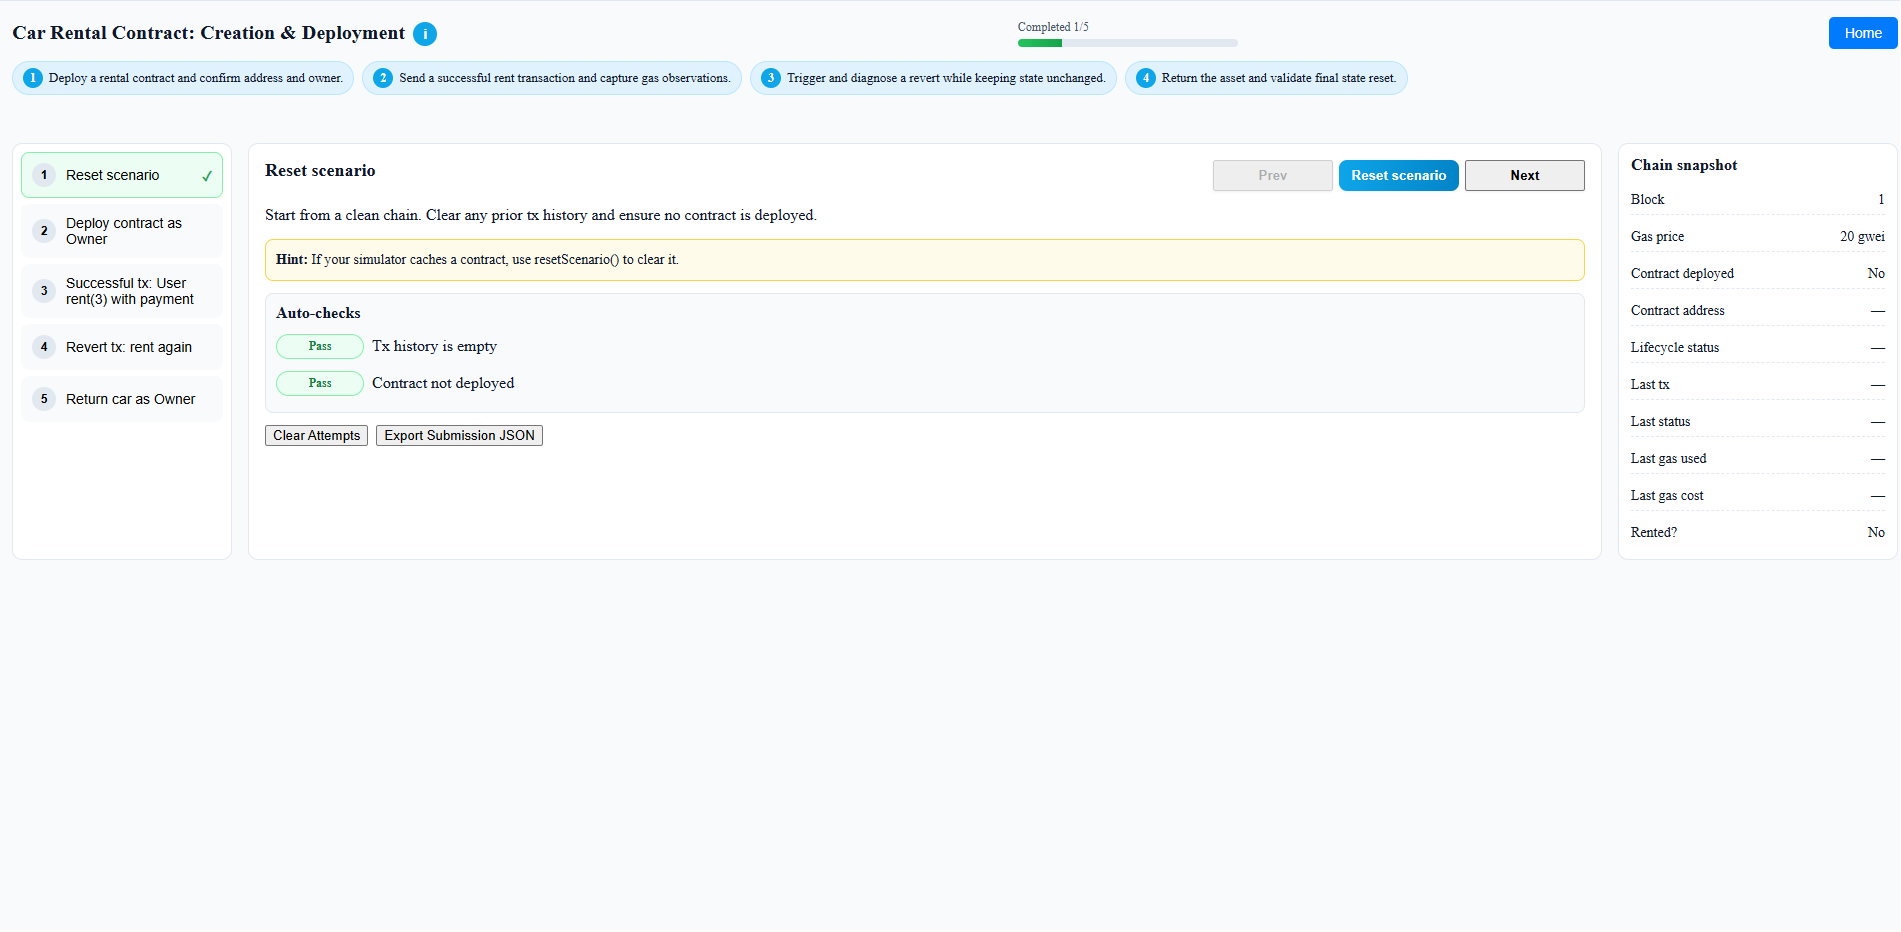
Step 1: From the main screen, click the Use-case button to start the practical task.
Step 2: The simulation will start with the Car Rental Contract: Creation & Deployment worksheet. The first step is to Reset scenario. Click the Reset scenario button to start from a clean chain.
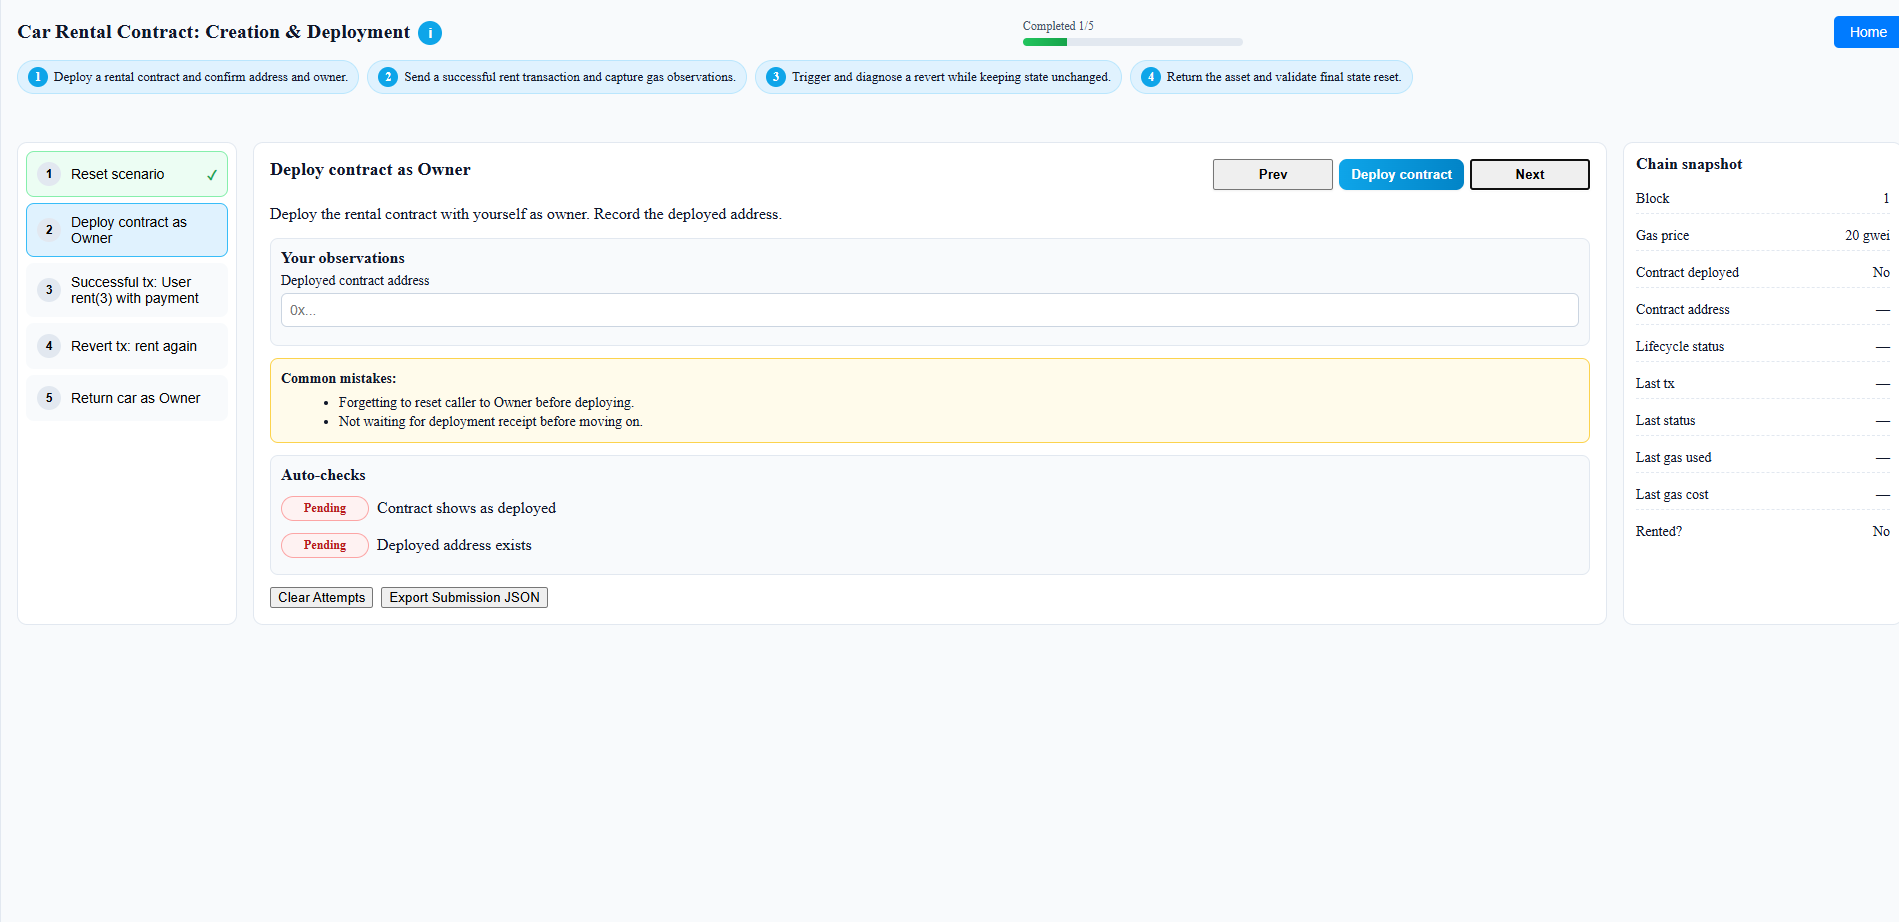
Step 3: The next step is to Deploy contract as Owner. Click the Deploy contract button to deploy the rental contract with yourself as owner. Record the deployed address.
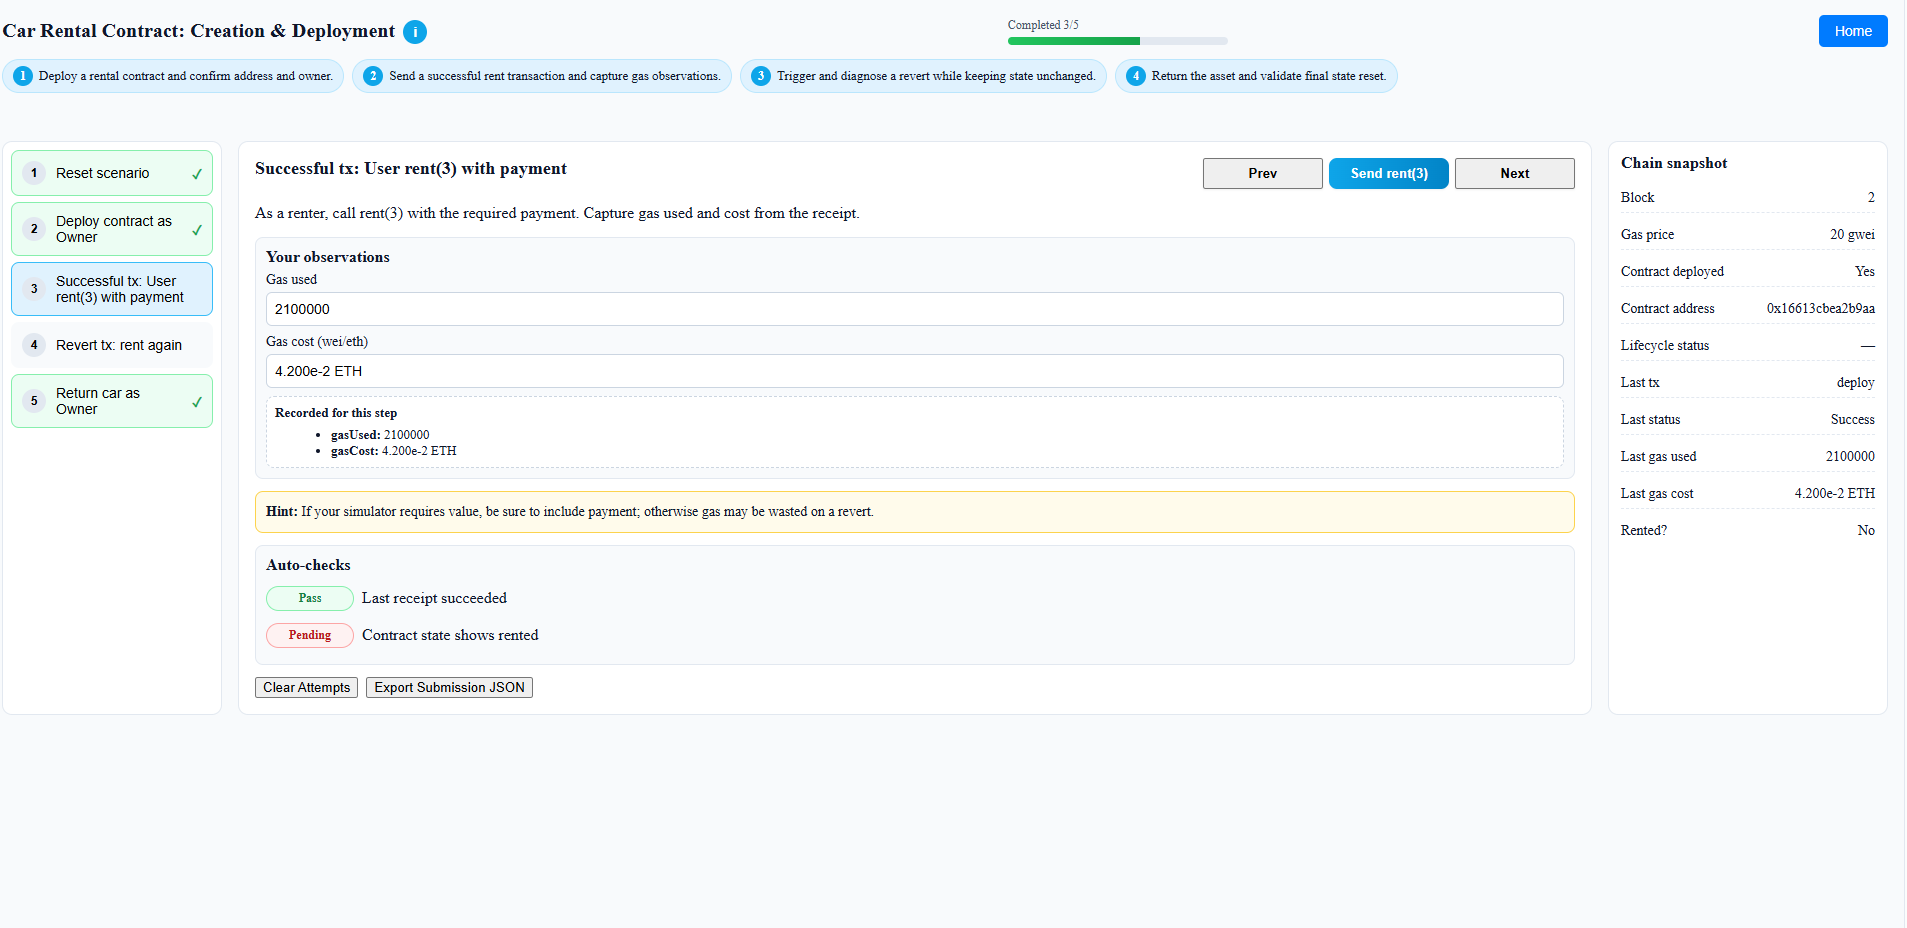
Step 4: The next step is to make a Successful tx: User rent(3) with payment. Click the Send rent(3) button to call rent(3) with the required payment. Capture gas used and cost from the receipt.
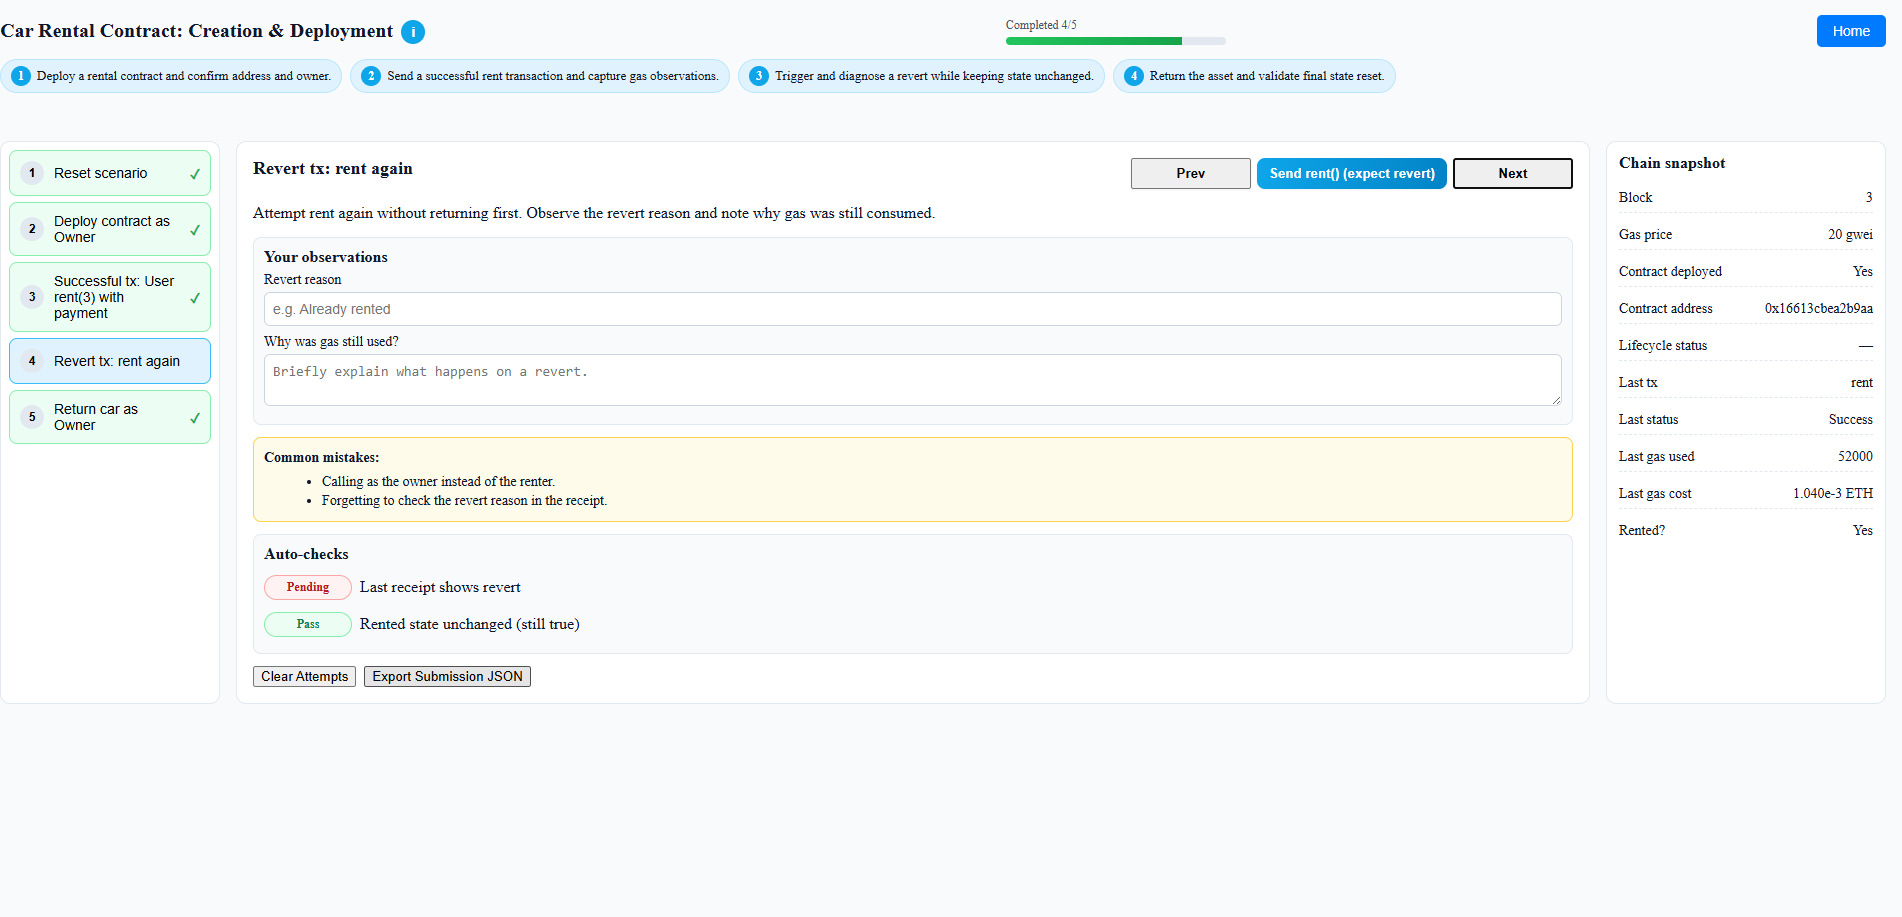
Step 5: The next step is to make a Revert tx: rent again. Click the Send rent() (expect revert) button to attempt to rent again without returning first. Observe the revert reason and note why gas was still consumed.
Step 6: The final step is to Return car as Owner. Click the Return car button to switch to owner and call returnCar(). State should show the car is available again.