
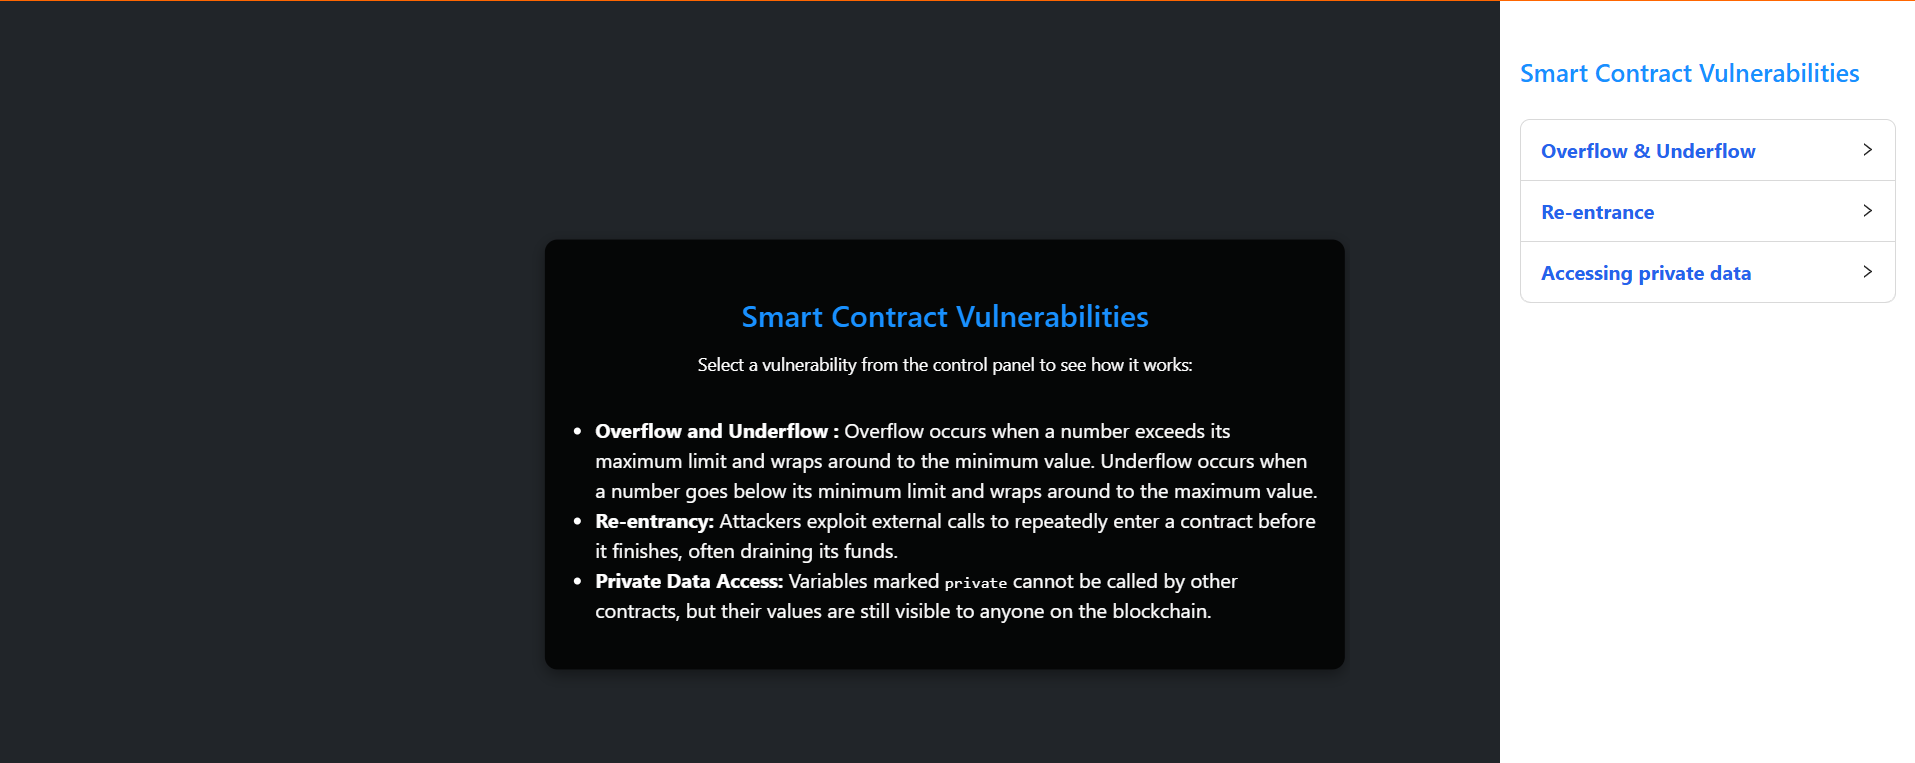
Smart contract vulnerabilities (Re-entrance, Arithmetic overflow and underflow, Accessing private data)
Overflow & Underflow
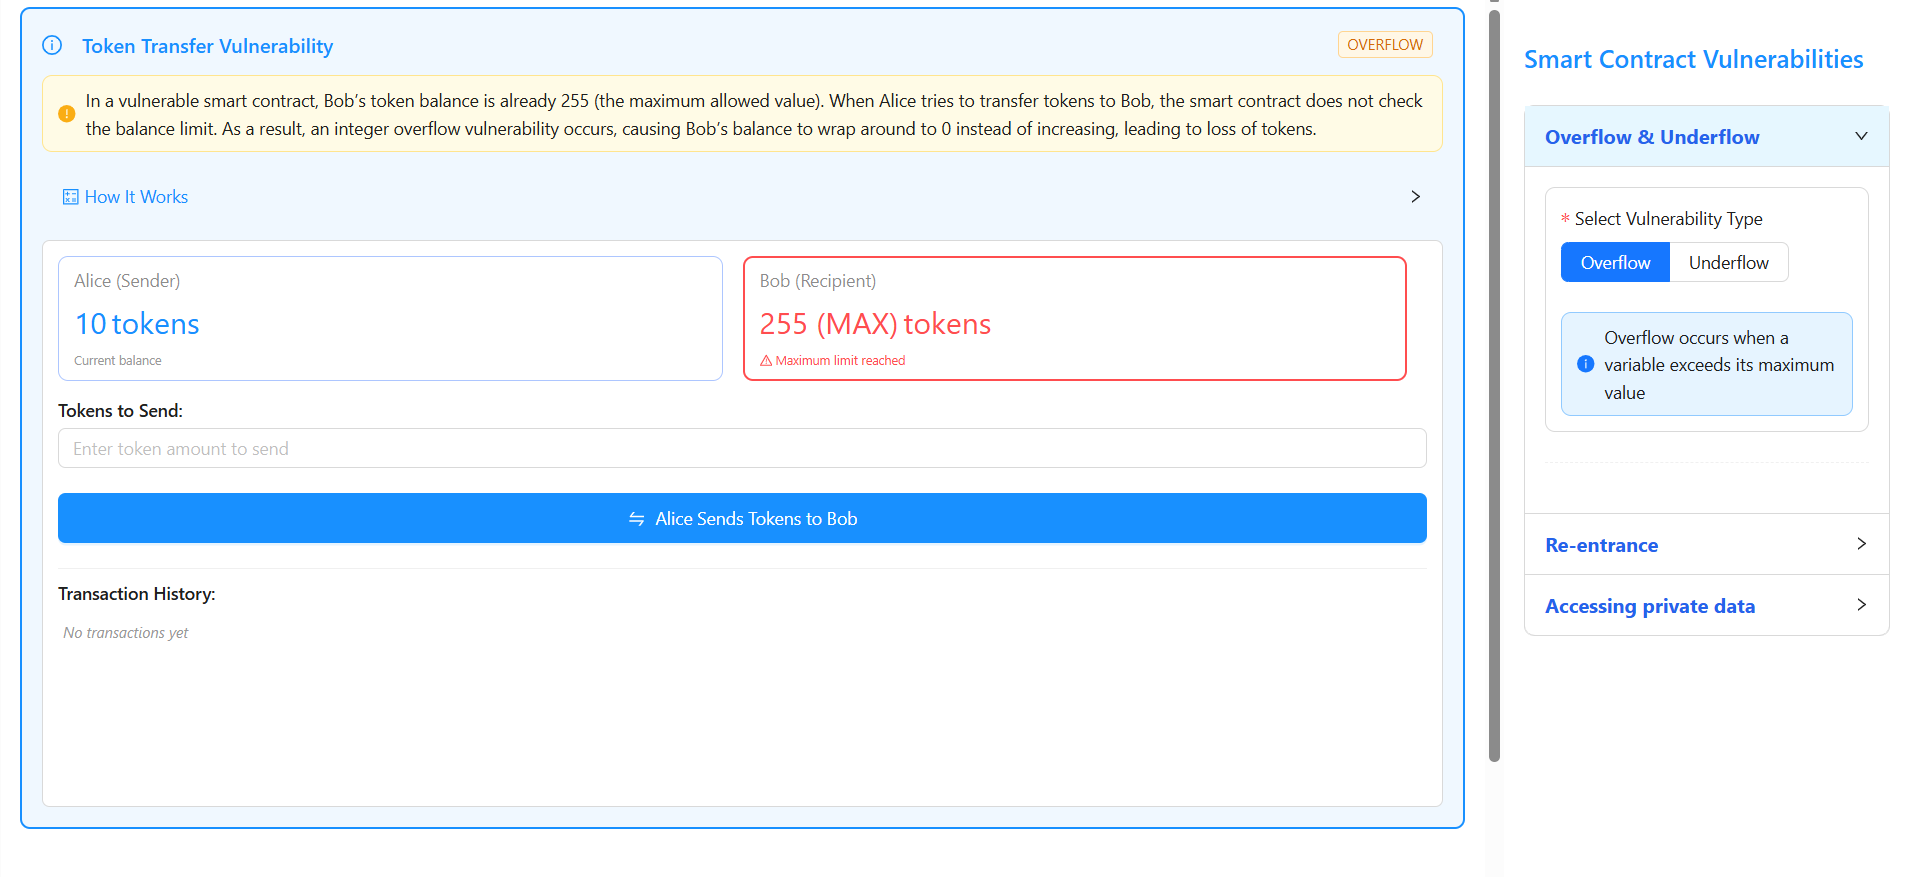
1. Open the Smart Contract Vulnerabilities page and choose either Overflow or Underflow from the right-side control panel by clicking on Overflow & Underflow.
2. Under Select Vulnerability Type, click Overflow and observe the initial balances where Alice (Sender) has 10 tokens and Bob (Recipient) has 255 tokens (maximum value of uint8).
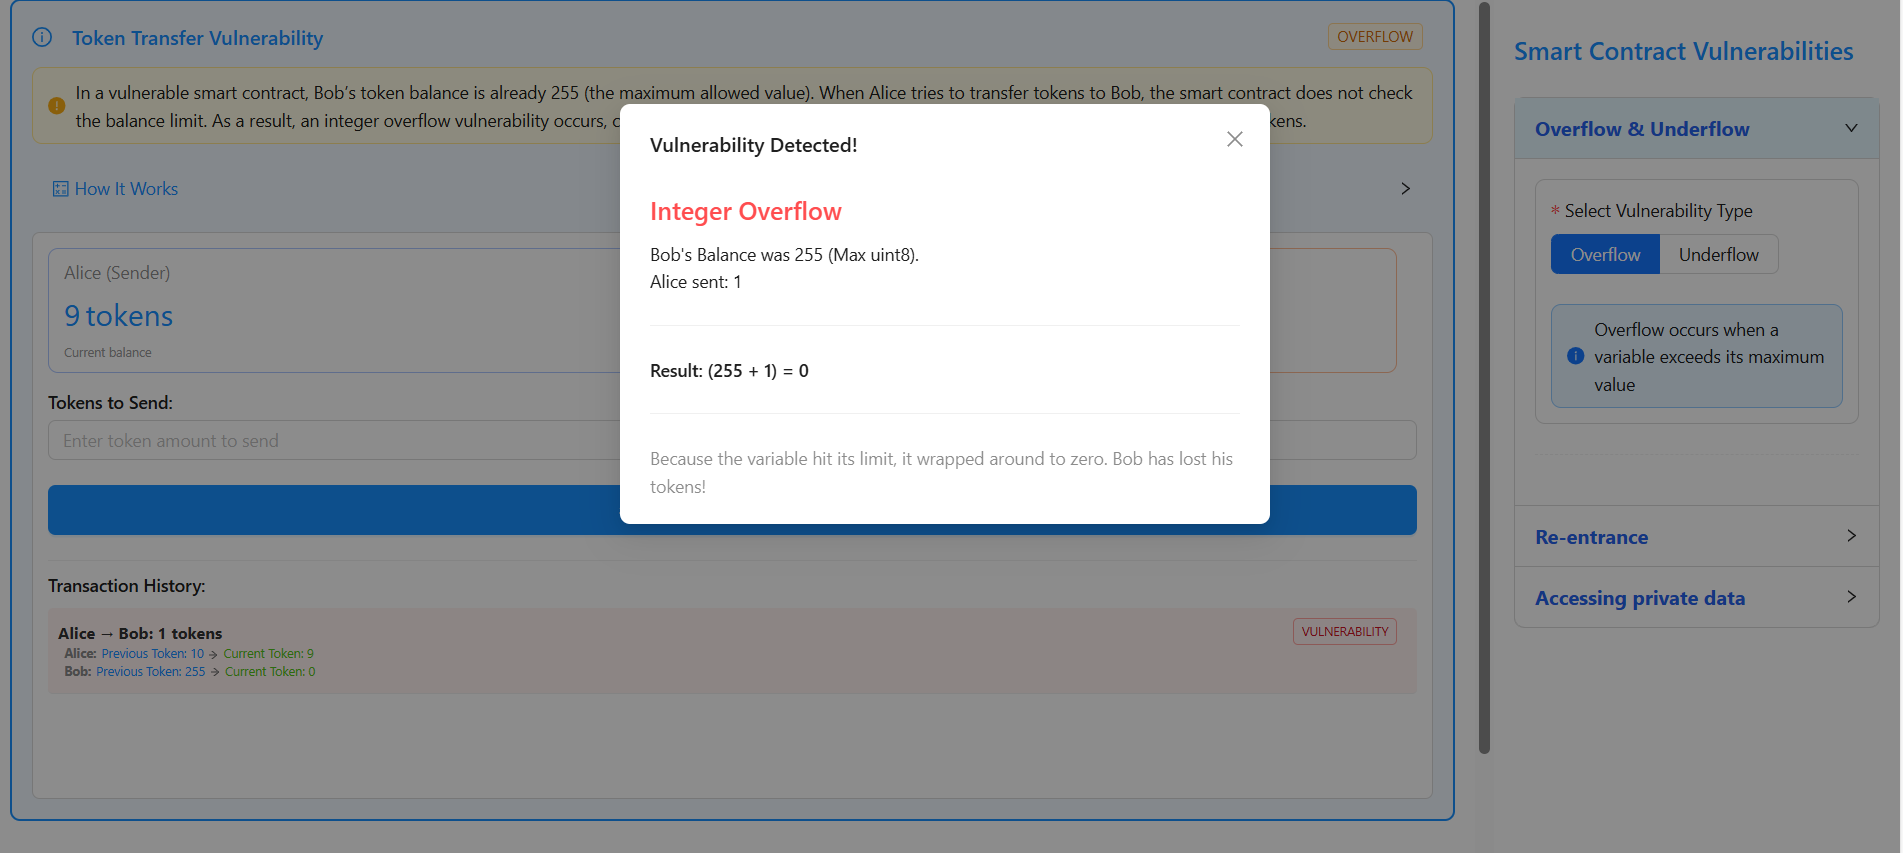
3. In the Tokens to Send input field, enter 1, click on “Alice Sends Tokens to Bob”, observe a popup showing “Vulnerability Detected – Integer Overflow”, and note that the calculation (255 + 1 = 0) causes Bob’s balance to wrap from 255 to 0 tokens, which is confirmed in the Transaction History where the overflow vulnerability is highlighted.
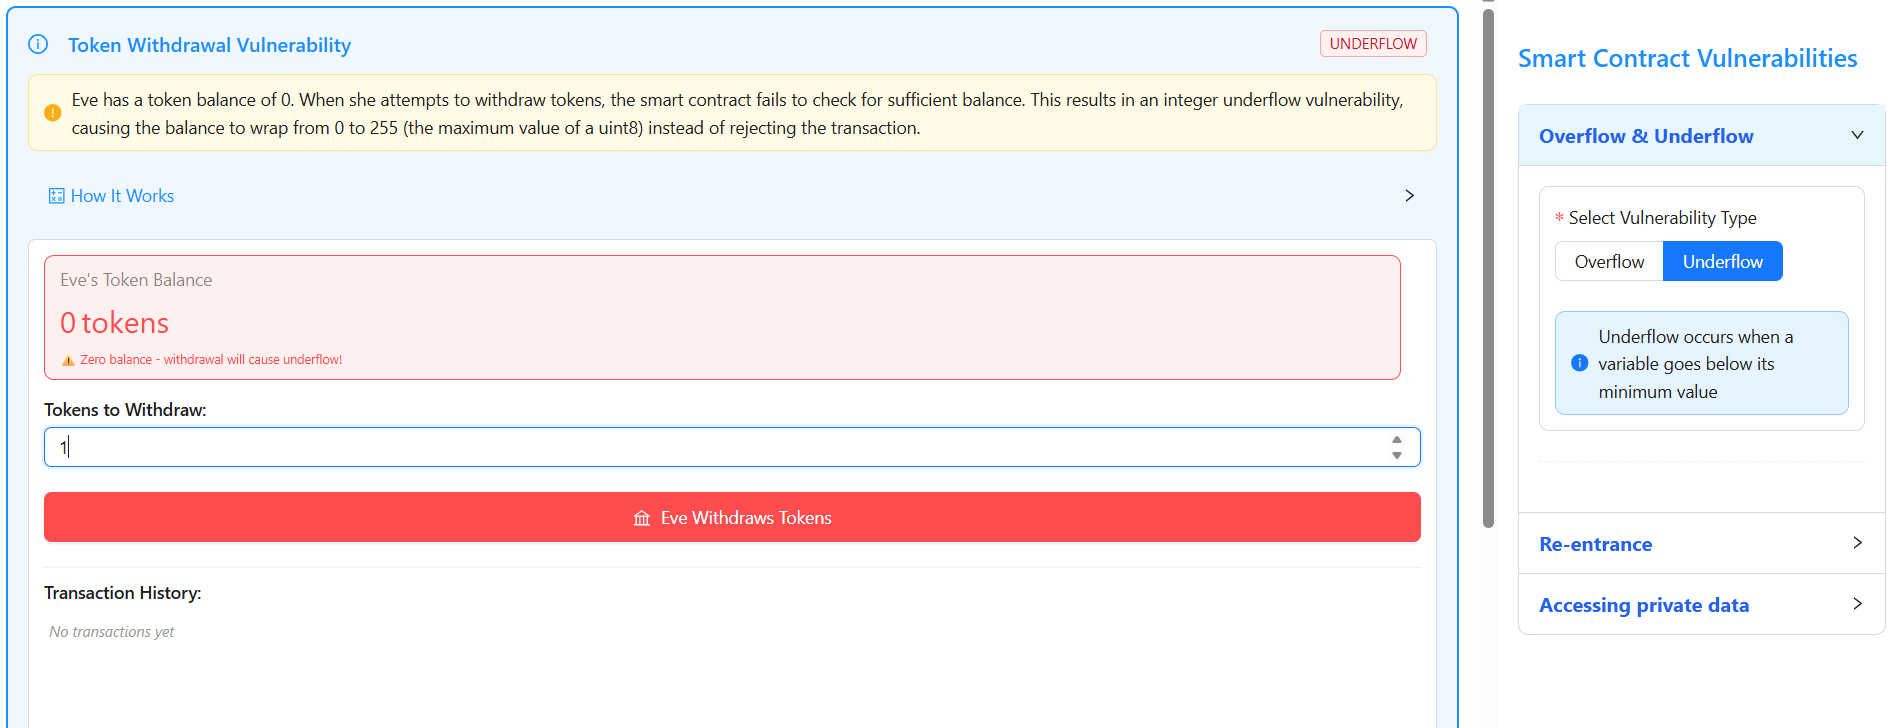
4. From the right-side control panel under Overflow & Underflow, click Underflow and observe that Eve has an initial balance of 0 tokens.
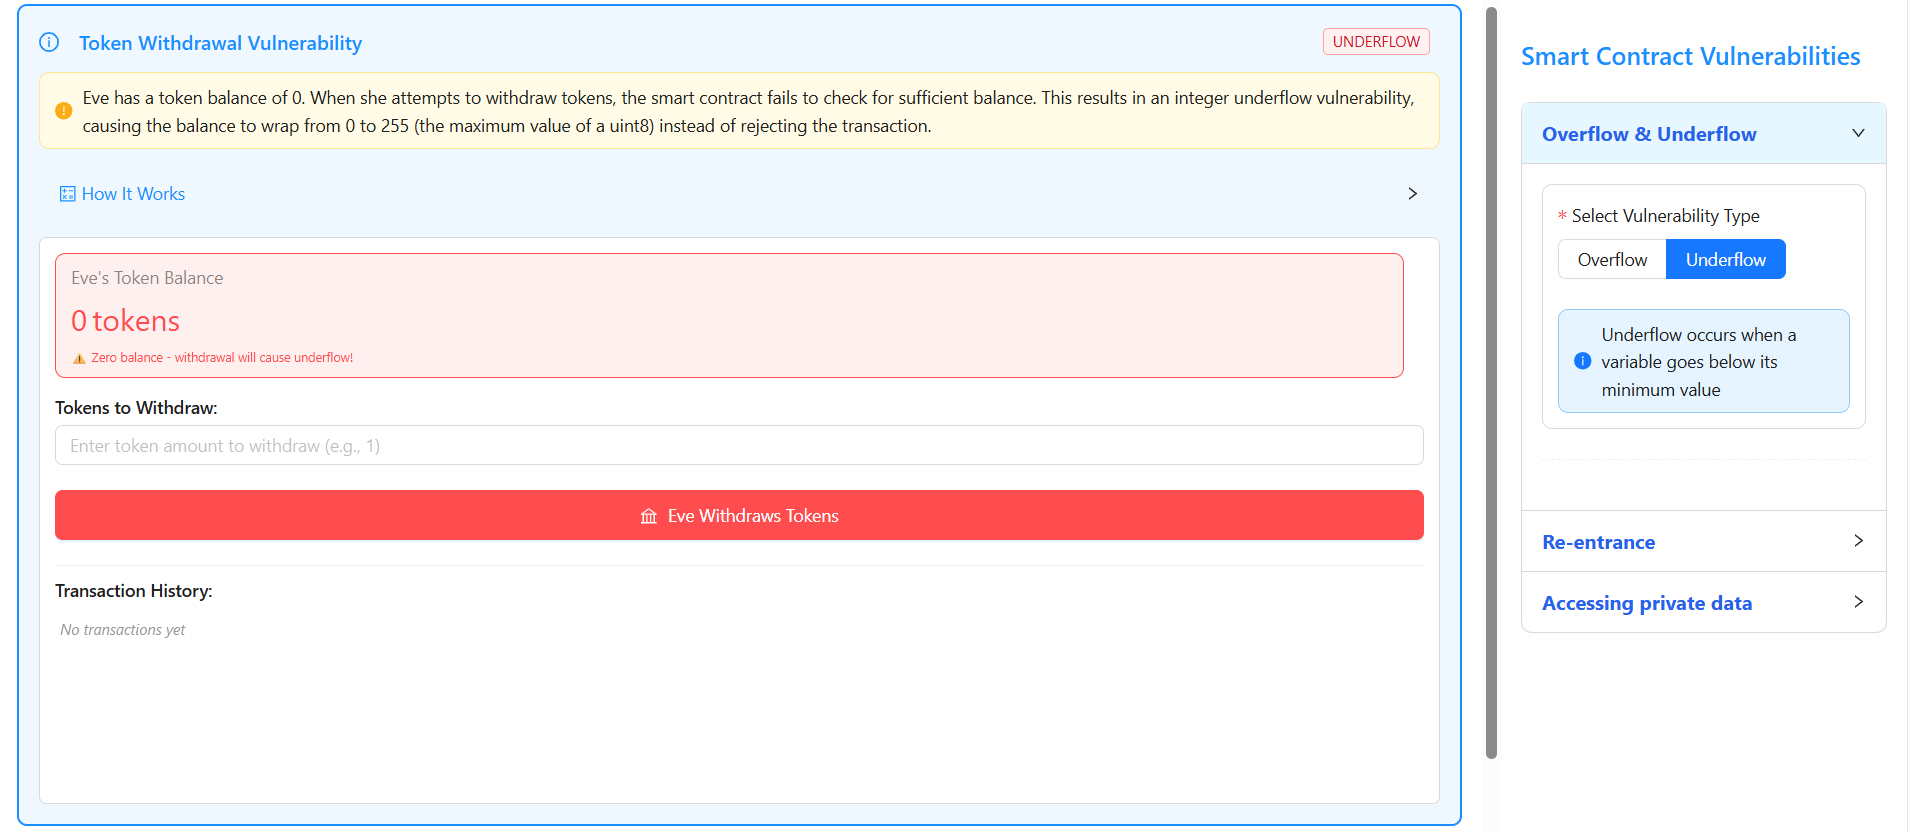
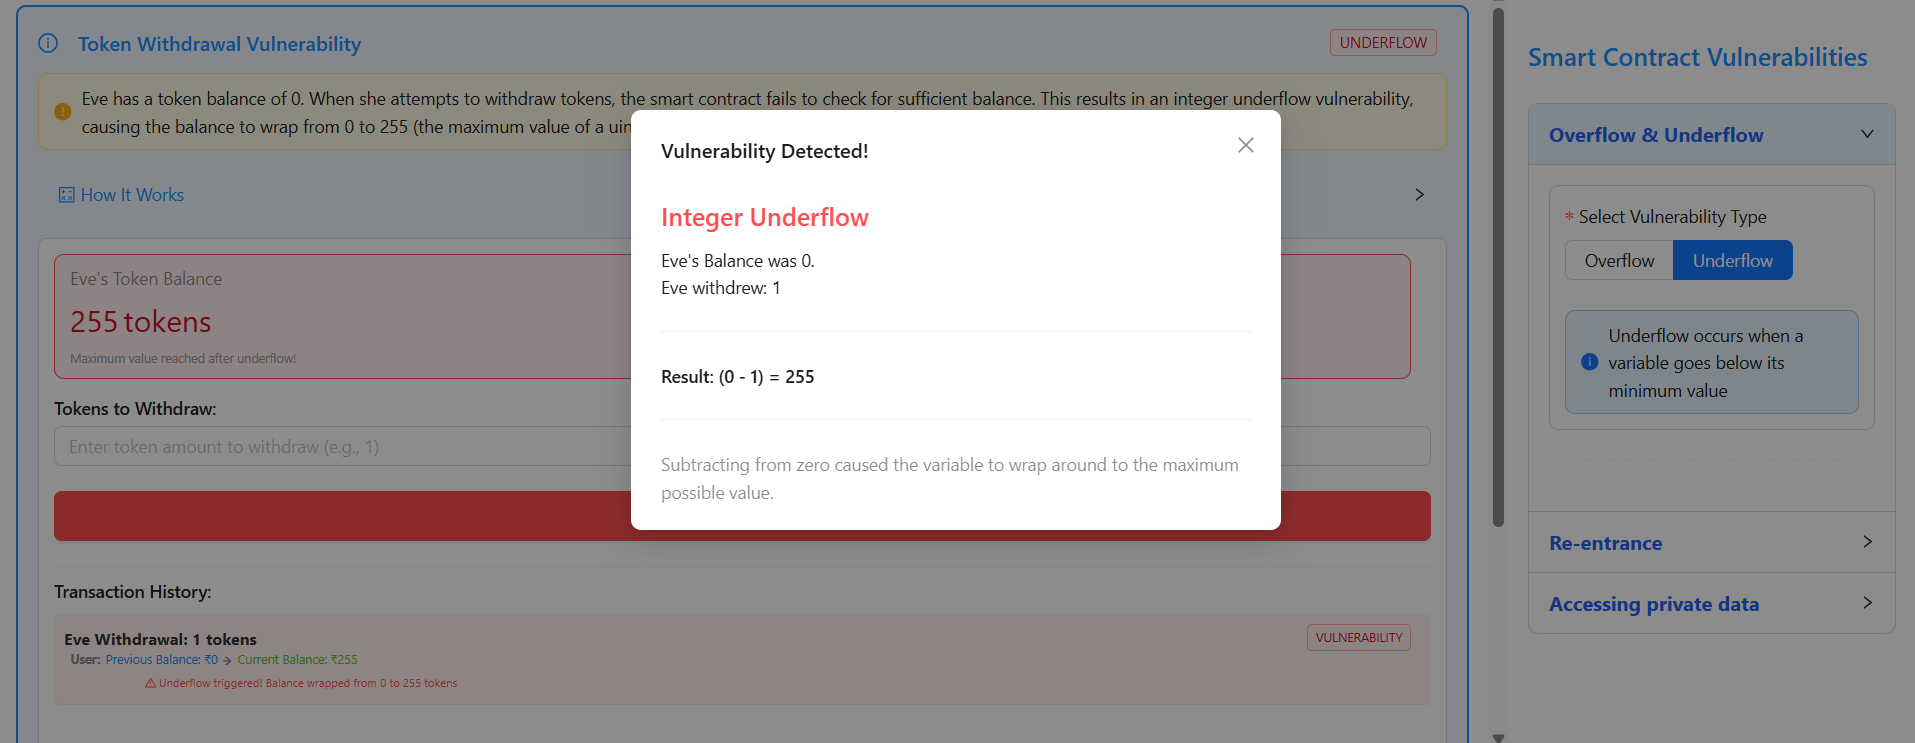
5. In the Tokens to Withdraw input field, enter 1 and click on “Eve Withdraws Tokens”.
6. Observe a popup displaying “Vulnerability Detected – Integer Underflow”, where the calculation (0 − 1 = 255) causes Eve’s balance to wrap from 0 to 255 tokens, which is confirmed in the Transaction History indicating the underflow vulnerability.
Re-entrancy
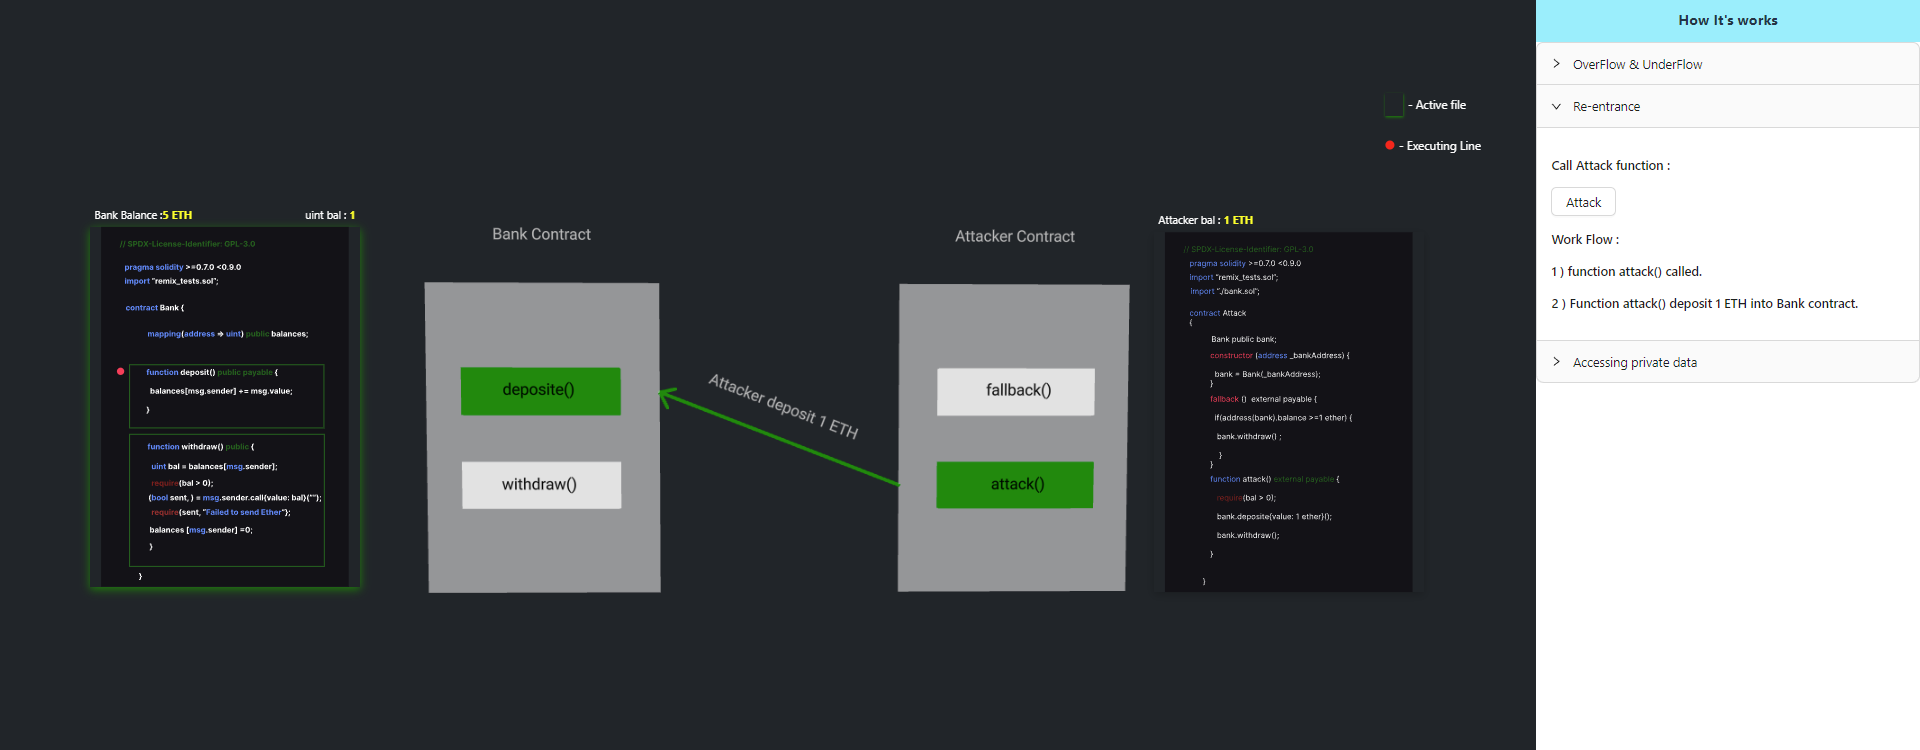
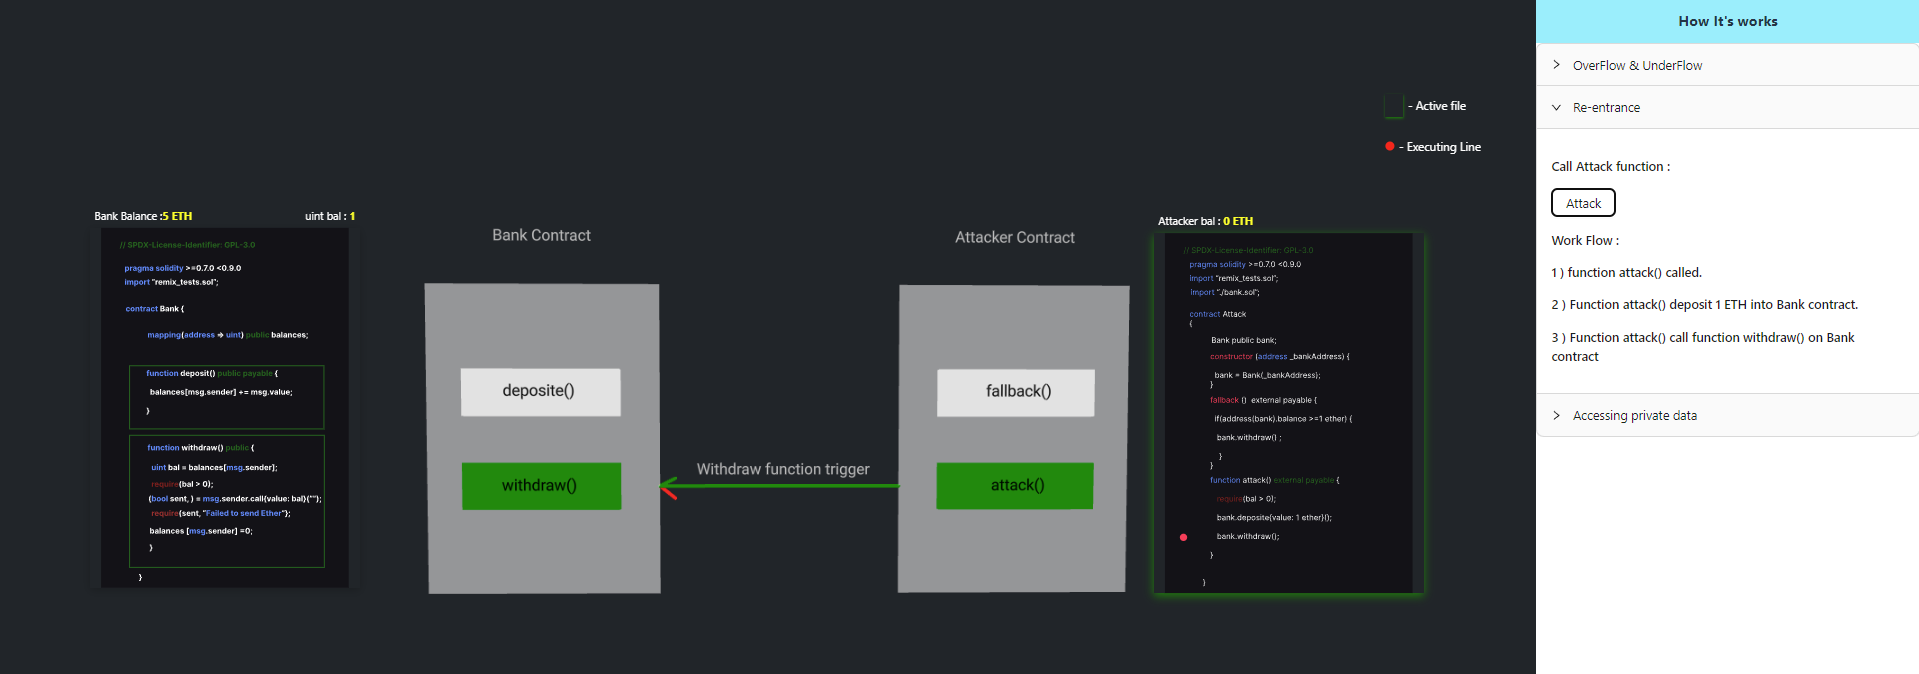
Click the Attack button to initiate the re-entrancy attack and observe the contract behavior step by step.
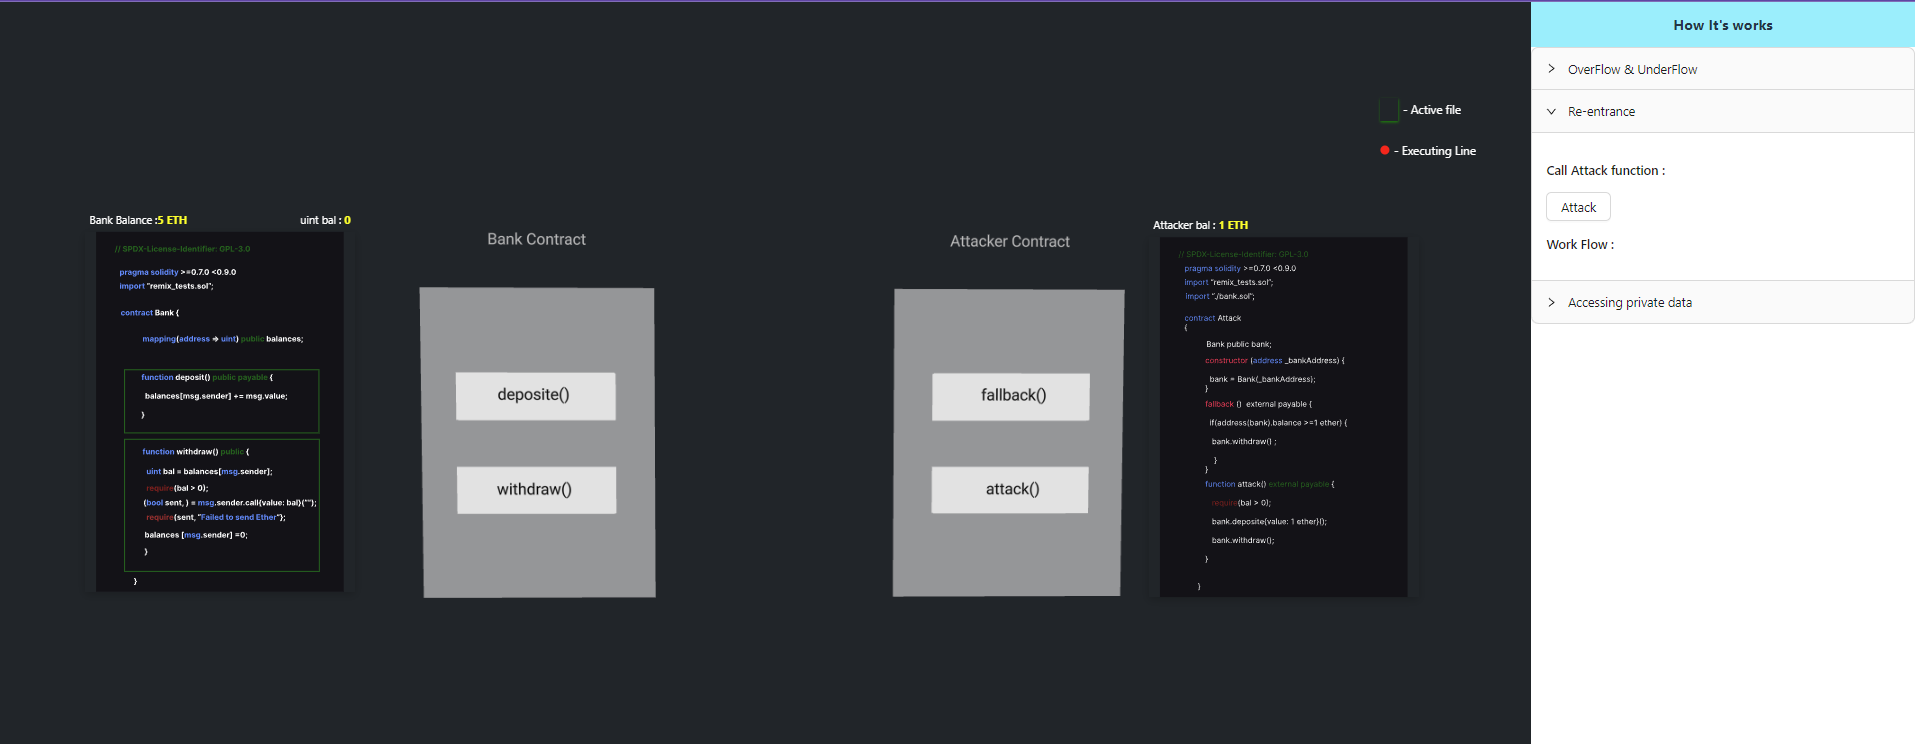
Step 1: Deposit Ether
The attack() function is executed, which deposits 1 ETH into the vulnerable Bank contract.
Step 2: Initiate Withdrawal
After the deposit, the attack() function invokes the withdraw() function of the Bank contract.
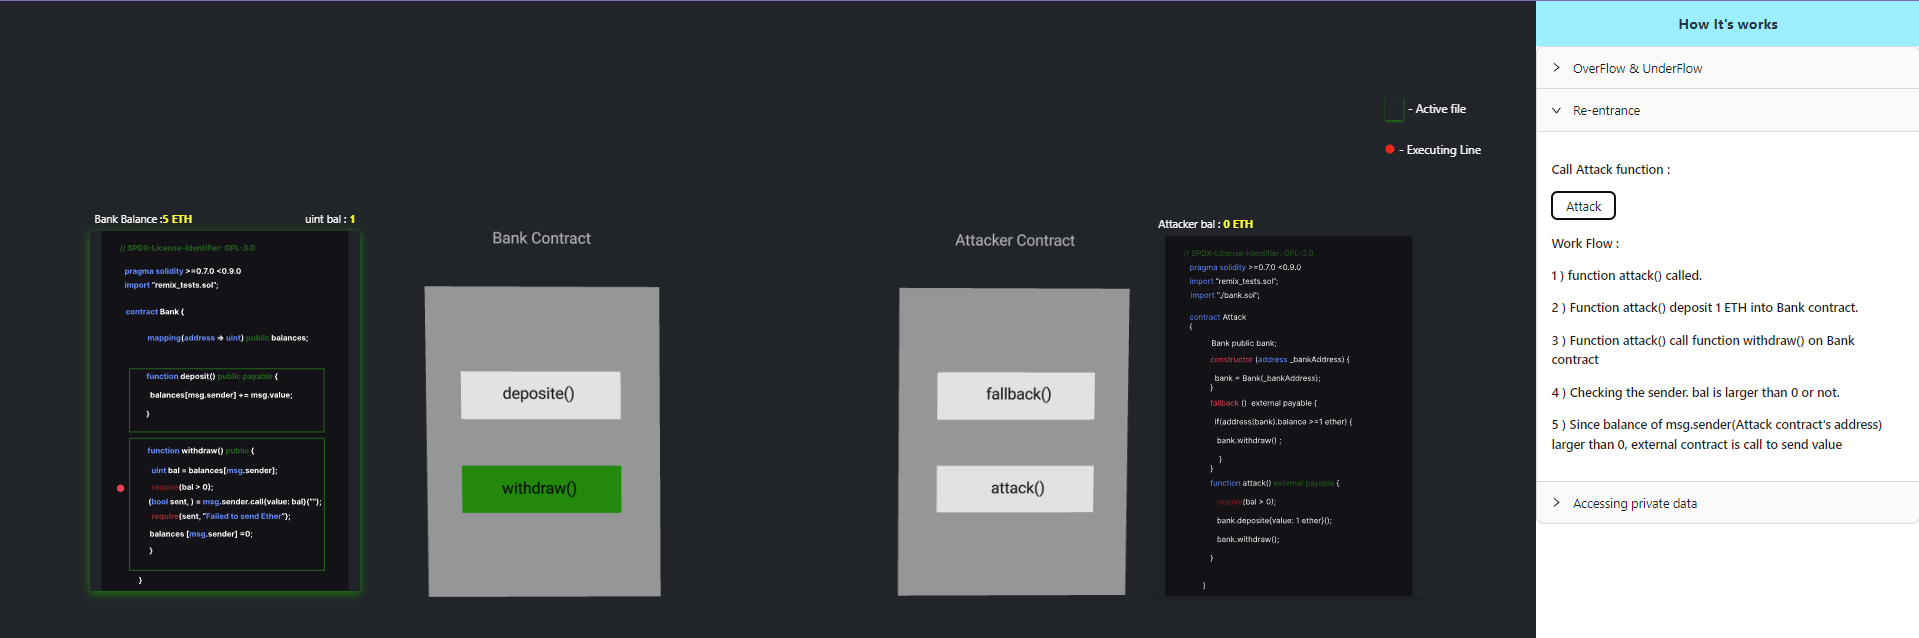
Step 3: External Call Execution
Since the balance of msg.sender (the Attack contract address) is greater than zero, the Bank contract performs an external call to transfer ETH.
Step 4: Re-entrant Callback
When ETH is received, the Attack contract’s fallback() function is triggered.
Before the Bank contract updates the sender’s balance, the fallback function calls withdraw() again.
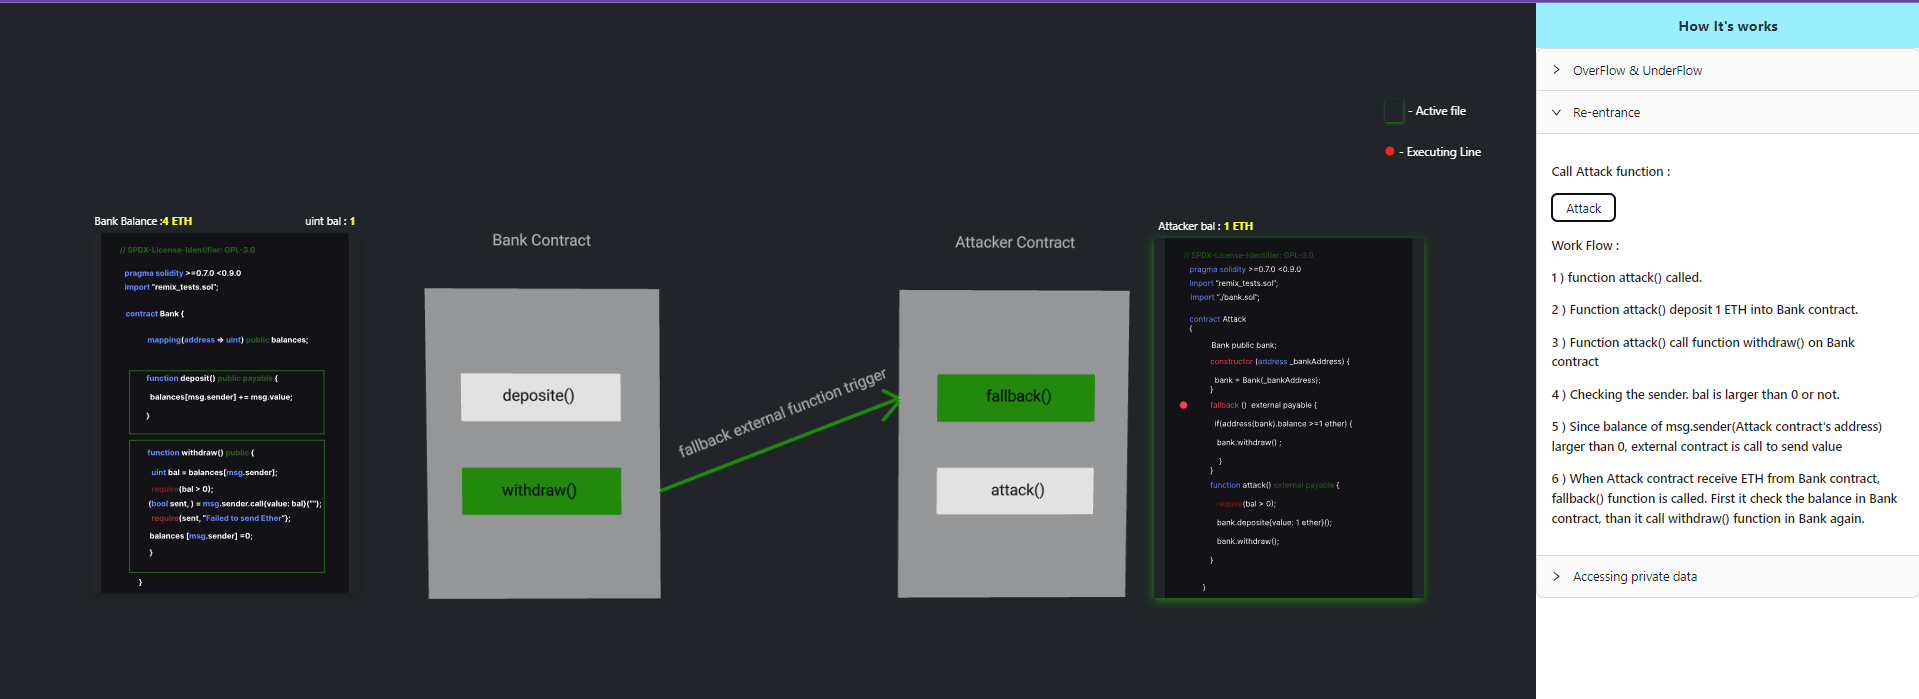
Step 5: Drain Contract Balance
Because balances[msg.sender] = 0 is executed only after the external call completes, the withdrawal process is re-entered repeatedly.
This continues until the Bank contract’s balance is fully drained.

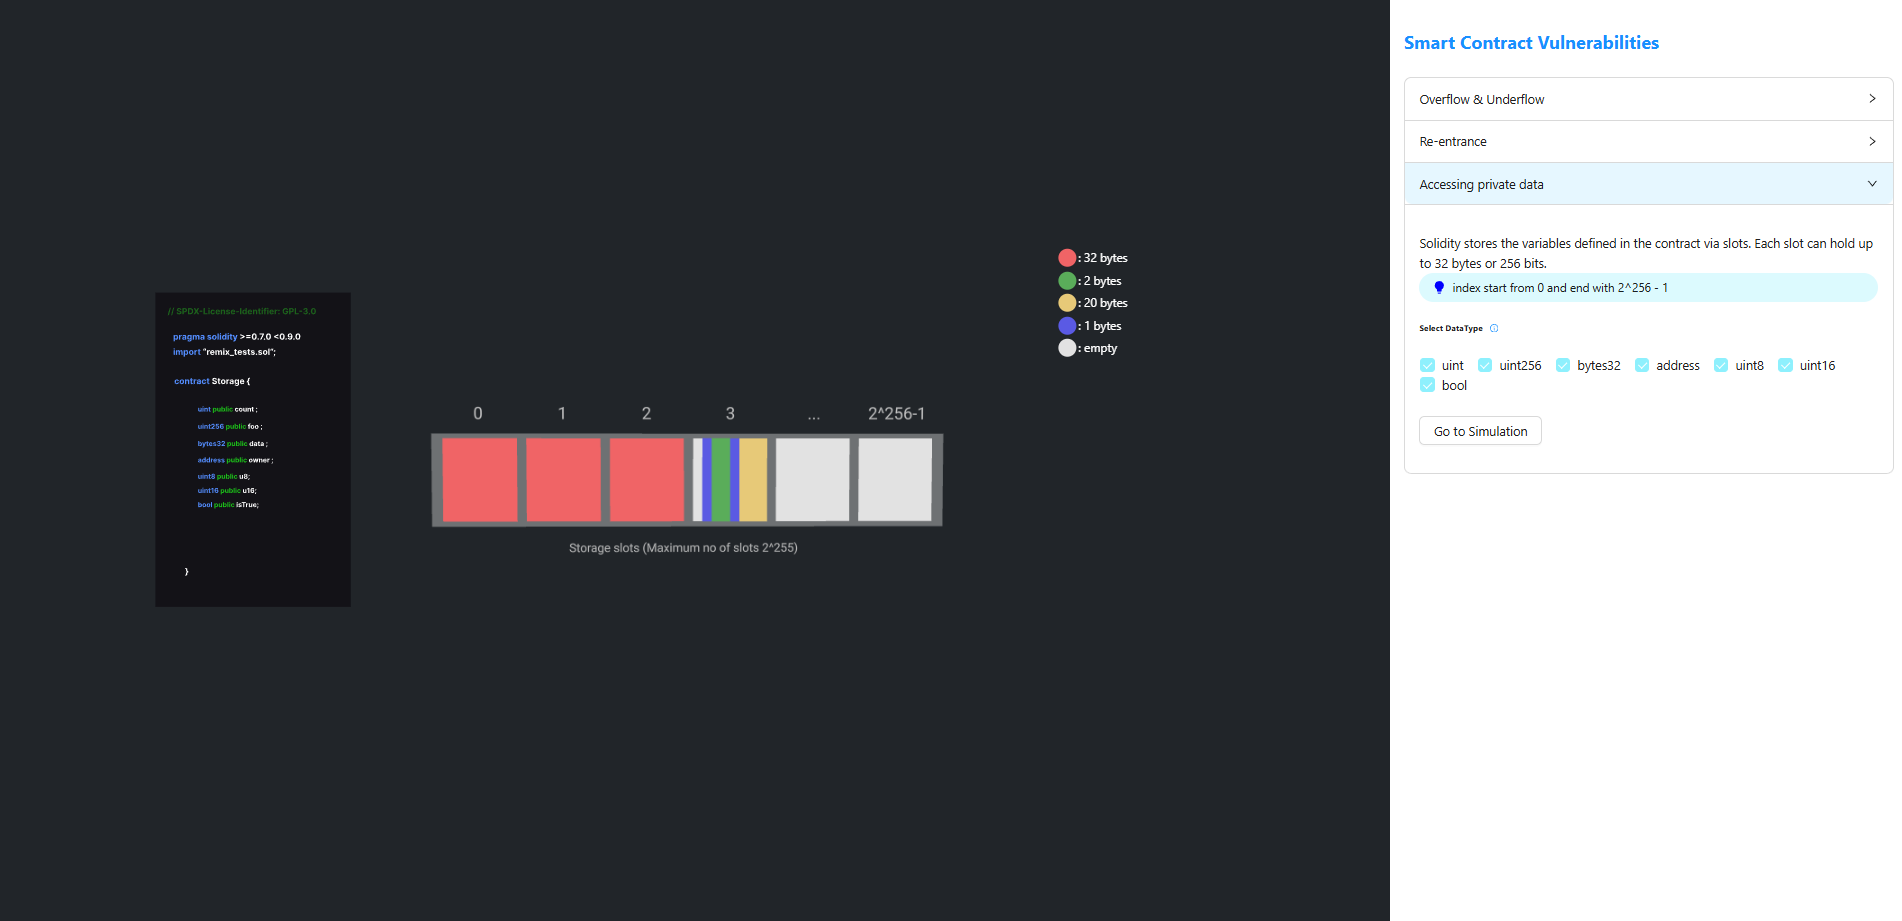
Accessing Private Data
Step 1: Select the Vulnerability
From the Smart Contract Vulnerabilities panel on the right side, select Accessing private data.
This opens the simulation explaining how Solidity stores state variables using storage slots.
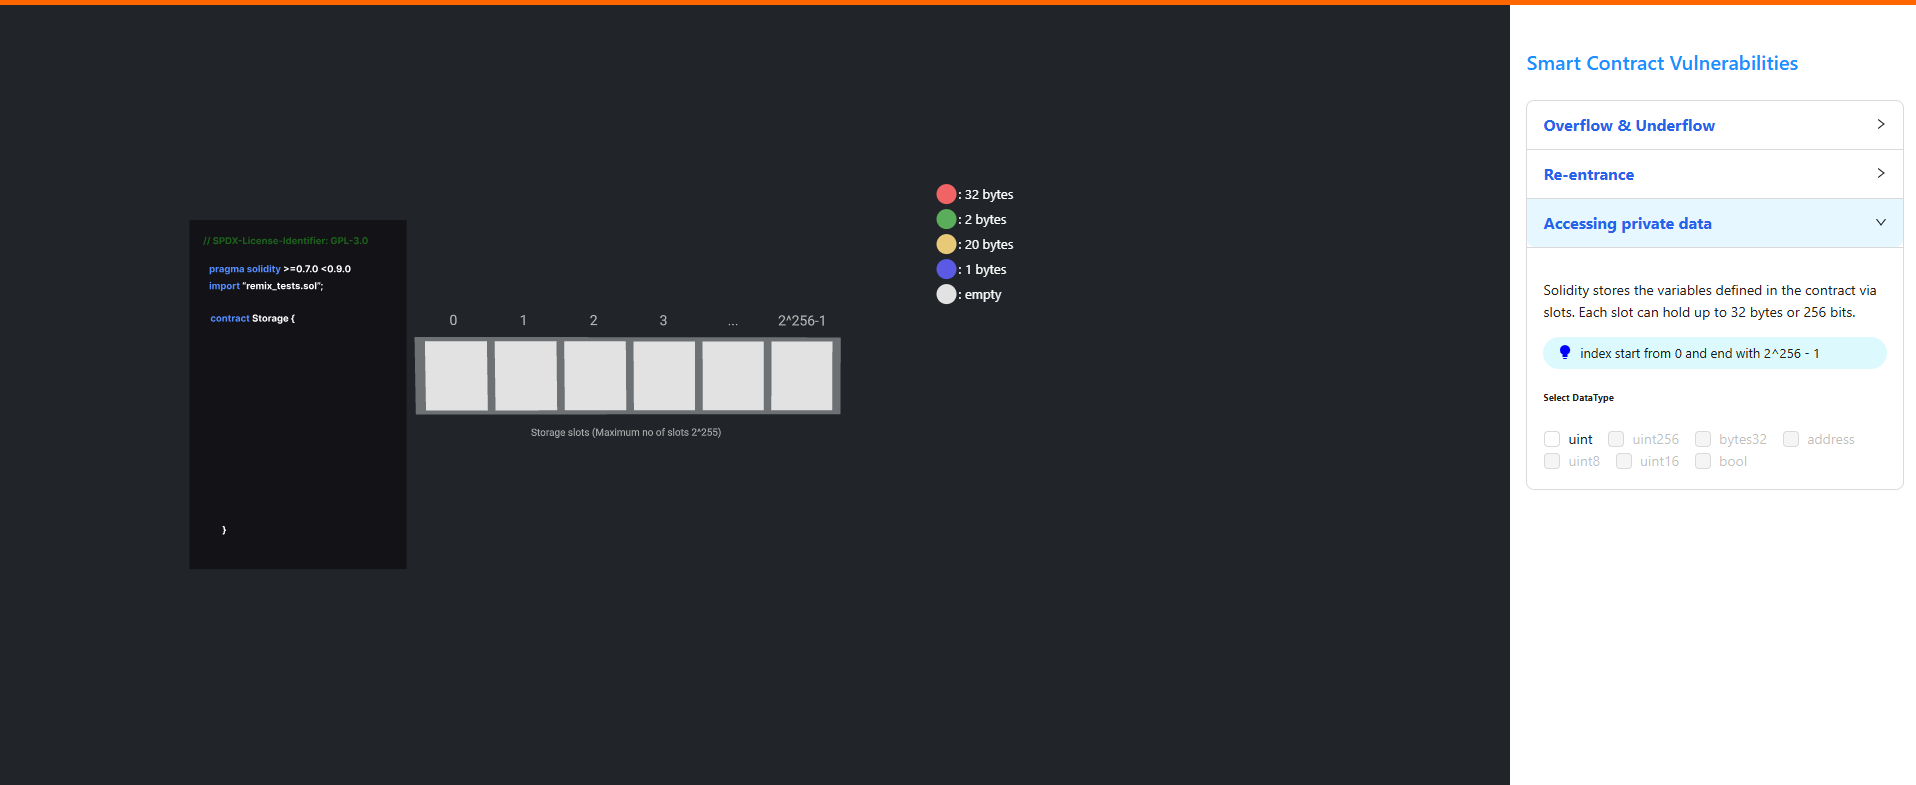
Step 2: Select Data Types
- Select the required data type(s) from the Select DataType section.
- Click Go to Simulation to proceed.
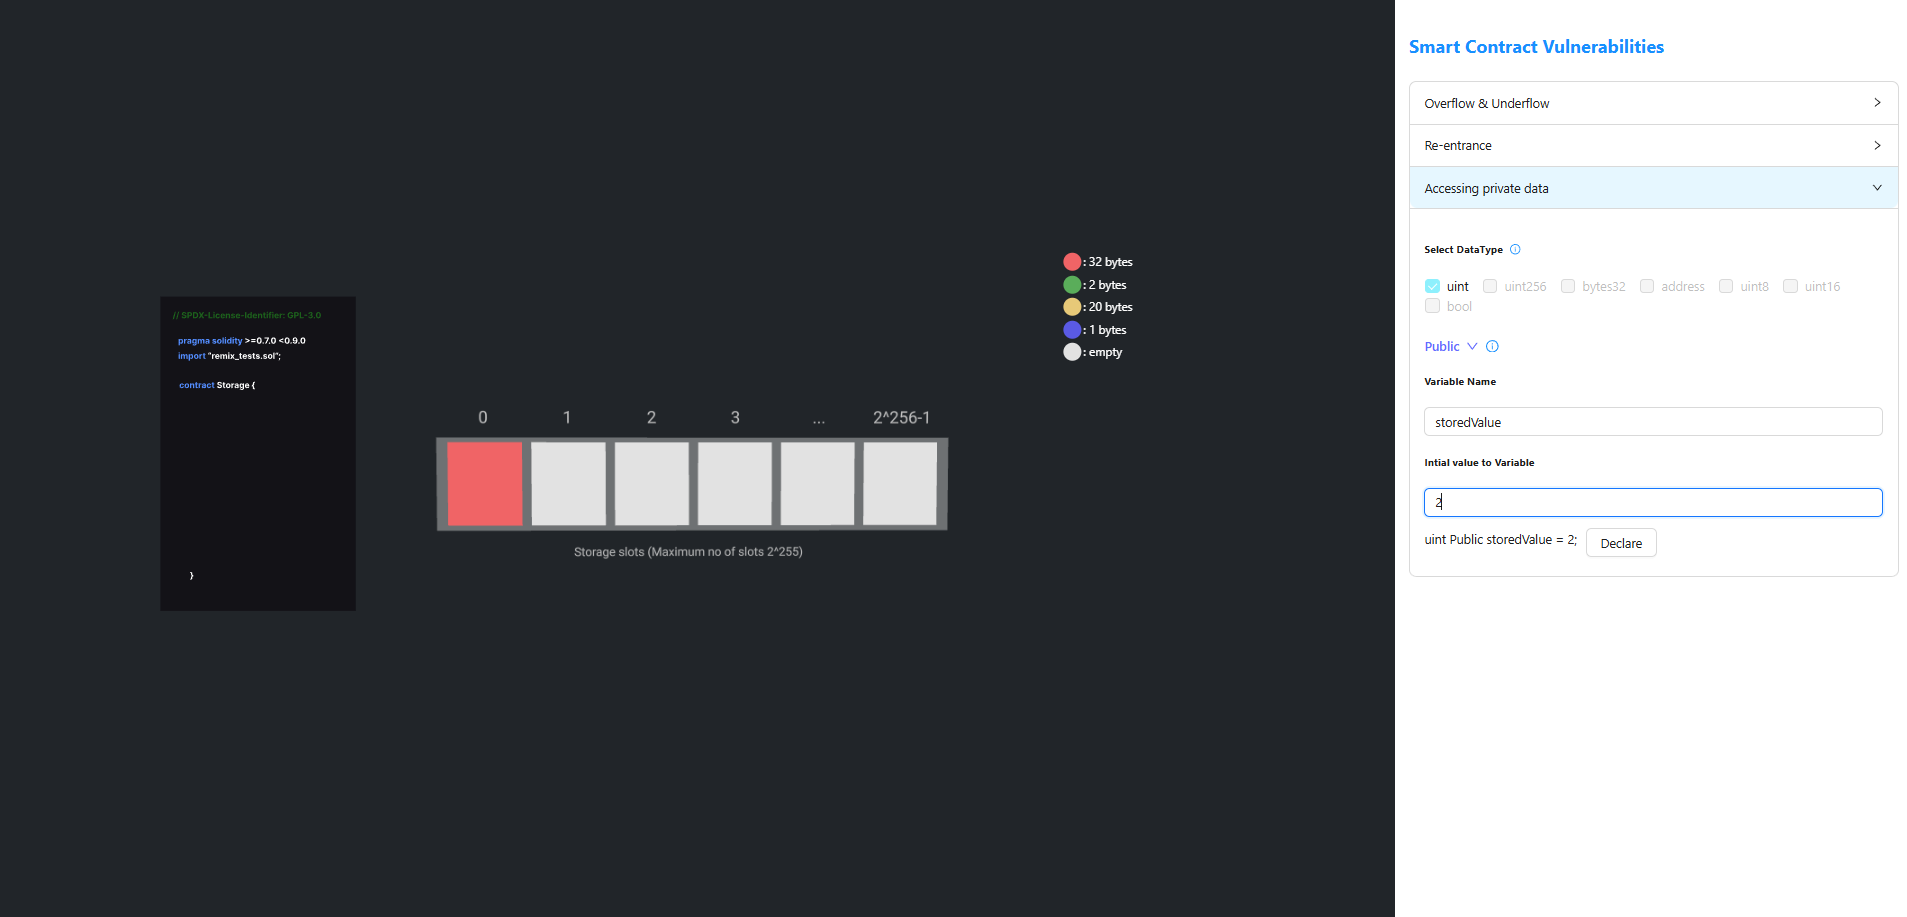
Step 3: Declare a State Variable
- Select the Access Specifier (e.g.,
publicorprivate). - Enter the Variable Name.
- Enter the Initial Value.
- Click Declare to add the variable to the contract.
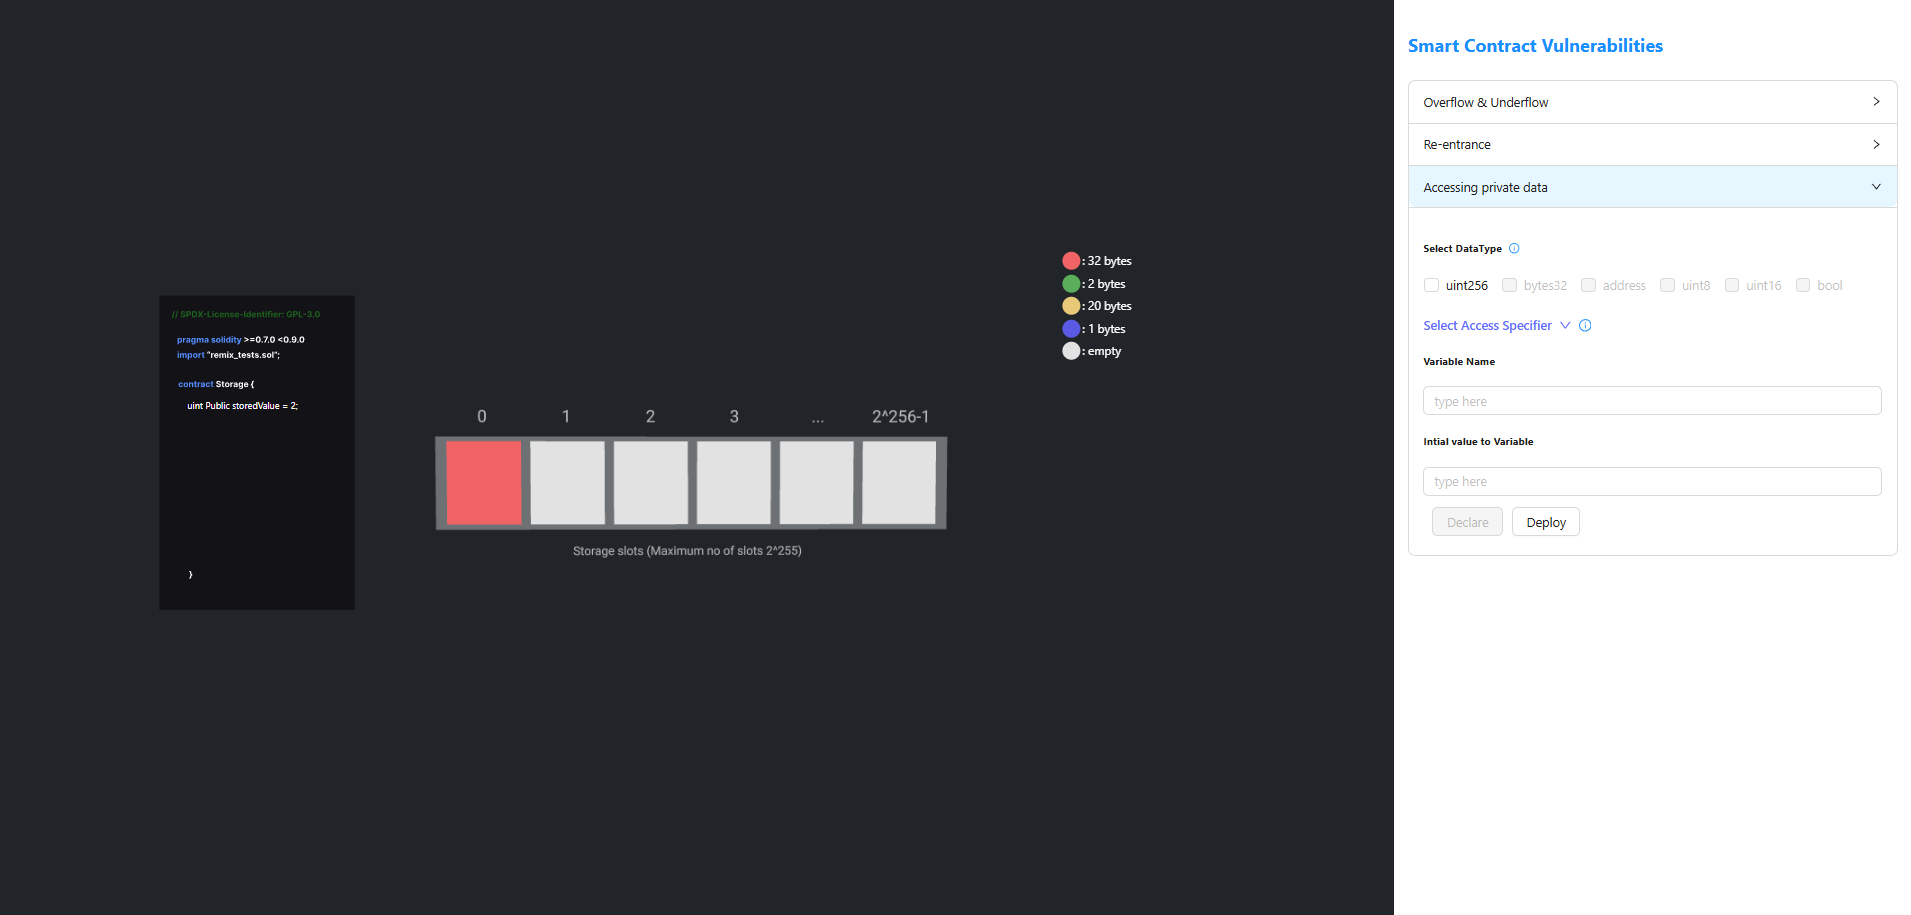
Step 4: Deploy the Contract
- Click Deploy to deploy the smart contract.
- After successful deployment, the Contract Address is displayed.
Step 5: Access the Private Data
- Copy the Contract Address.
- Paste it into the Contract address field under Access private data.
- Enter the corresponding Storage Slot Number.
- Click Access private Data.
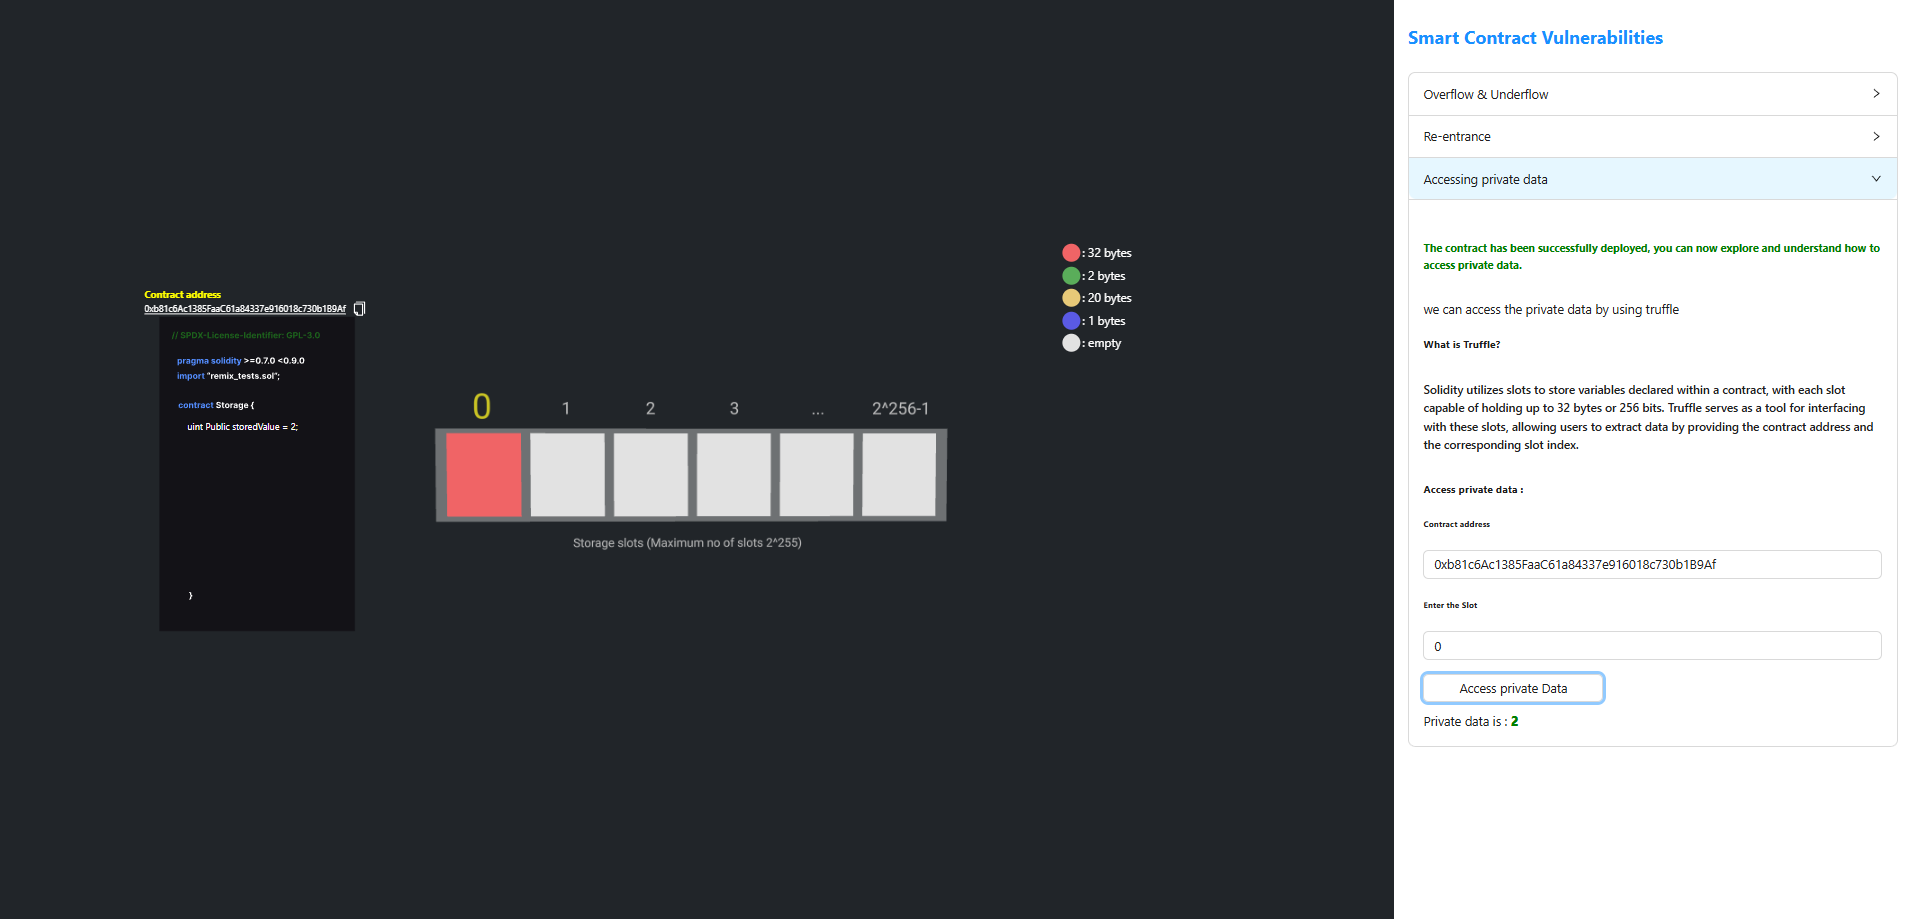
The value stored in the specified storage slot is displayed, even if the variable is declared as private.