
Implement Service-Based Architecture (SBA)
Step 1: Create and Start Service 1
1. Start Service Creation
Click the Create New Service button located in the Services Panel on the dashboard. This opens the configuration panel for a new service.
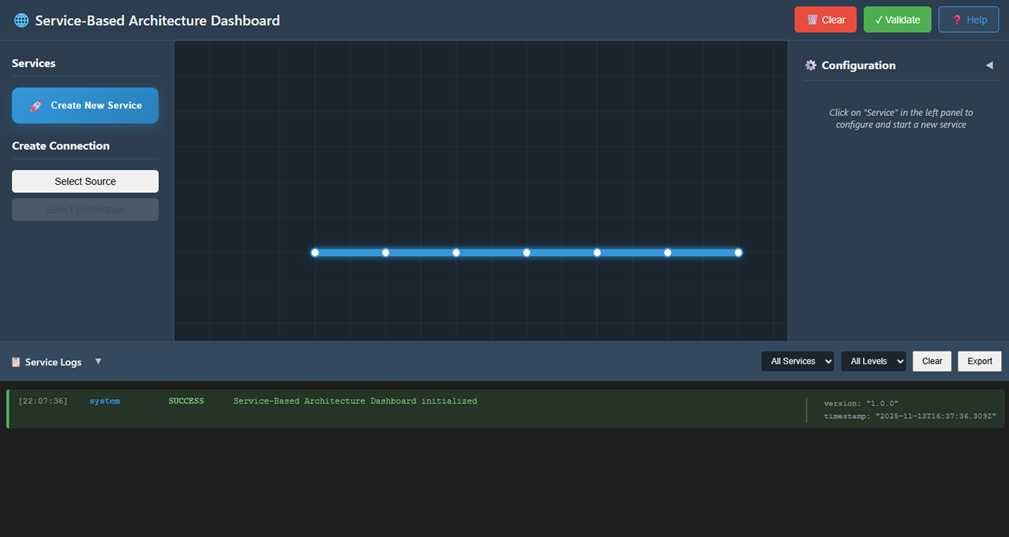
Fig: Service-Based Architecture Dashboard
2. Configure Service 1
In the Service Configuration Panel, enter the following details:
- Service Name: Enter Service1.
- IP Address: Provide a valid IPv4 address. Example: 192.168.1.11
- Port: Specify a valid port number, such as 8081 or according to your setup.
- Protocol: Select the required protocol from the dropdown: HTTP/1 or HTTP/2
- Description (Optional): Add a short description of the service if needed.
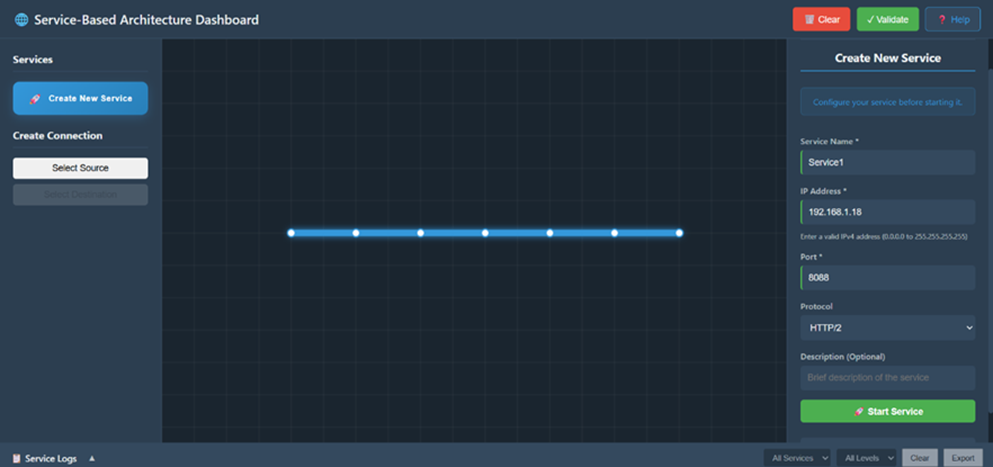
Fig: Configure the Service
3. Start Service 1
Click the Start Service button to initialize and deploy Service1.
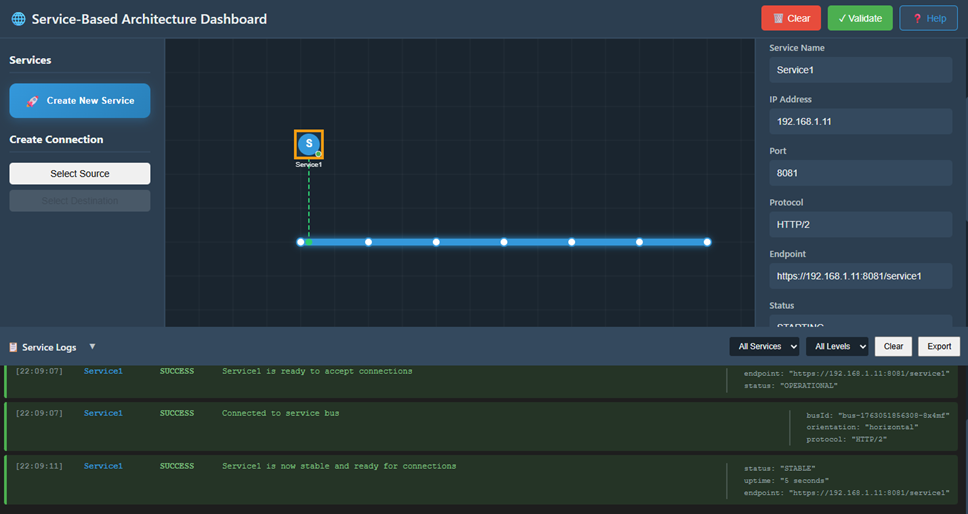
Fig: Service1 is now Stable
4. Verify Service 1 Logs
After starting the service:
- Wait about 5 seconds for initialization.
- Scroll to the Service Logs Panel at the bottom.
- Look for log messages such as:
- "Service1 initialized successfully"
- "Service1 is now active"
This confirms Service1 is running and ready.
Step 2: Create Service 2 and Establish Connection
1. Create Service 2
Click the Create New Service button again to start creating your second service.
2. Configure Service 2
In the configuration panel, fill in:
- Service Name: Enter Service2.
- IP Address: Provide a different valid IPv4 address. Example: 192.168.1.21
- Port: Enter a port number such as 8088.
- Protocol: It may auto-select based on Service1's protocol. Otherwise, select HTTP/2 manually.
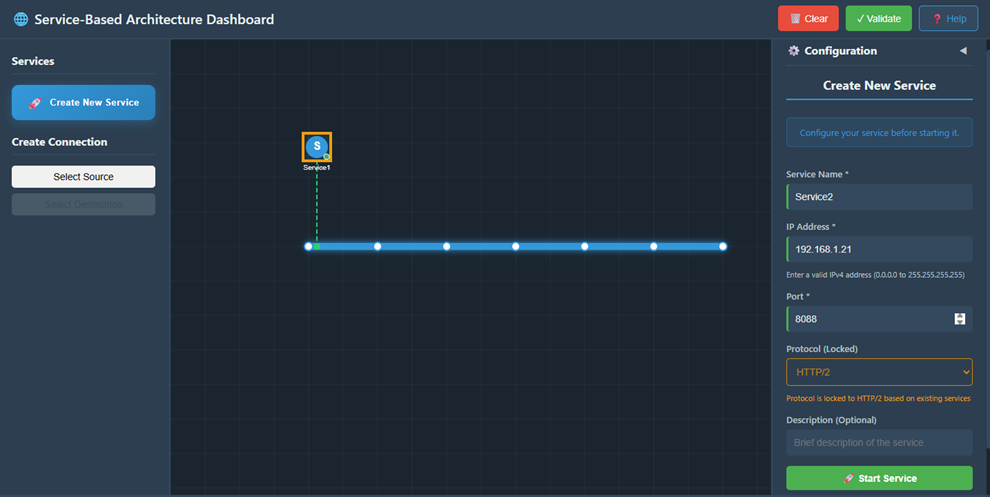
Fig: Configure the Service
3. Start Service 2
Click Start Service to deploy and activate Service2.
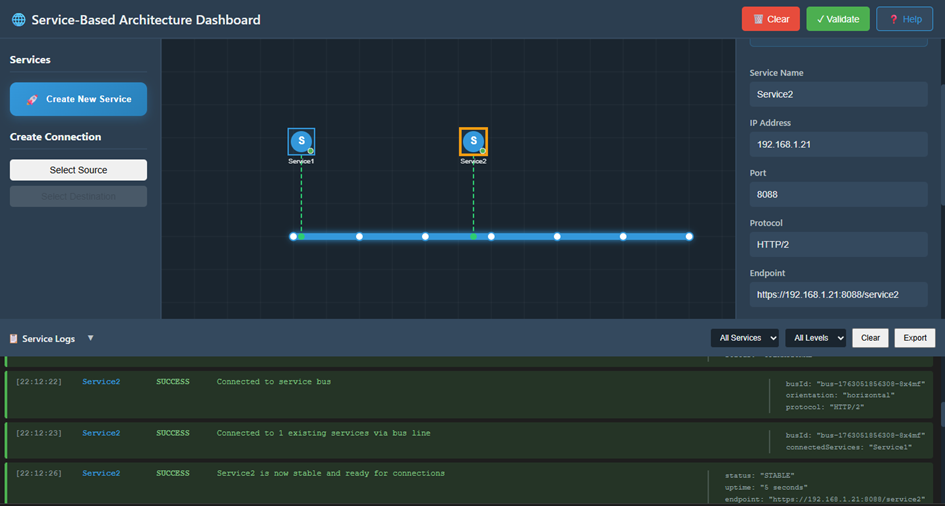
Fig: Service2 is now Stable
4. Verify Inter-Service Connection Logs
Once Service2 starts:
- Open the Service Logs Panel again.
- Look for logs showing communication between Service1 and Service2:
- "Service1 → Response sent to Service2"
- "Service2 → Response received from Service1"
These logs confirm that the connection between the two services is successfully established.
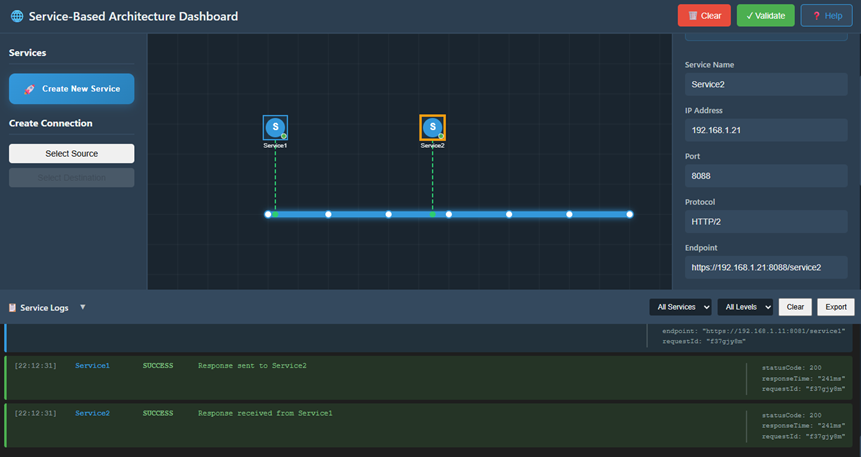
Fig: Verify the Request/Response Logs
Step 3: Troubleshoot and Validate Connectivity
1. Open Terminal for Service2
- Click on the Service2 icon on the dashboard.
- In the right-hand configuration panel, scroll down.
- Click the Open Service Terminal button.
This opens a dedicated terminal window showing:
- Service Name
- Service IP (e.g., 192.168.1.16)
- Port
- Status
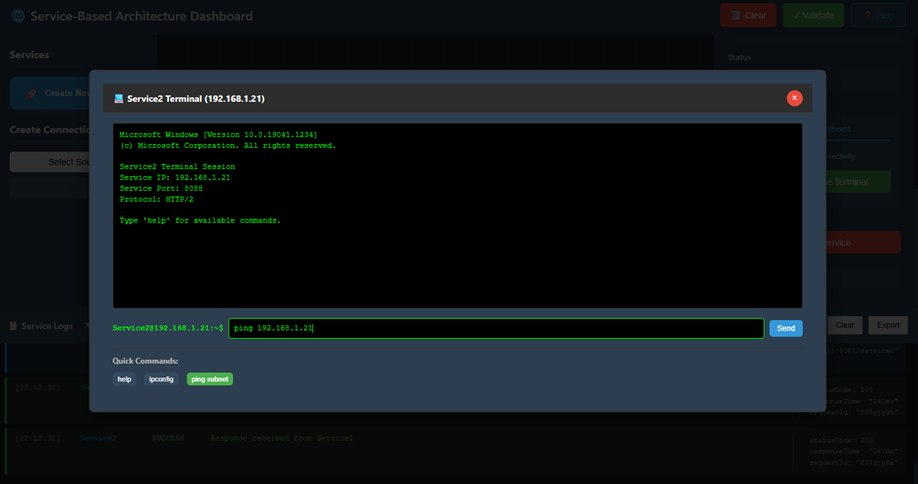
Fig: NF Terminal
2. Execute a Ping Command
In the terminal command input box, type the ping command with Service1's IP address:
ping <Service1_IP>
Example:
ping 192.168.1.21
3. Send Command
Click the Send button to execute the ping command.
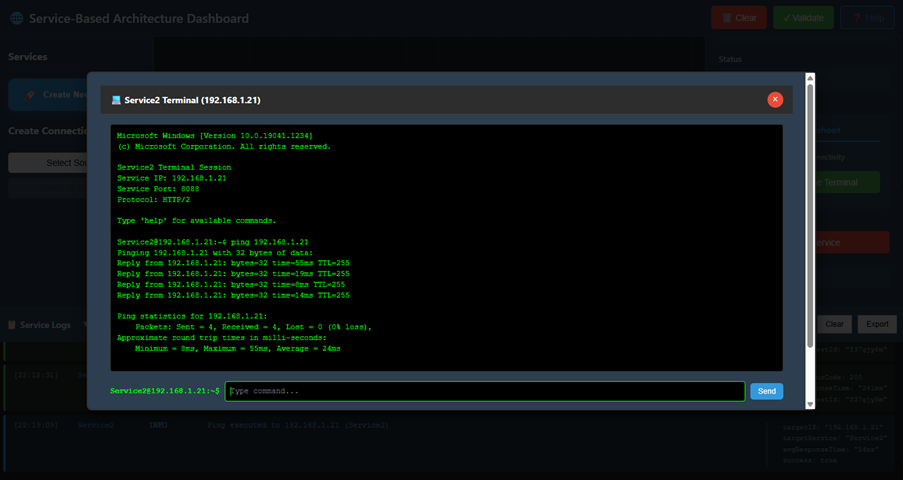
Fig: Ping Test
4. Analyze Connectivity Results
Check the terminal output:
- You should see multiple lines like: "Reply from 192.168.1.18: bytes=32 time<1ms"
- After completion, a summary appears showing:
- Packets Sent: 4
- Packets Received: 4
- Packet Loss: 0%