Tools
Performance Tool
Validation Tool
Aim
Theory
Pretest
Procedure
Simulation
Posttest
References
Feedback
Aim
Theory
Pretest
Procedure
Simulation
Posttest
References
Feedback
Drone’s Take-off, Flight and Landing Basics
Procedure
Drone's Take-off, Flight & Landing Basics
Click Here to Enter the Lab
Click the next button
Click the next button
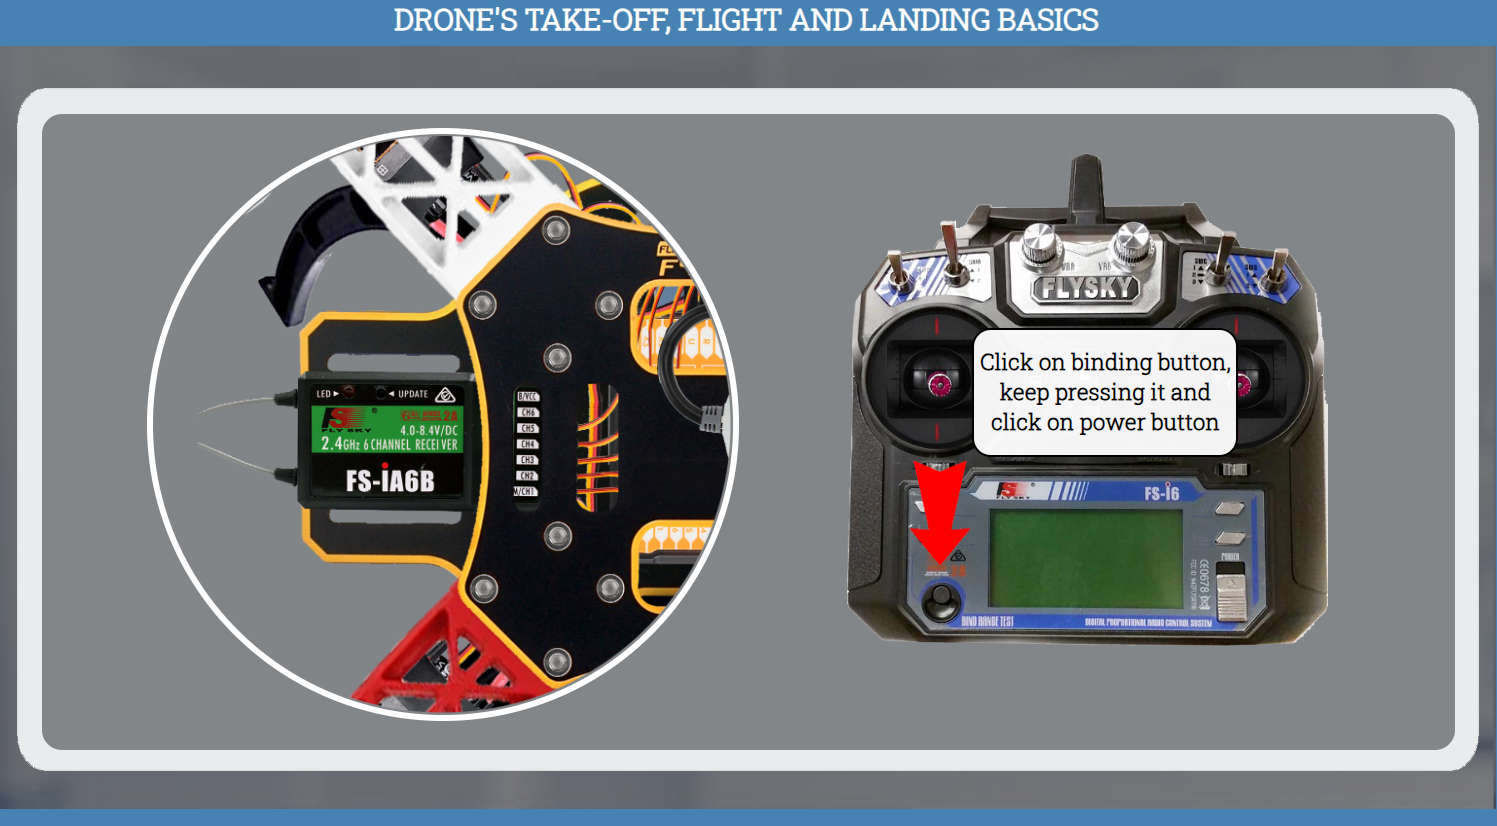
Click on binding button, keep pressing it and click on power button
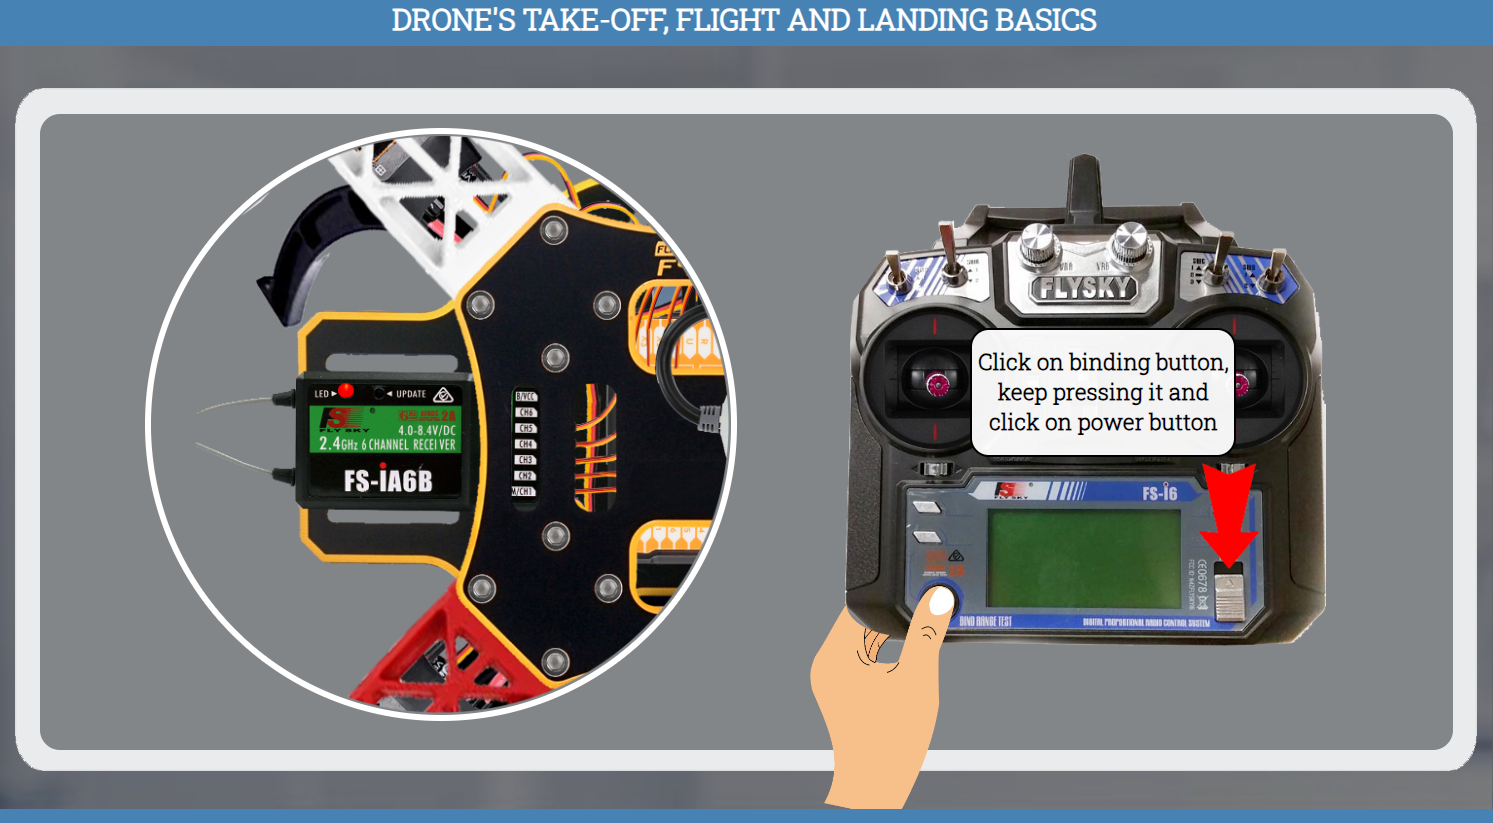
Click on binding button, keep pressing it and click on power button
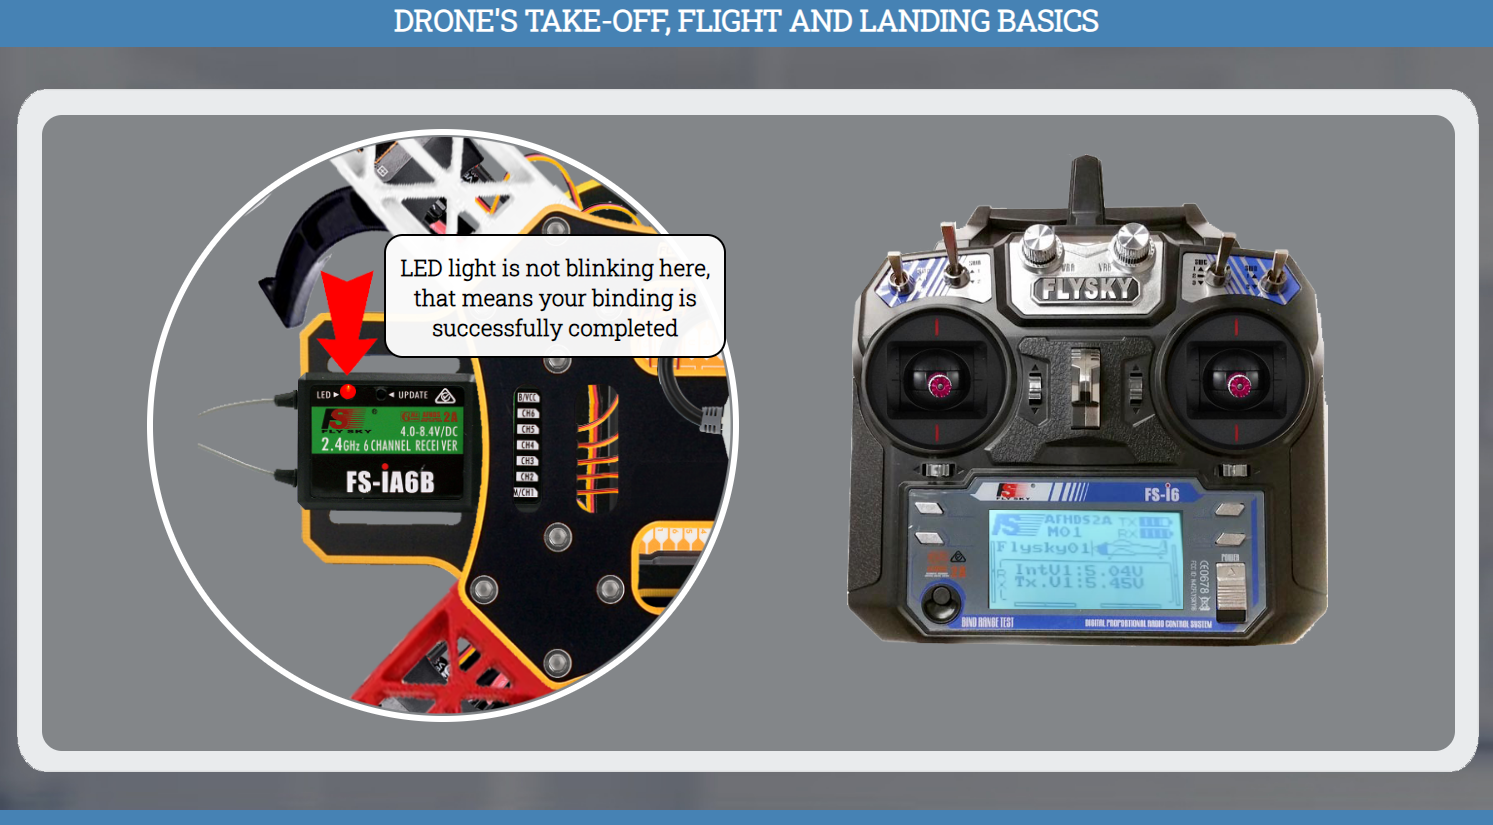
LED light is not blinking here, that means your binding is successfully completed
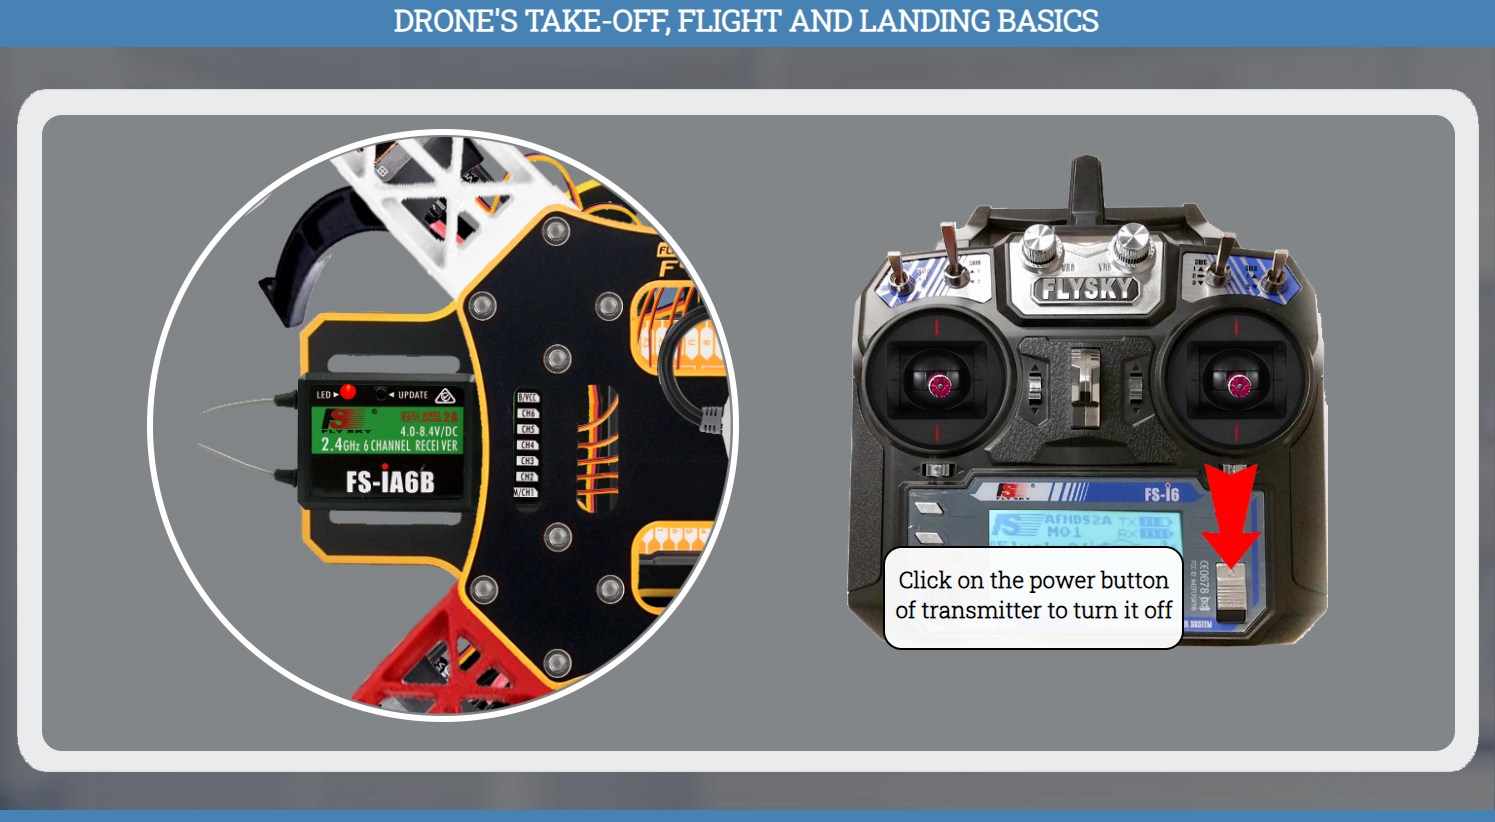
Click on the power button of transmitter to turn it off
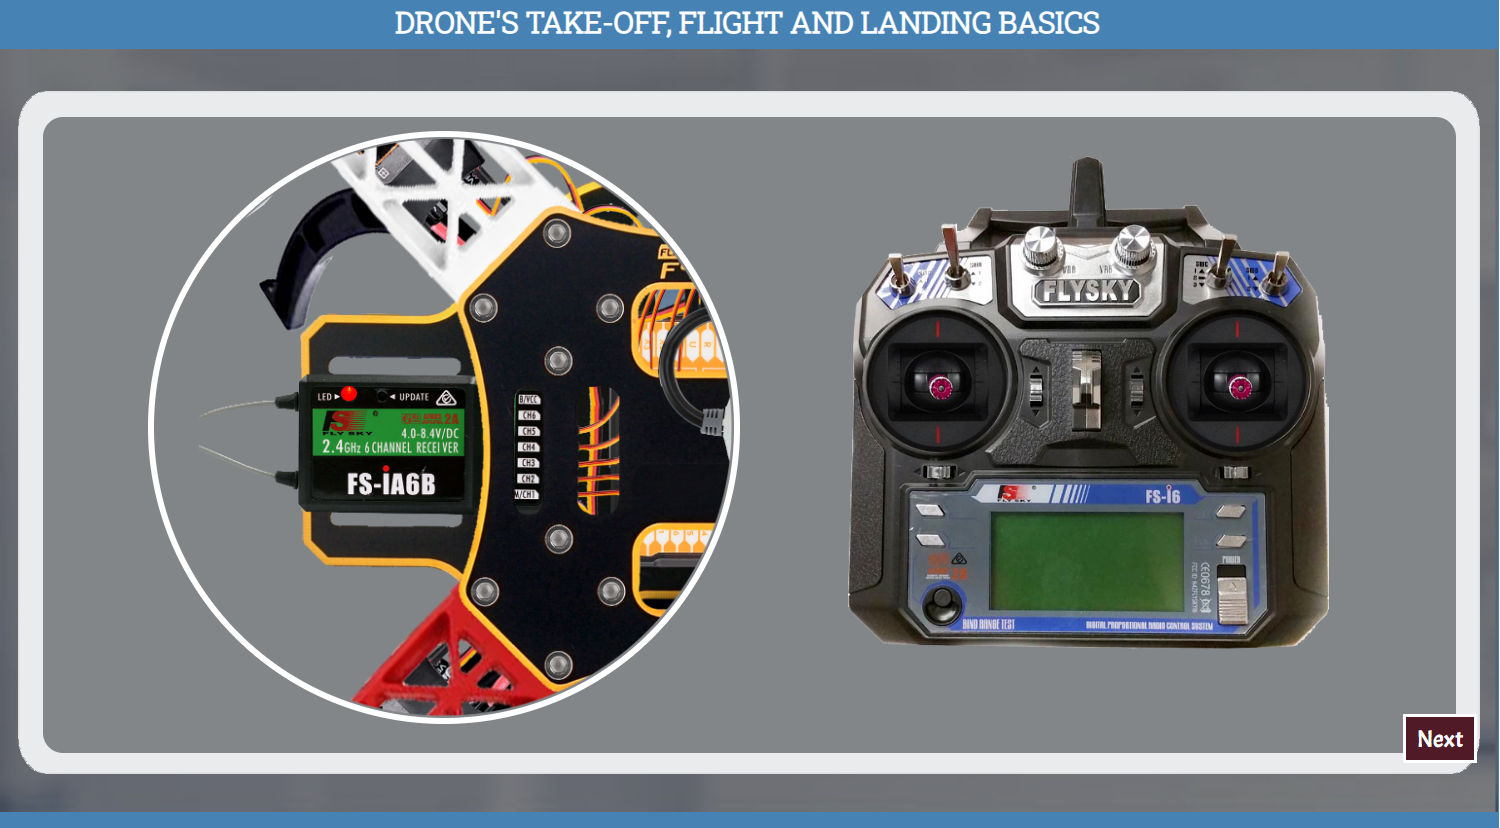
Click the next button
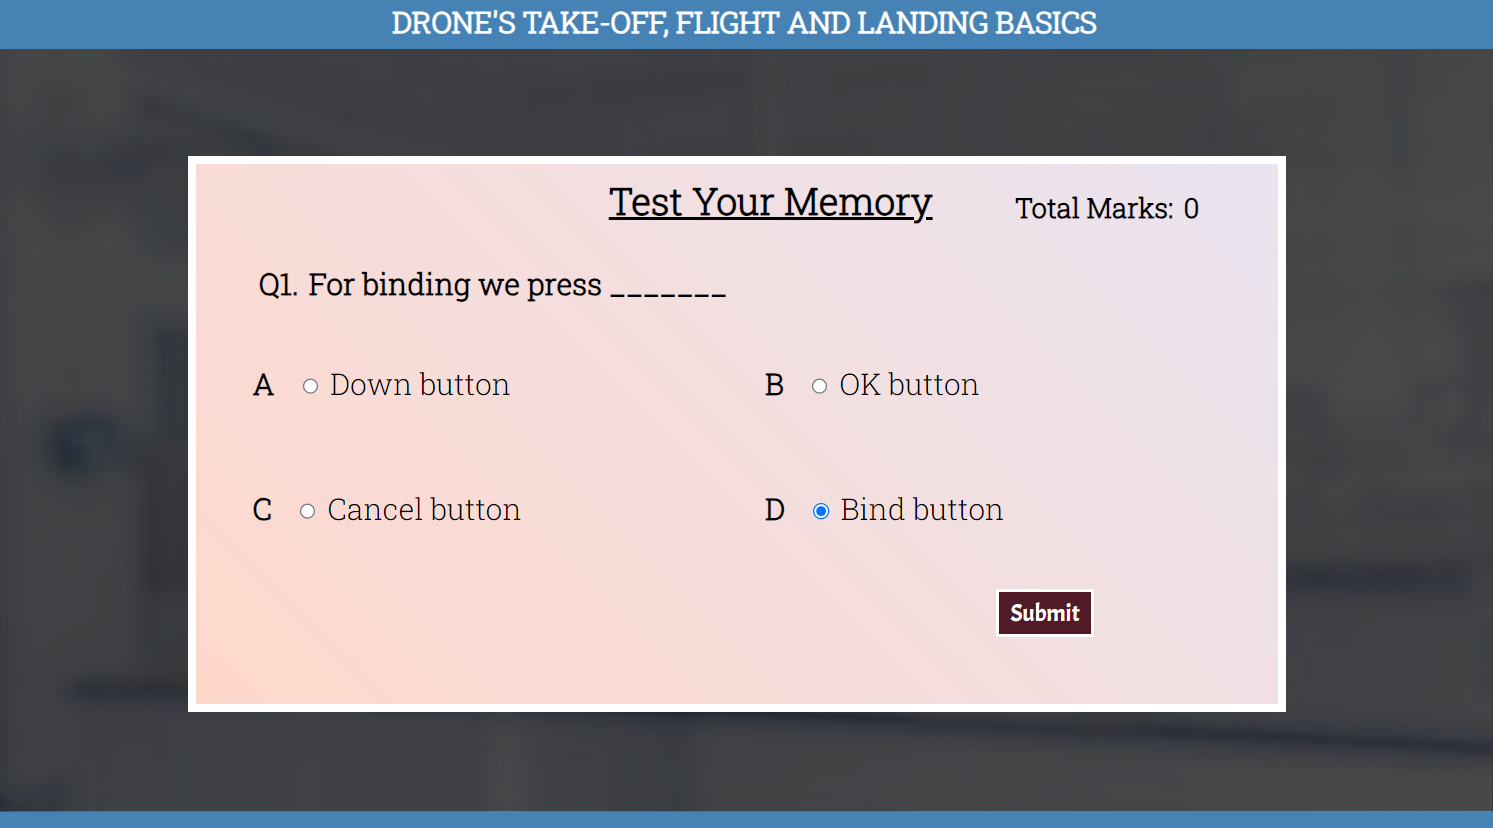
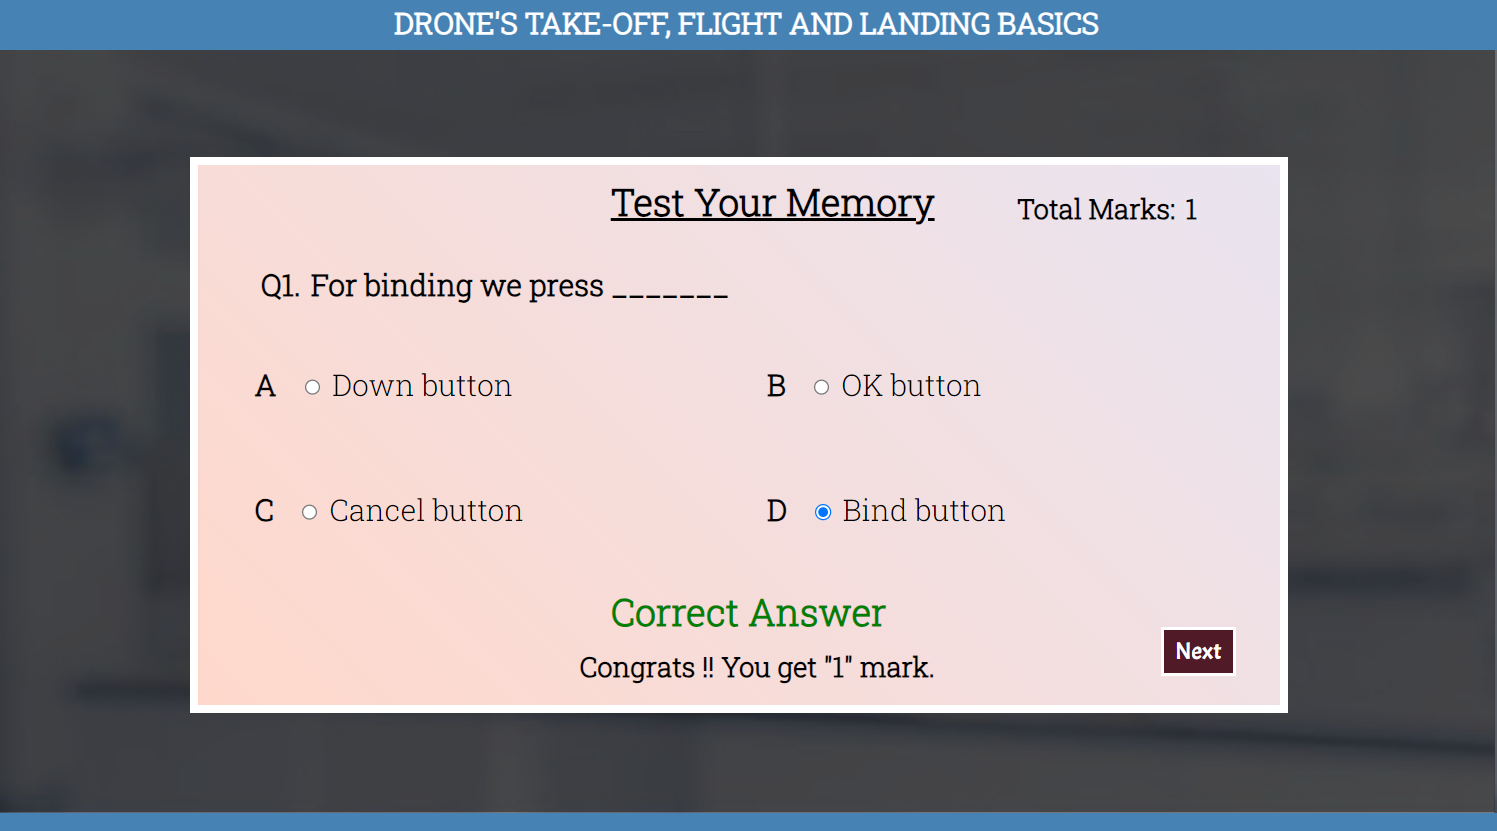
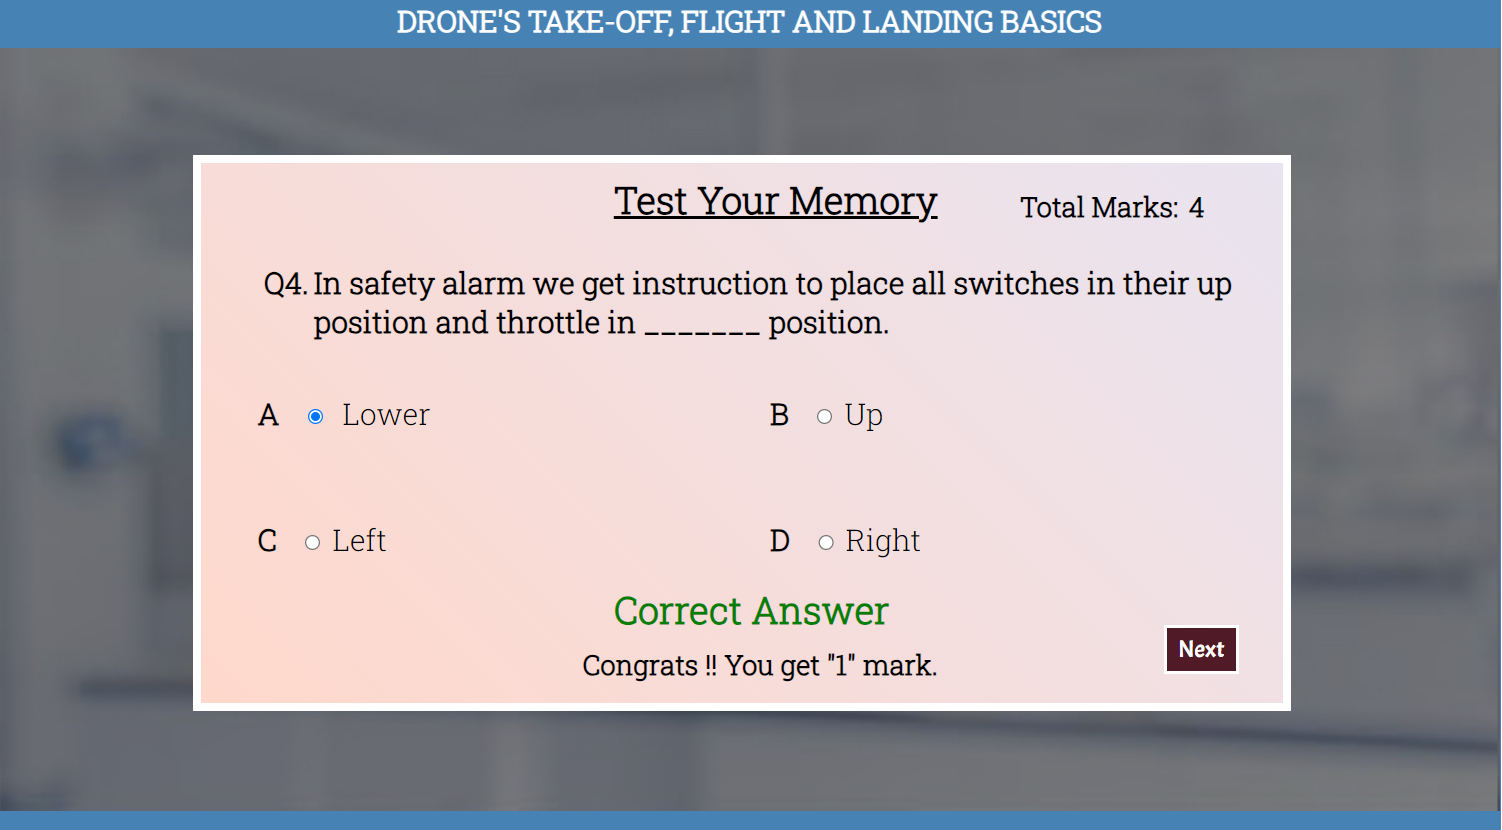
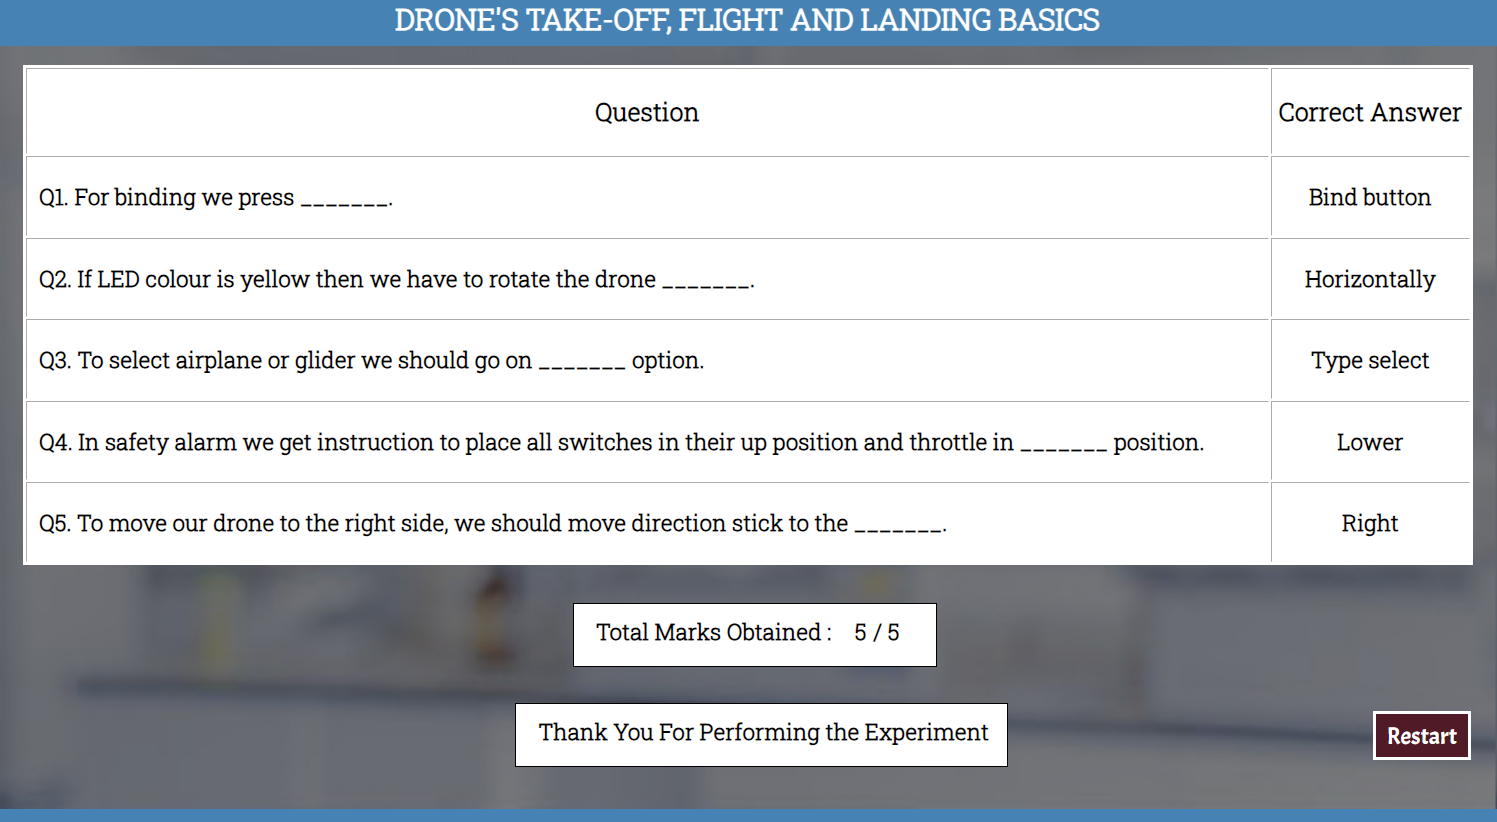
Test Your Memory
Choose the option and click on the submit button
Click the next button
Click the next button
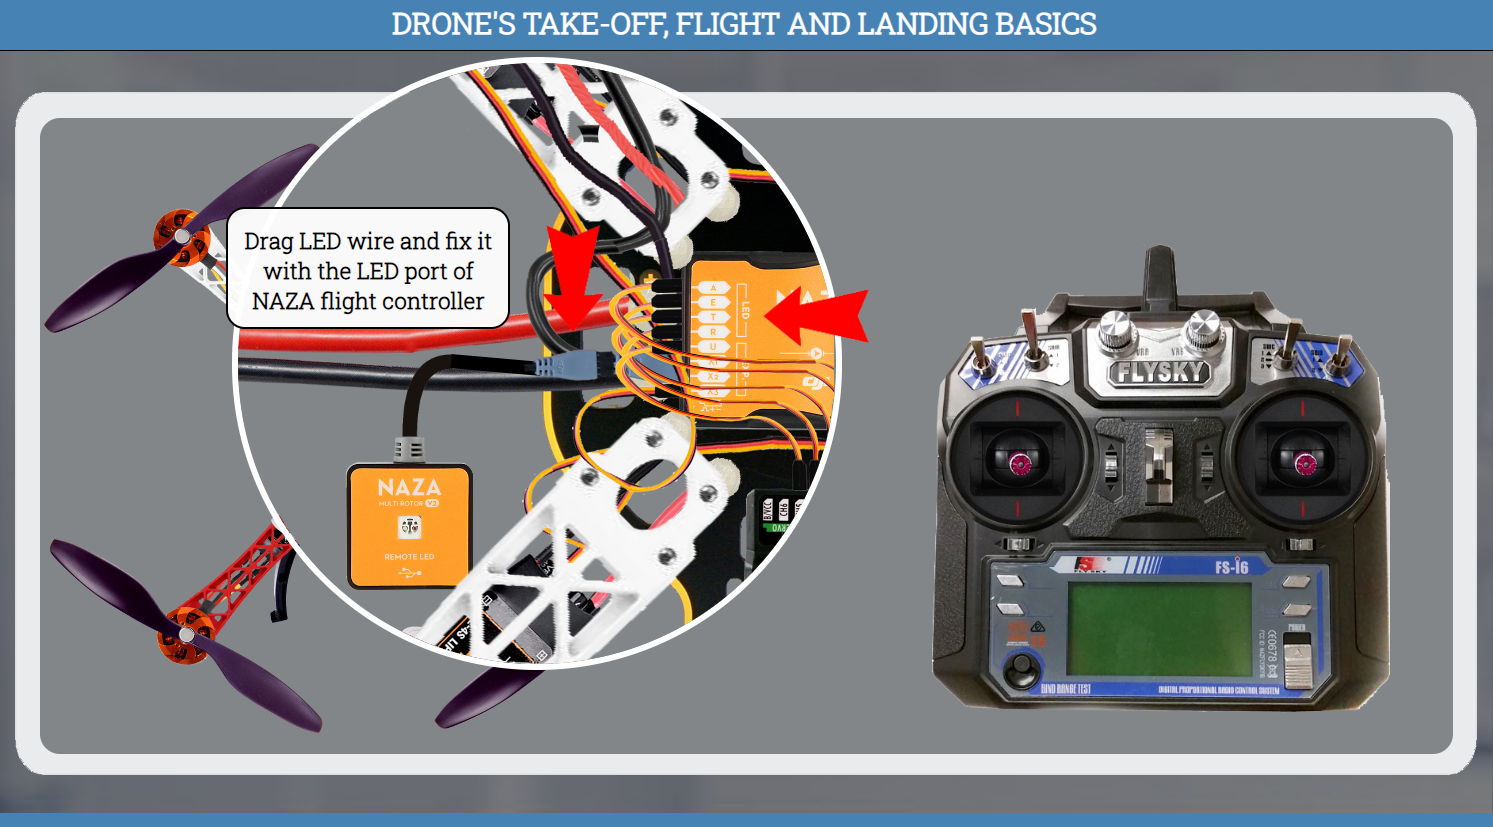
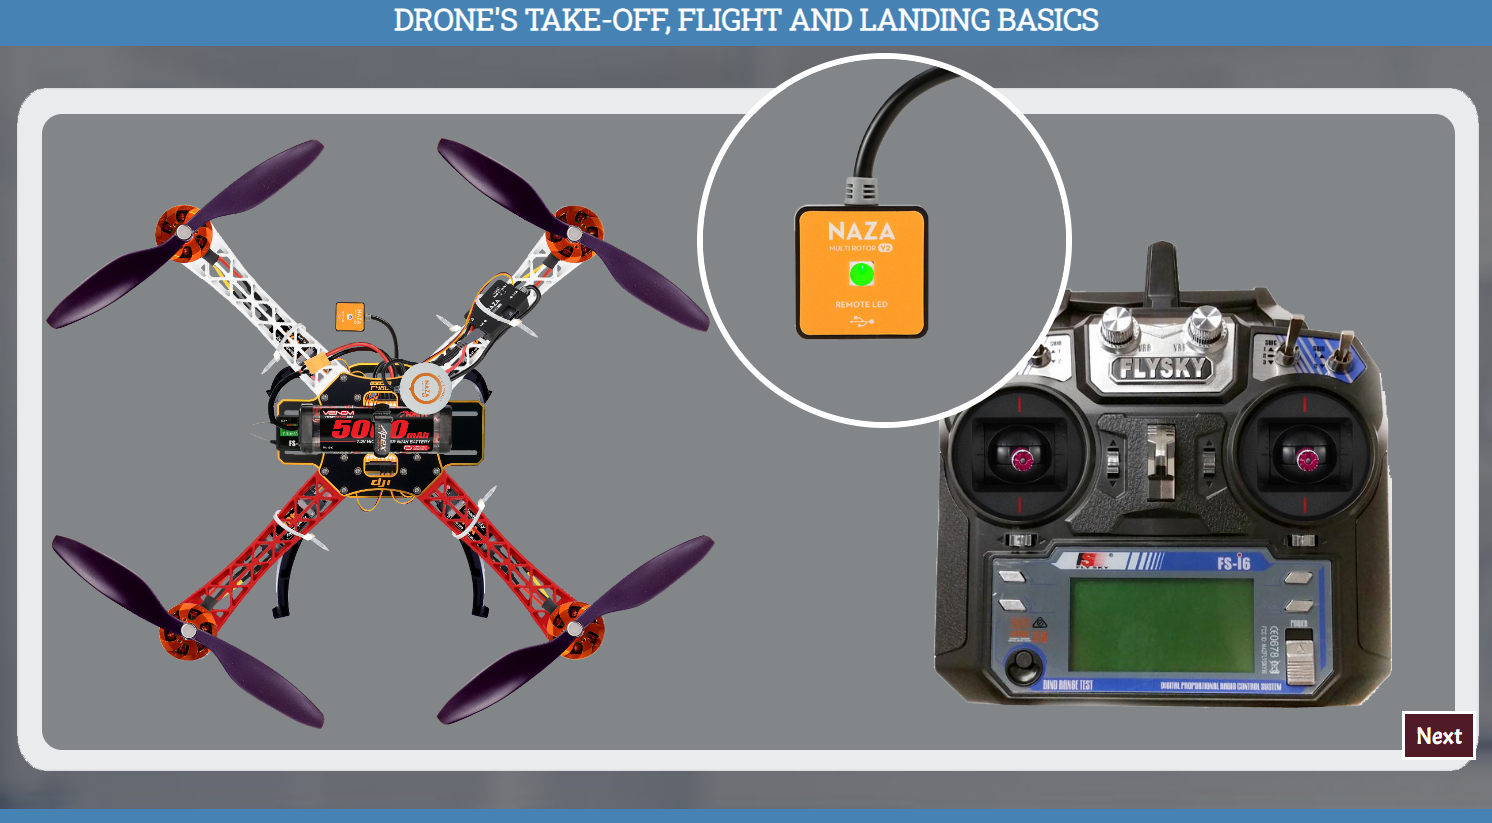
Drag LED wire and fix it with the LED port of NAZA flight controller
Click on the power button of transmitter
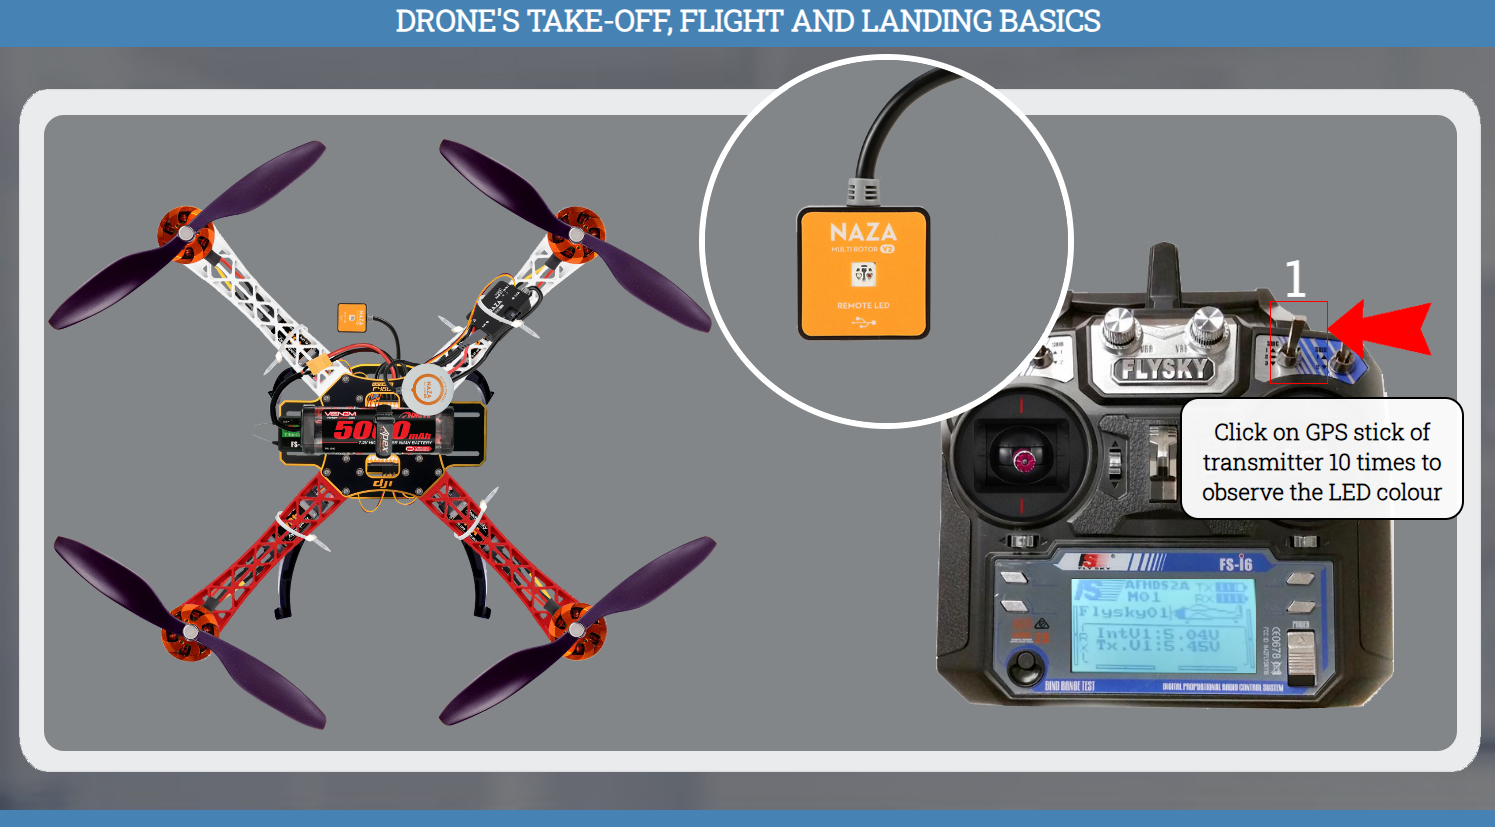
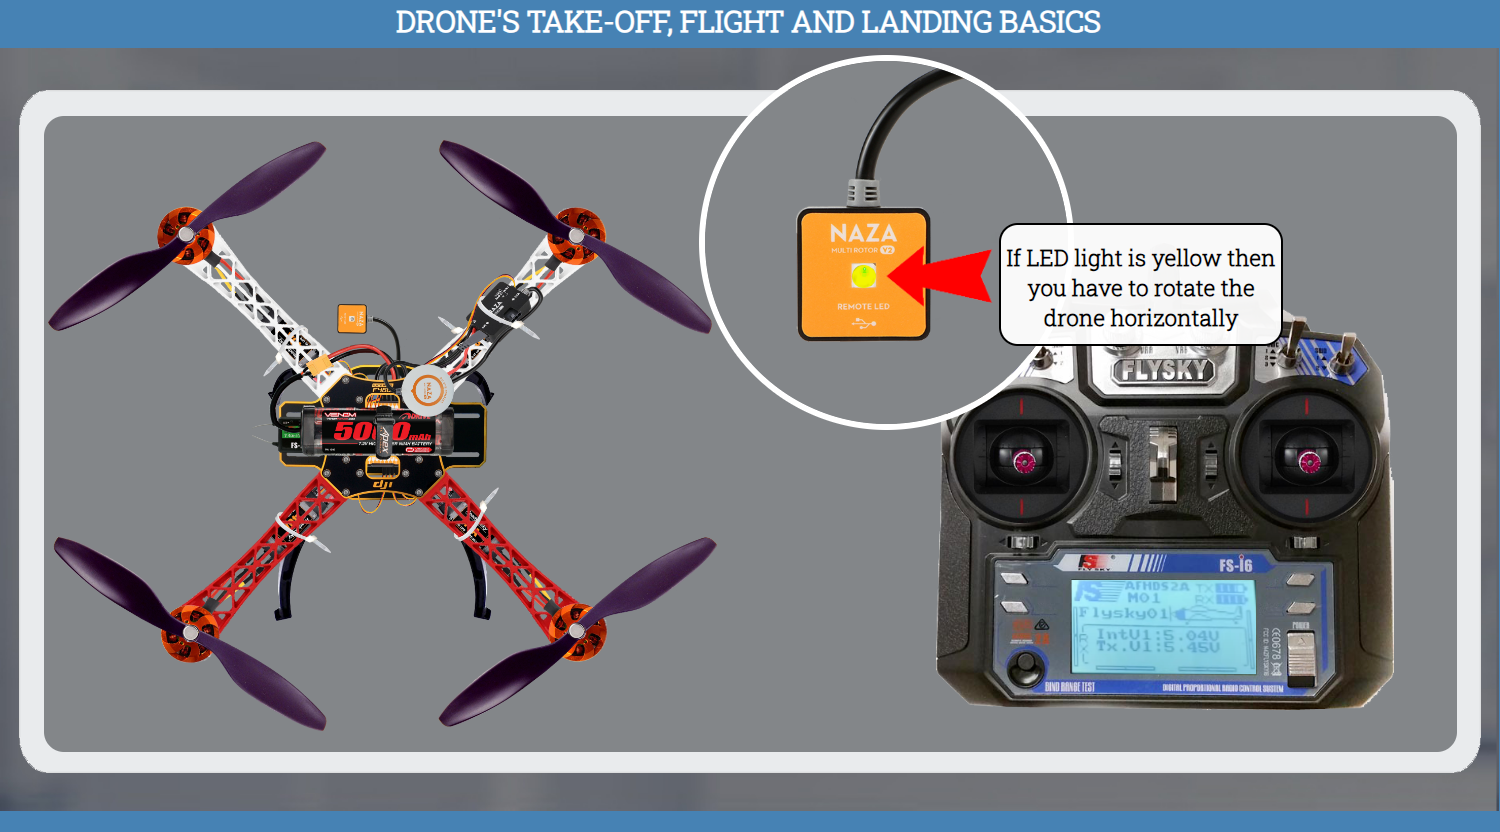
Click on GPS stick of transmitter 10 times to observe the LED colour
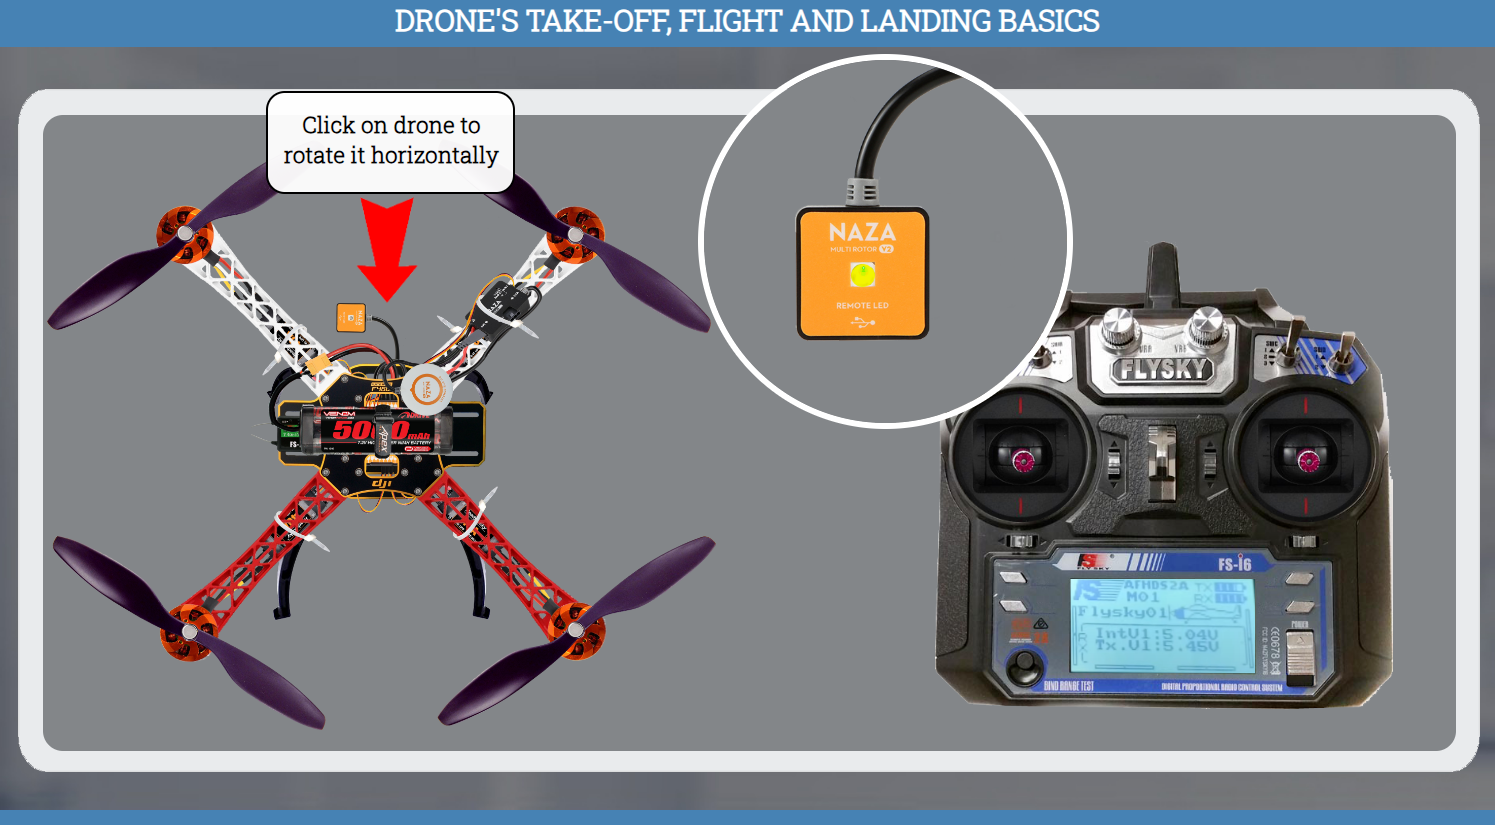
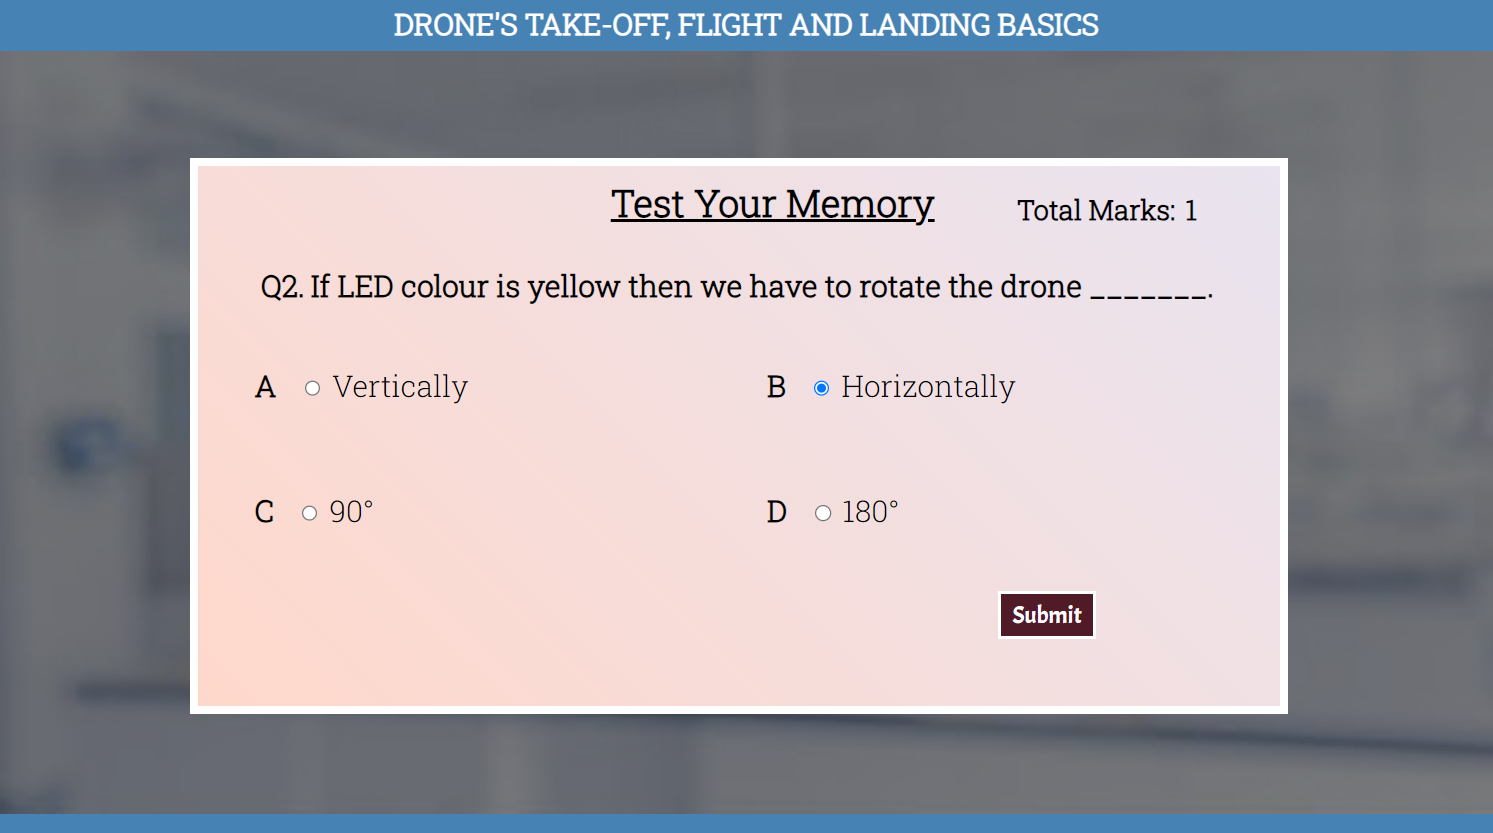
If LED light is yellow then you have to rotate the drone horizontally
Click on drone to rotate it horizontally
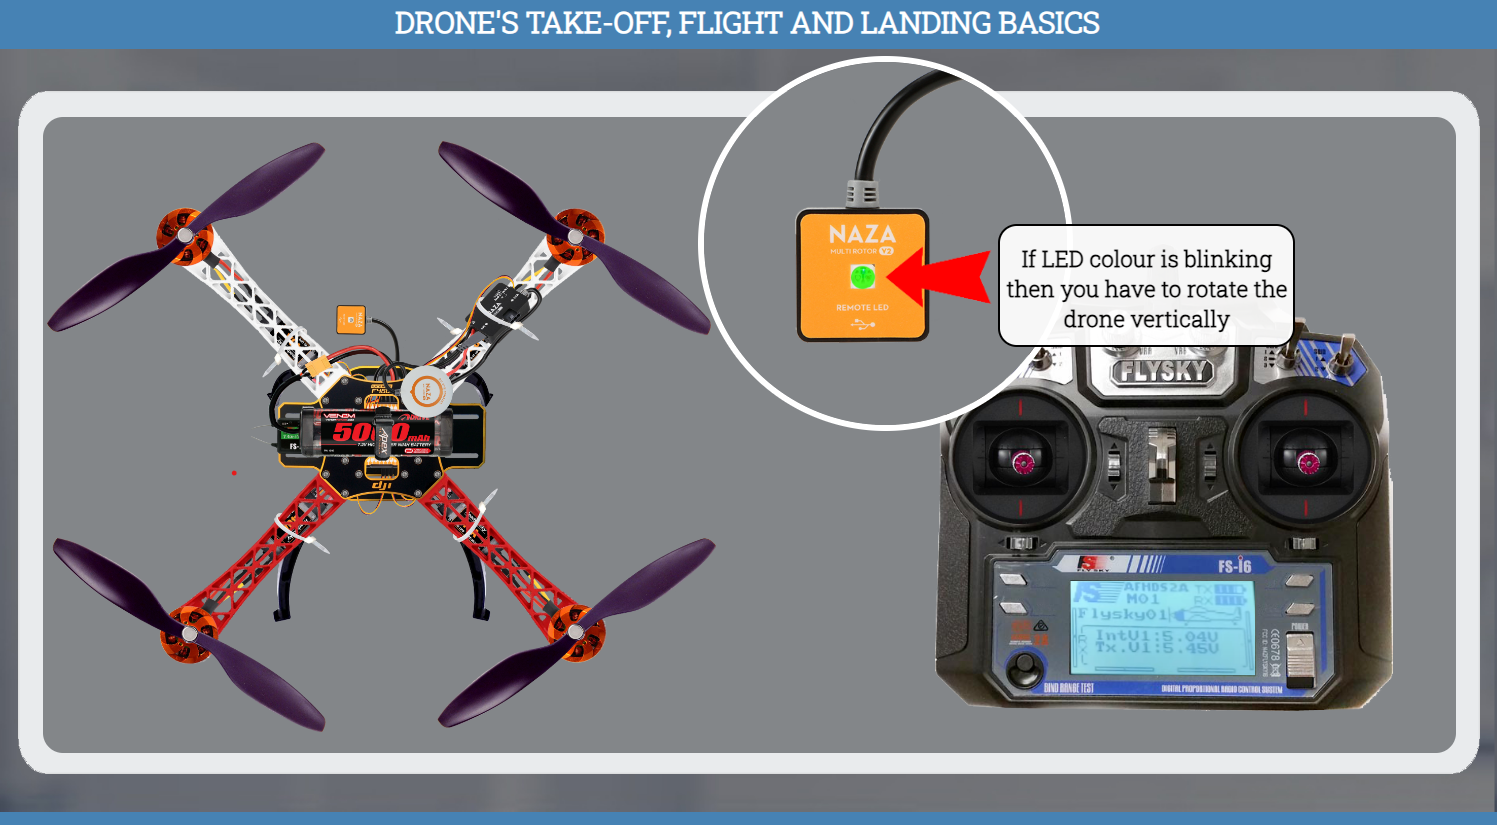
If LED colour is blinking then you have to rotate the drone vertically
Click on drone to rotate it vertically
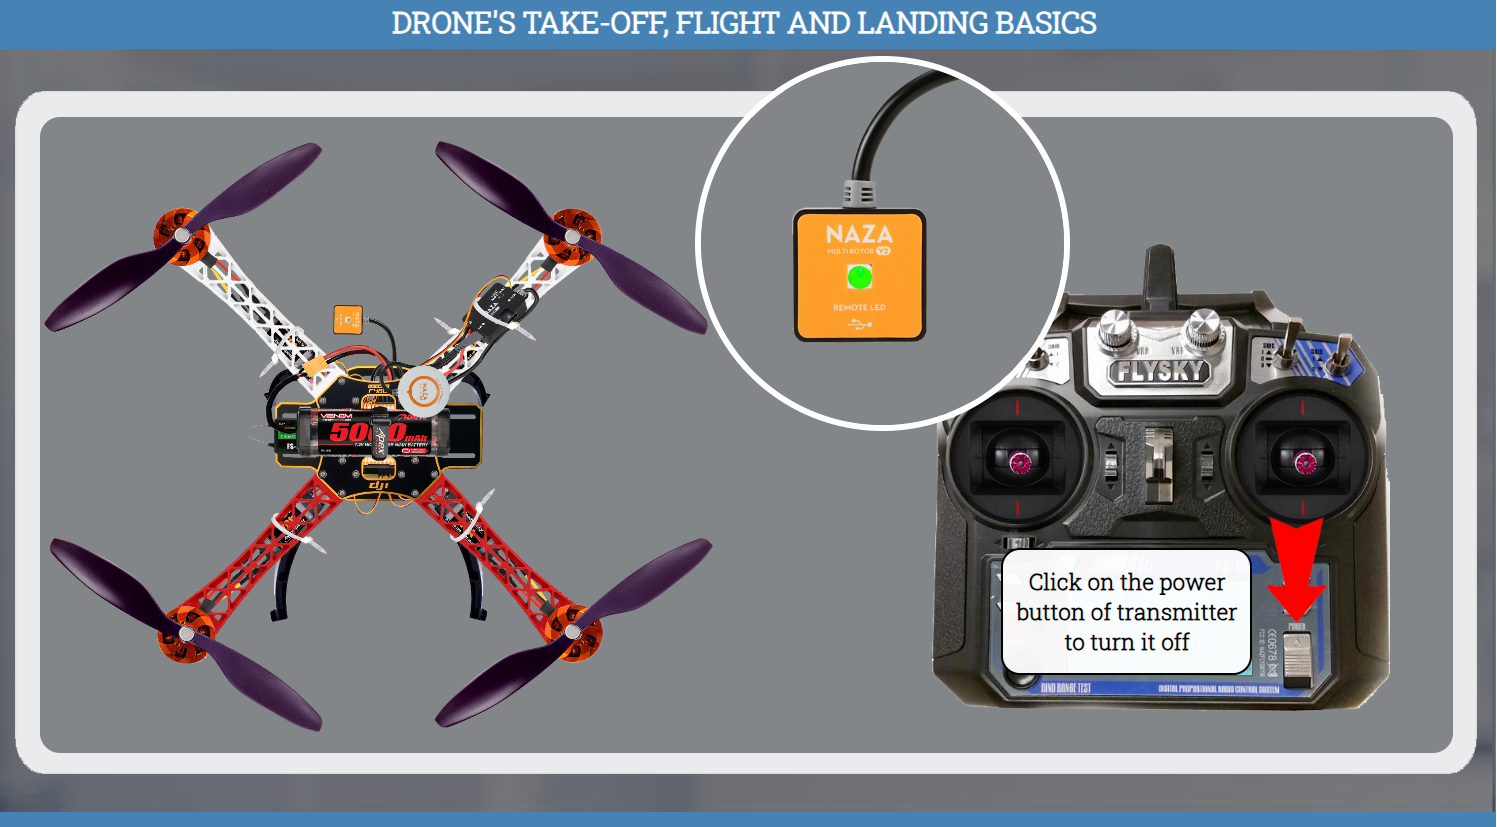
Click on the power button of transmitter to turn it off
Click the next button
Test Your Memory
Choose the option and click on the submit button
Click the next button
Click the next button
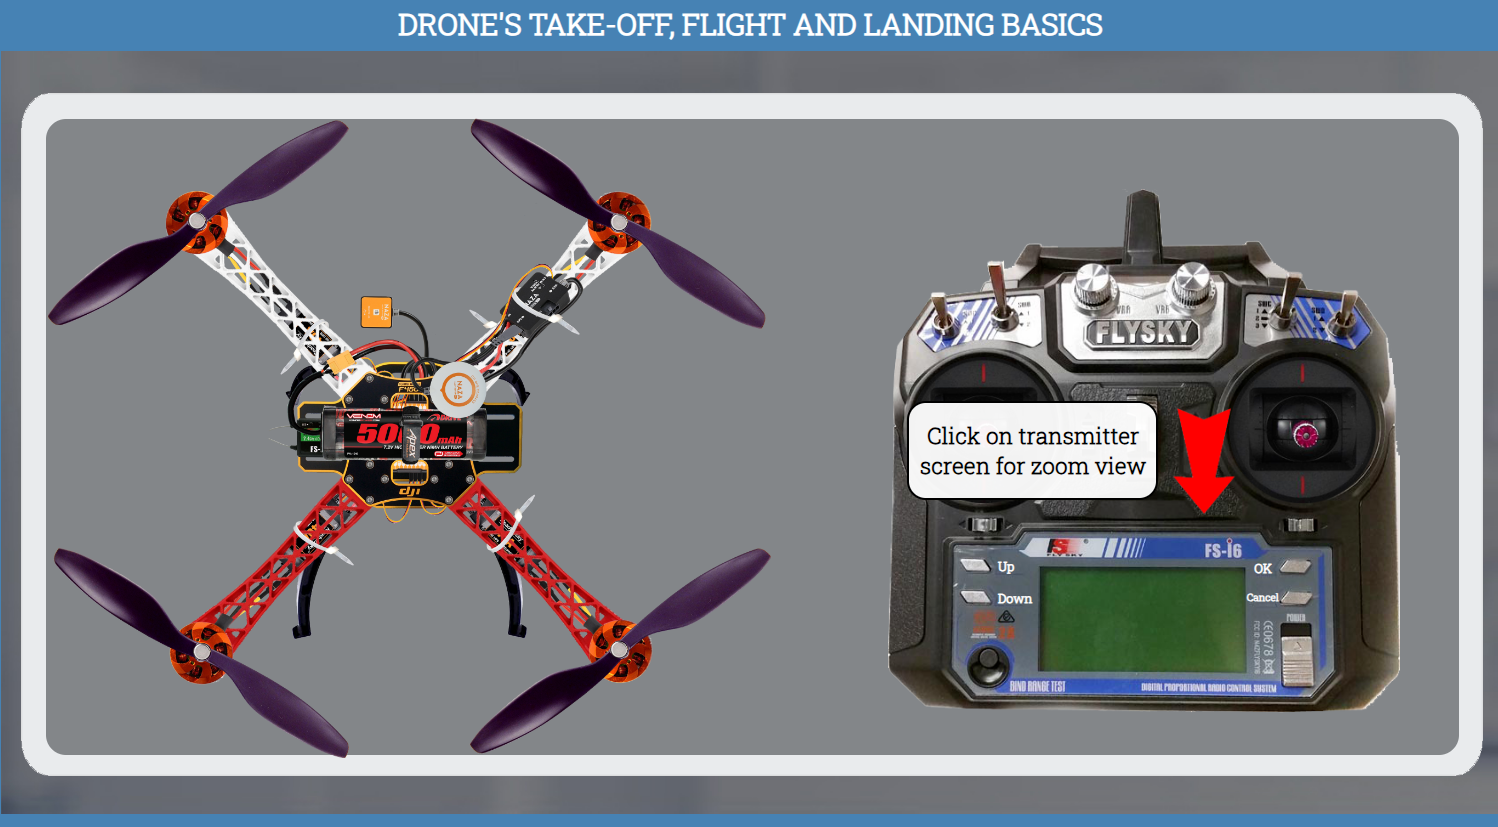
Click on transmitter screen for zoom view
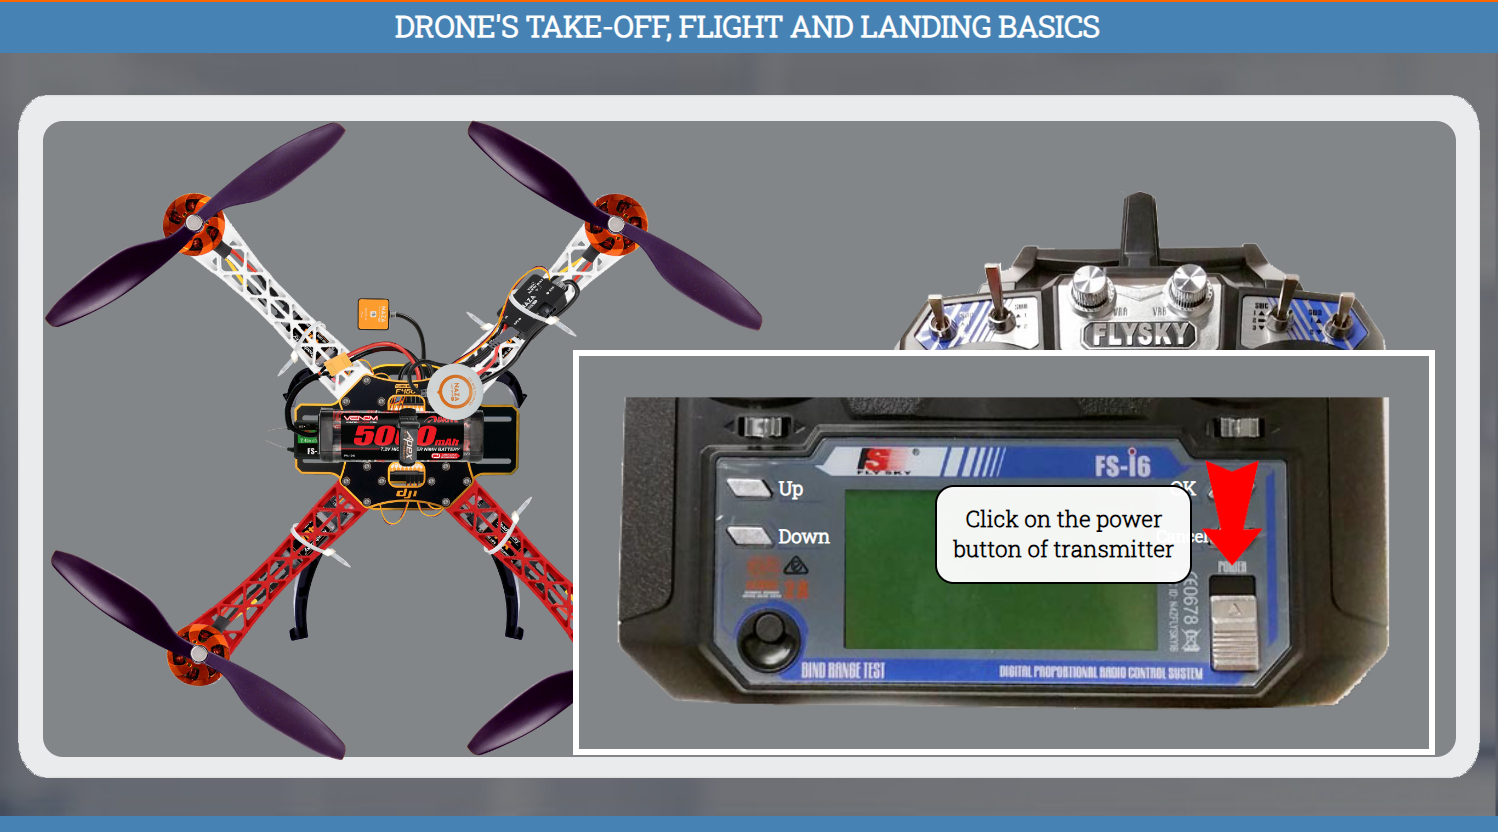
Click on the power button of transmitter
Long press OK button
To select system option click on OK button
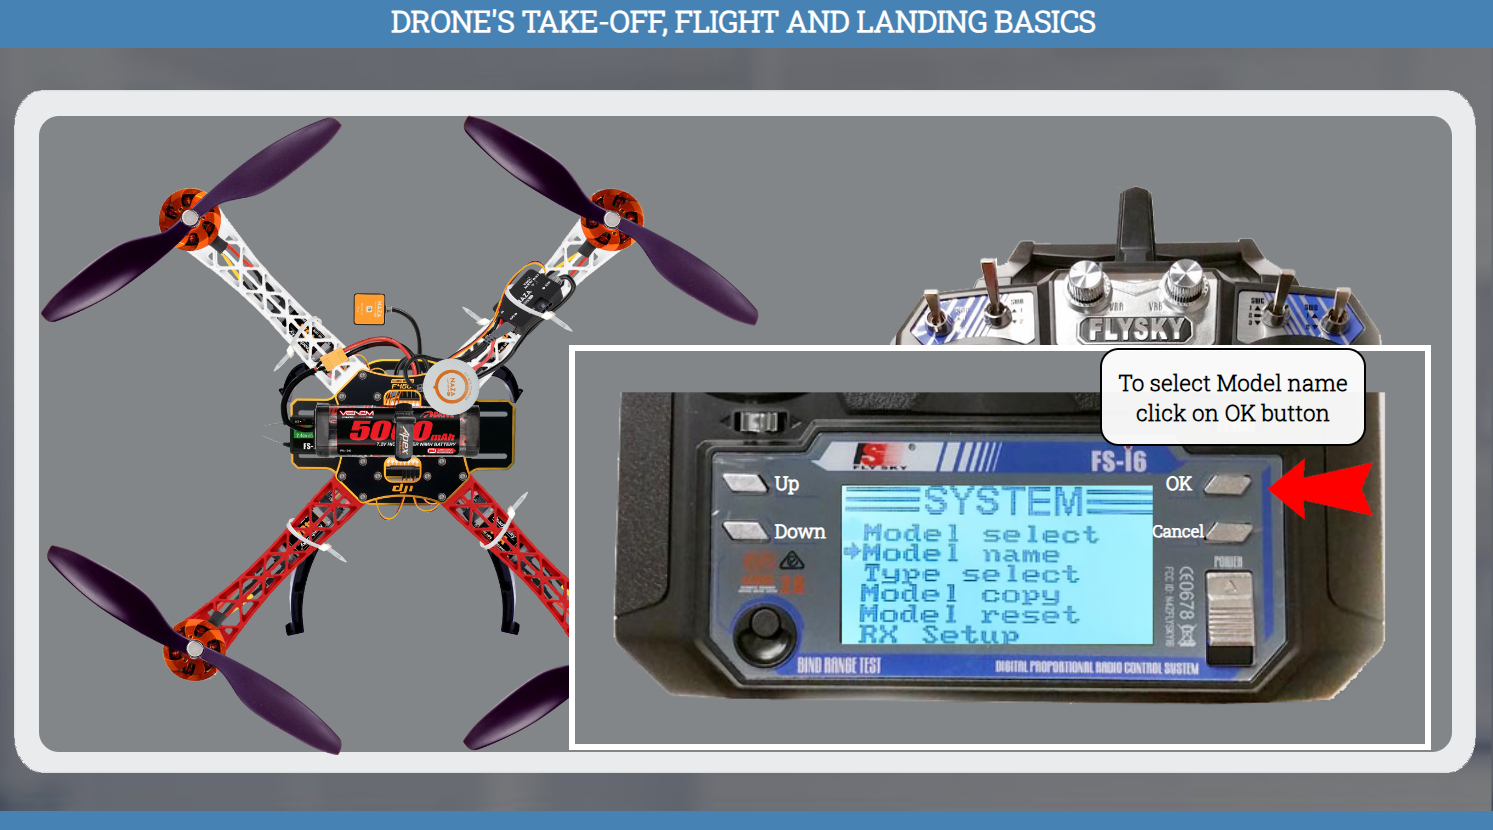
To select Model select option click on OK button
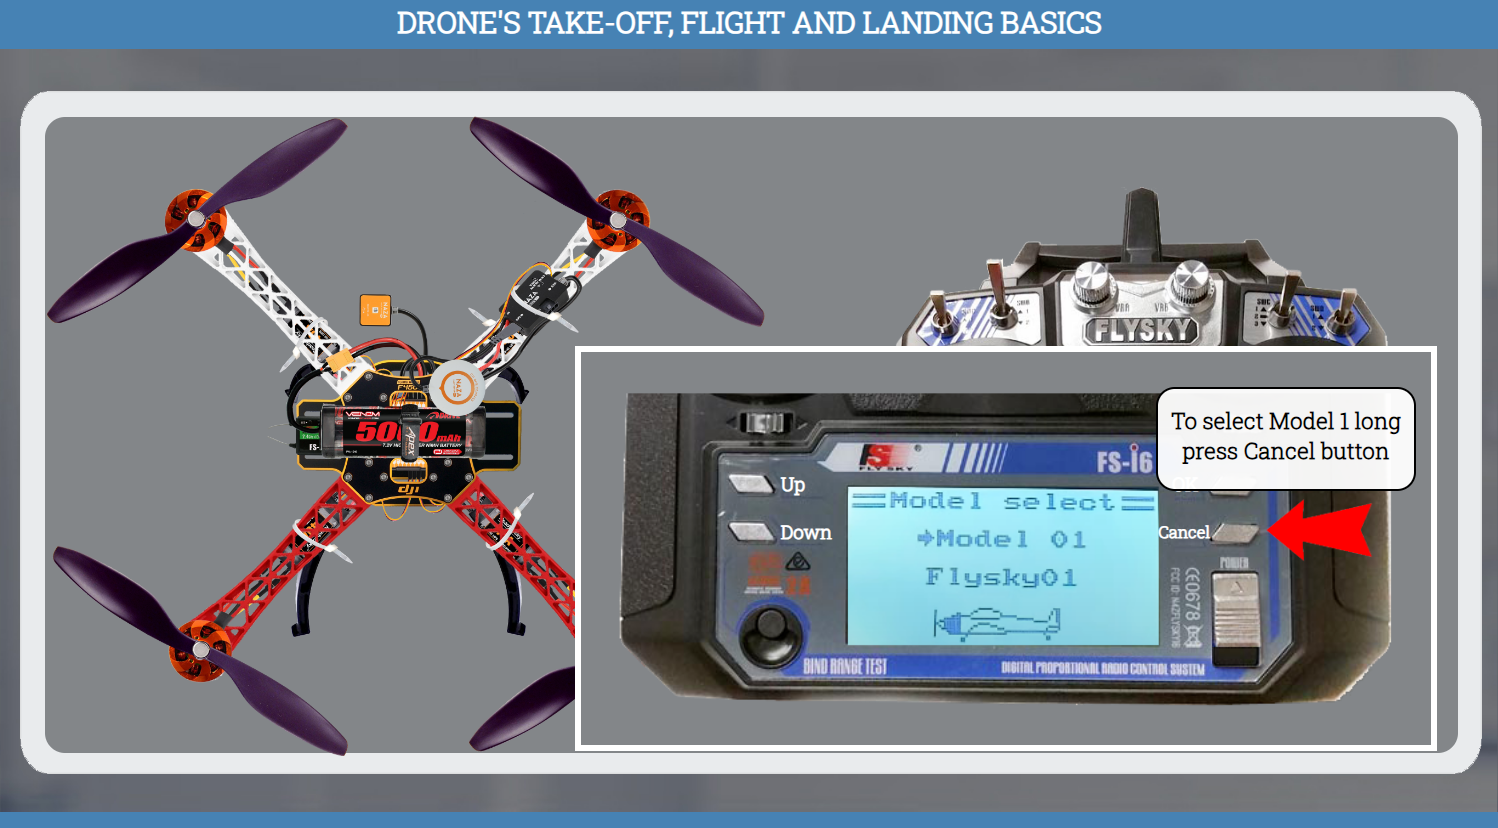
To select Model 1 long press Cancel button
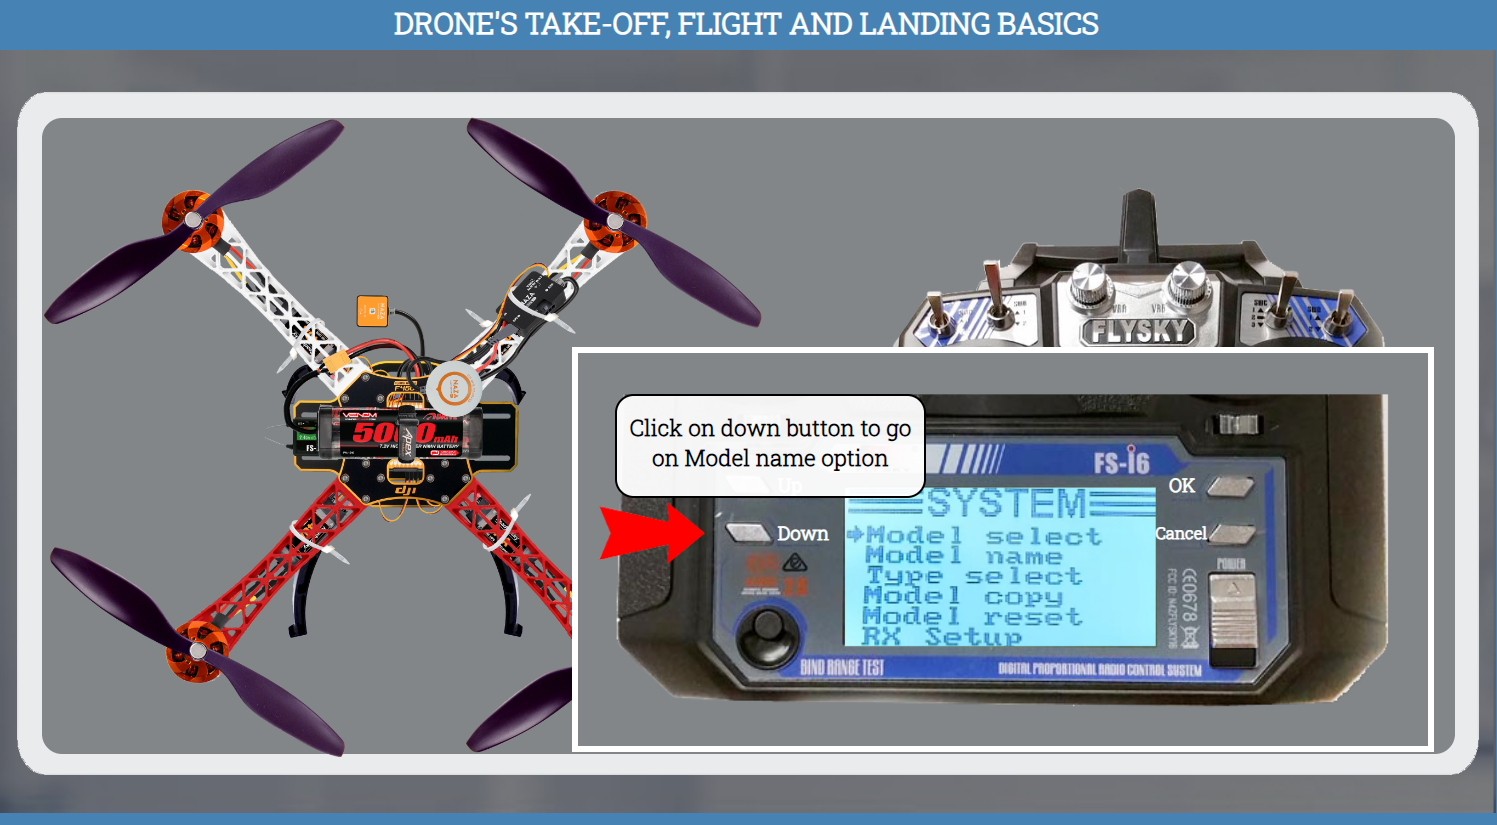
Click on down button to go on Model name option
To select Model name click on OK button
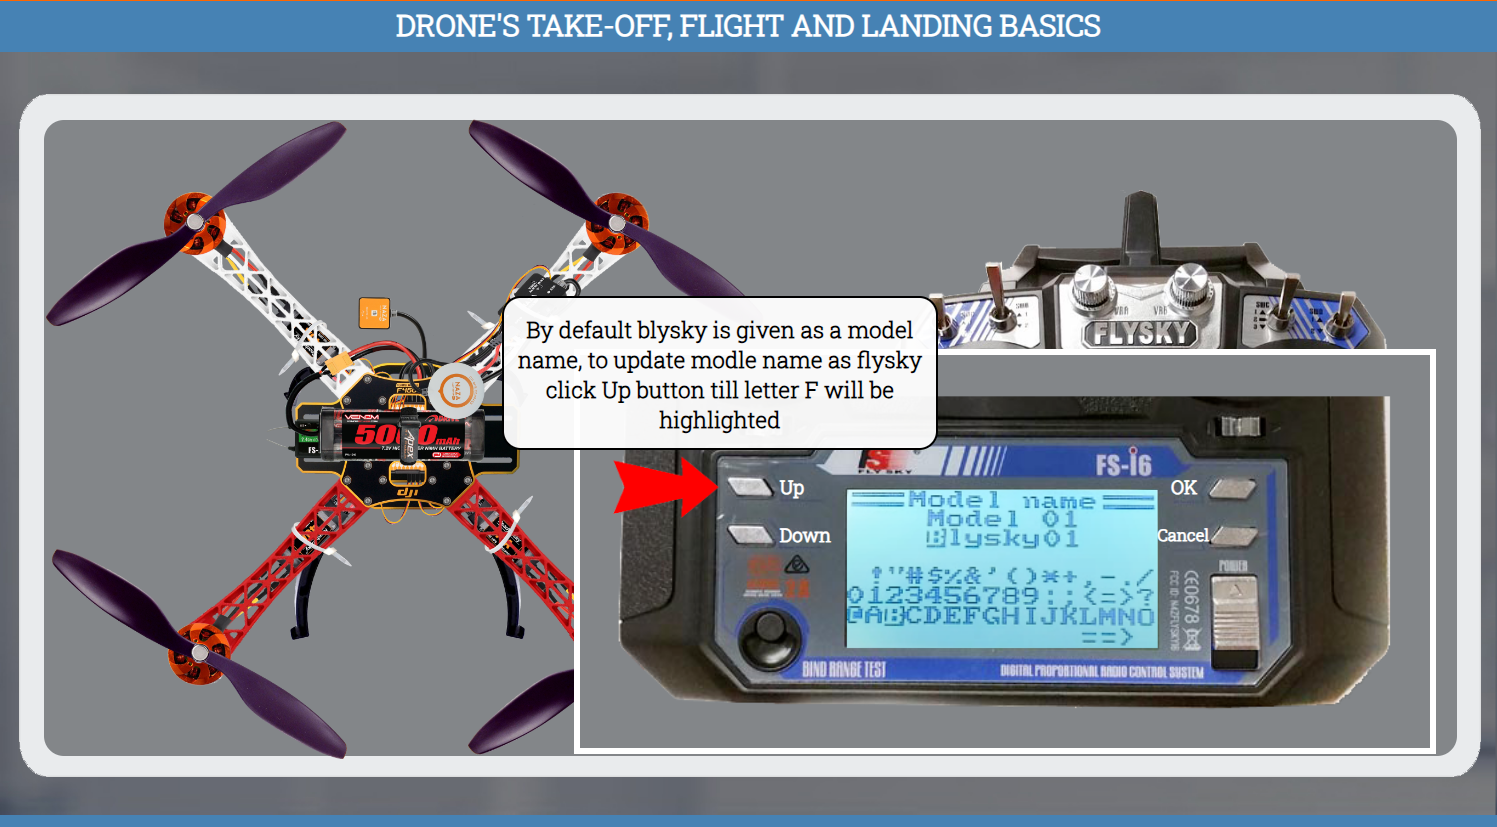
By default blysky is given as a model name, to update modle name as flysky click Up button till letter F will be highlighted
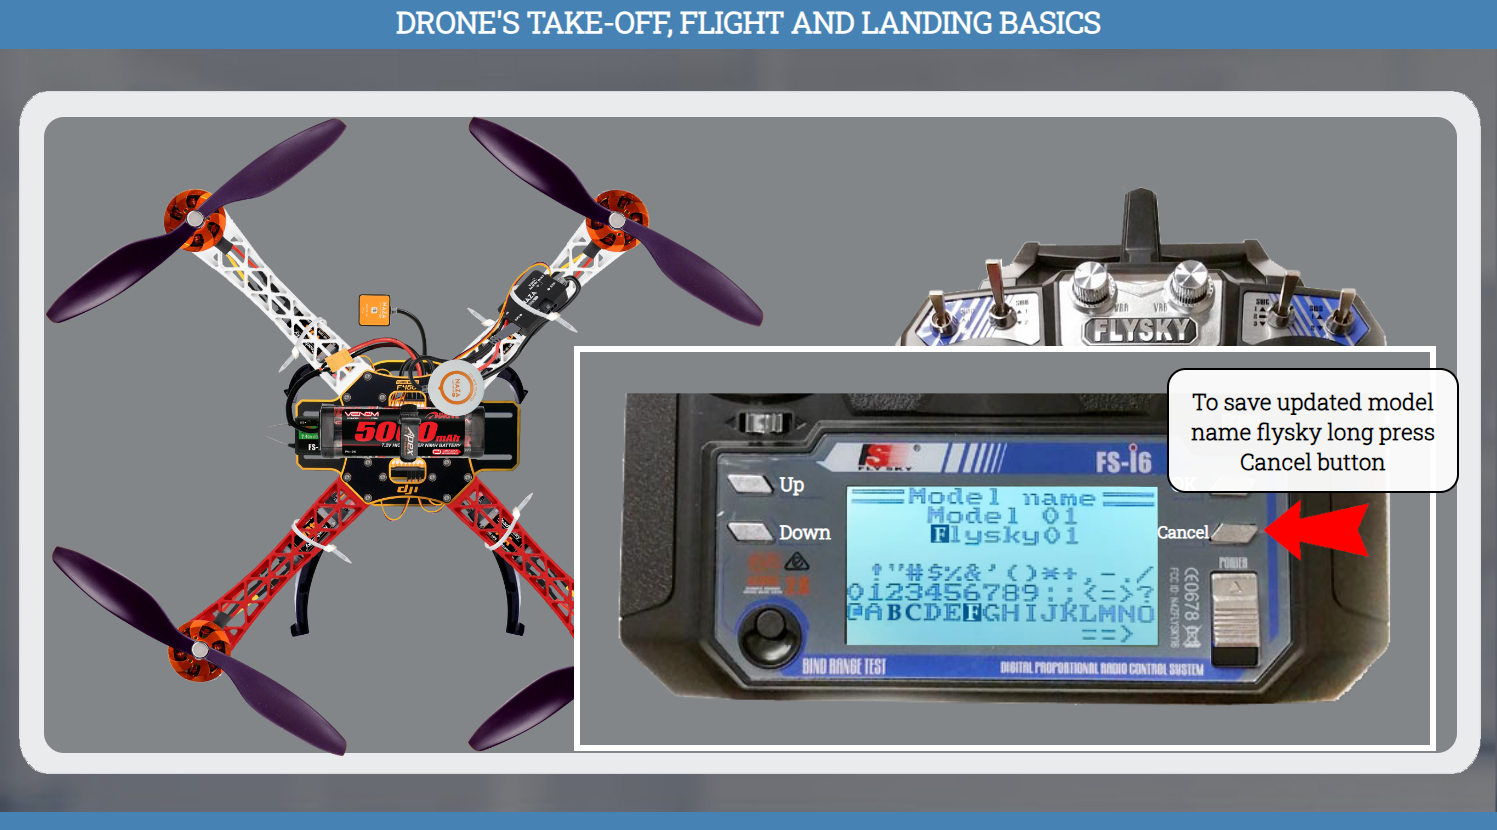
To save updated model name flysky long press Cancel button
Click on down button to go on Type select option
To select Type select option click on OK button
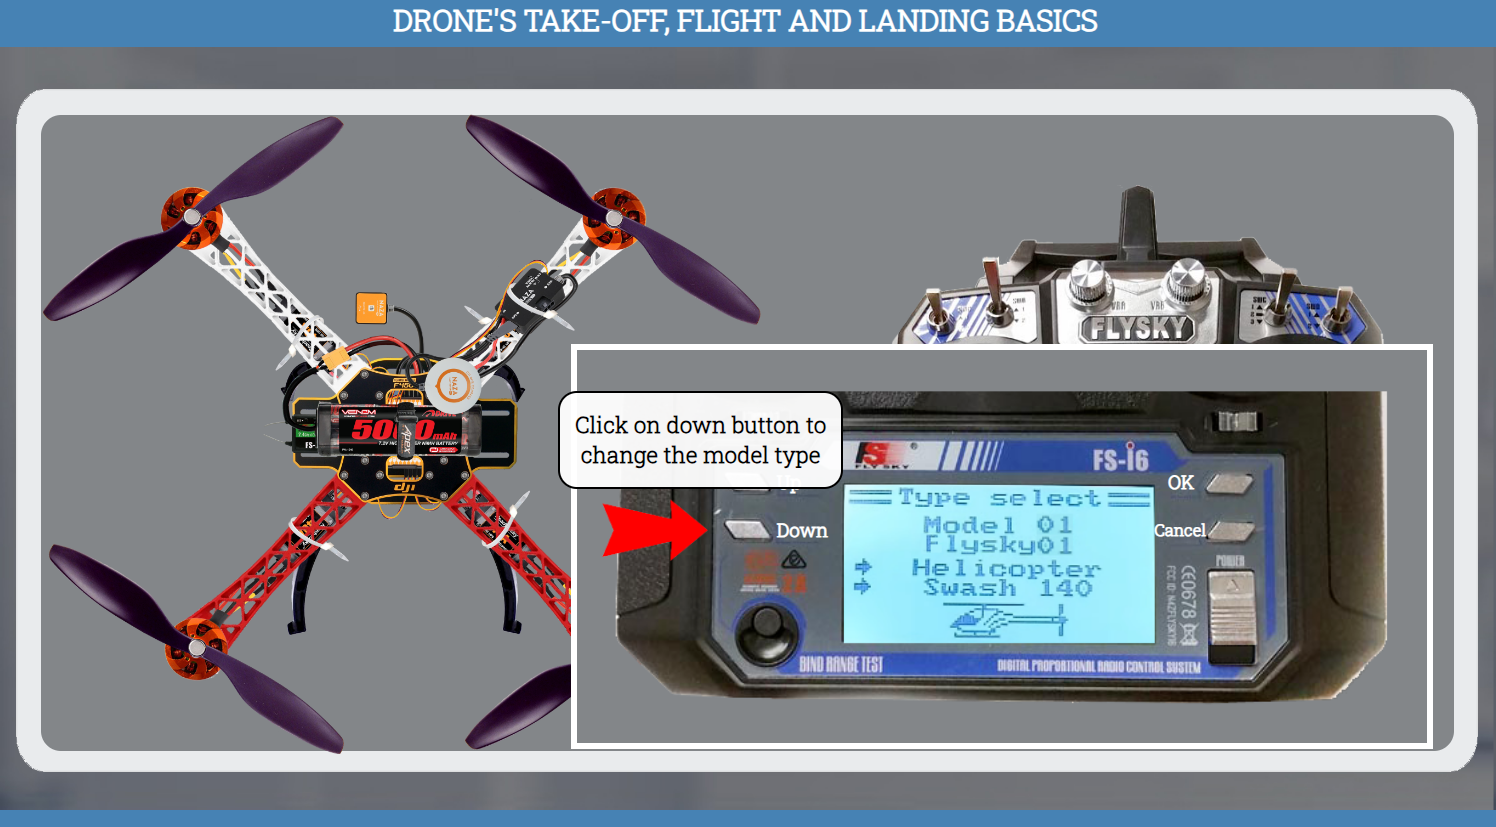
Click on down button to change the model type
To save Airplane or glider long press Cancel button
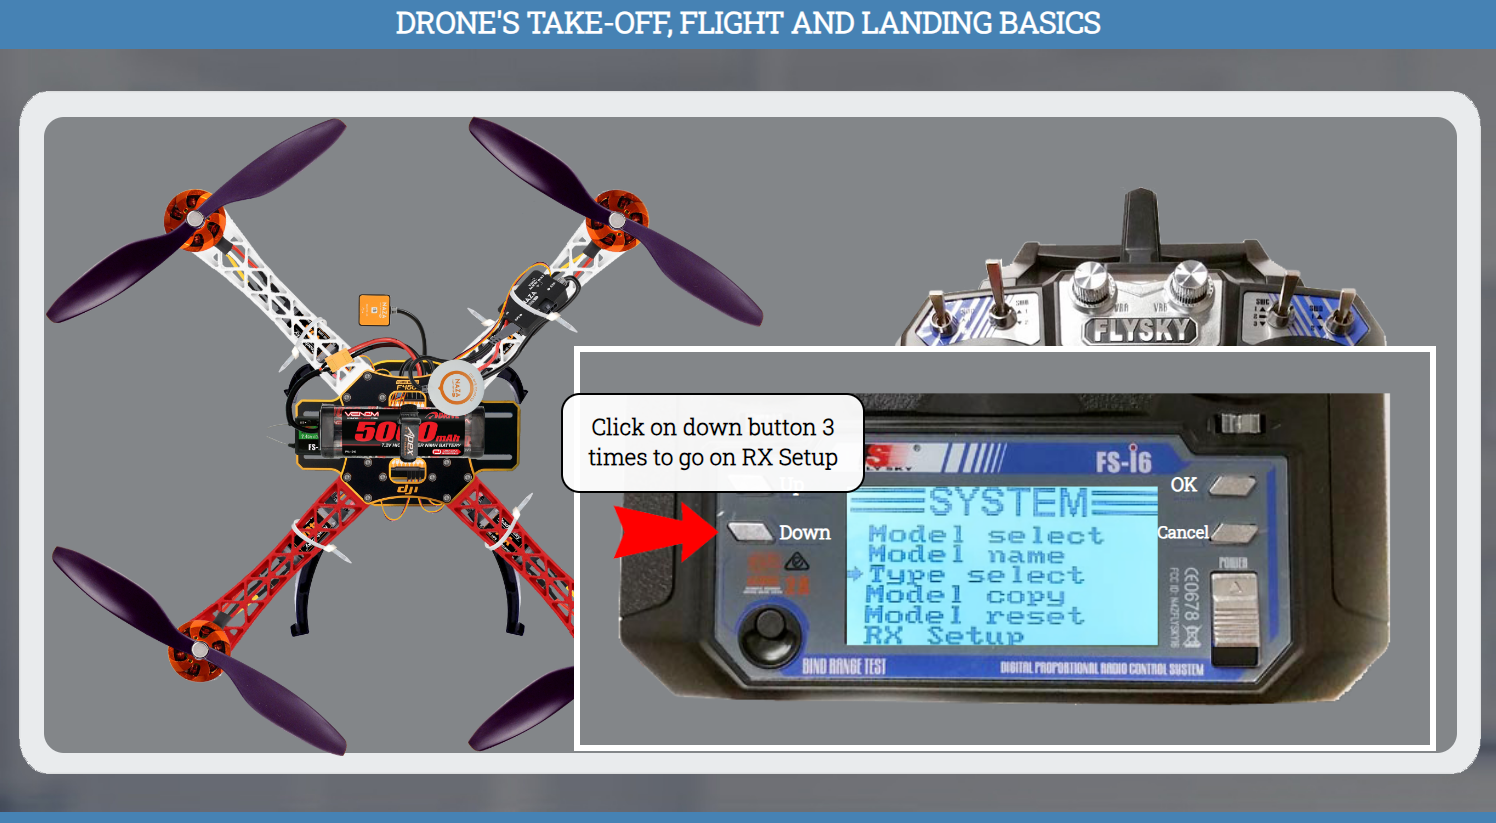
Click on down button 3 times to go on RX Setup
To select RX Setup option click on OK button
To select AFHDS 2A option click on OK button
Click on down button to ON AFHDS 2A
To save changes long press Cancel button
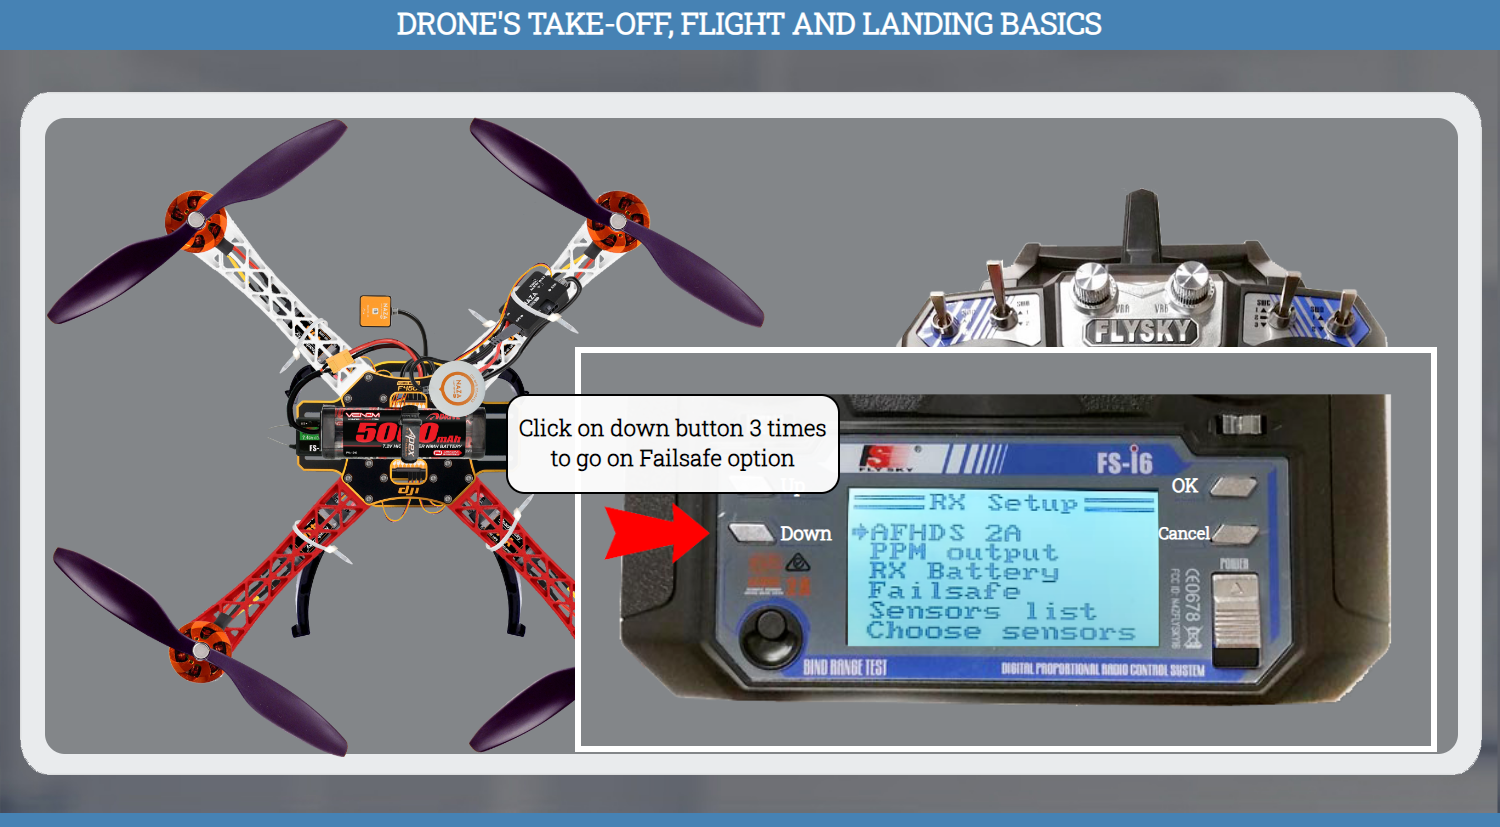
Click on down button 3 times to go on Failsafe option
To select Failsafe option click on OK button
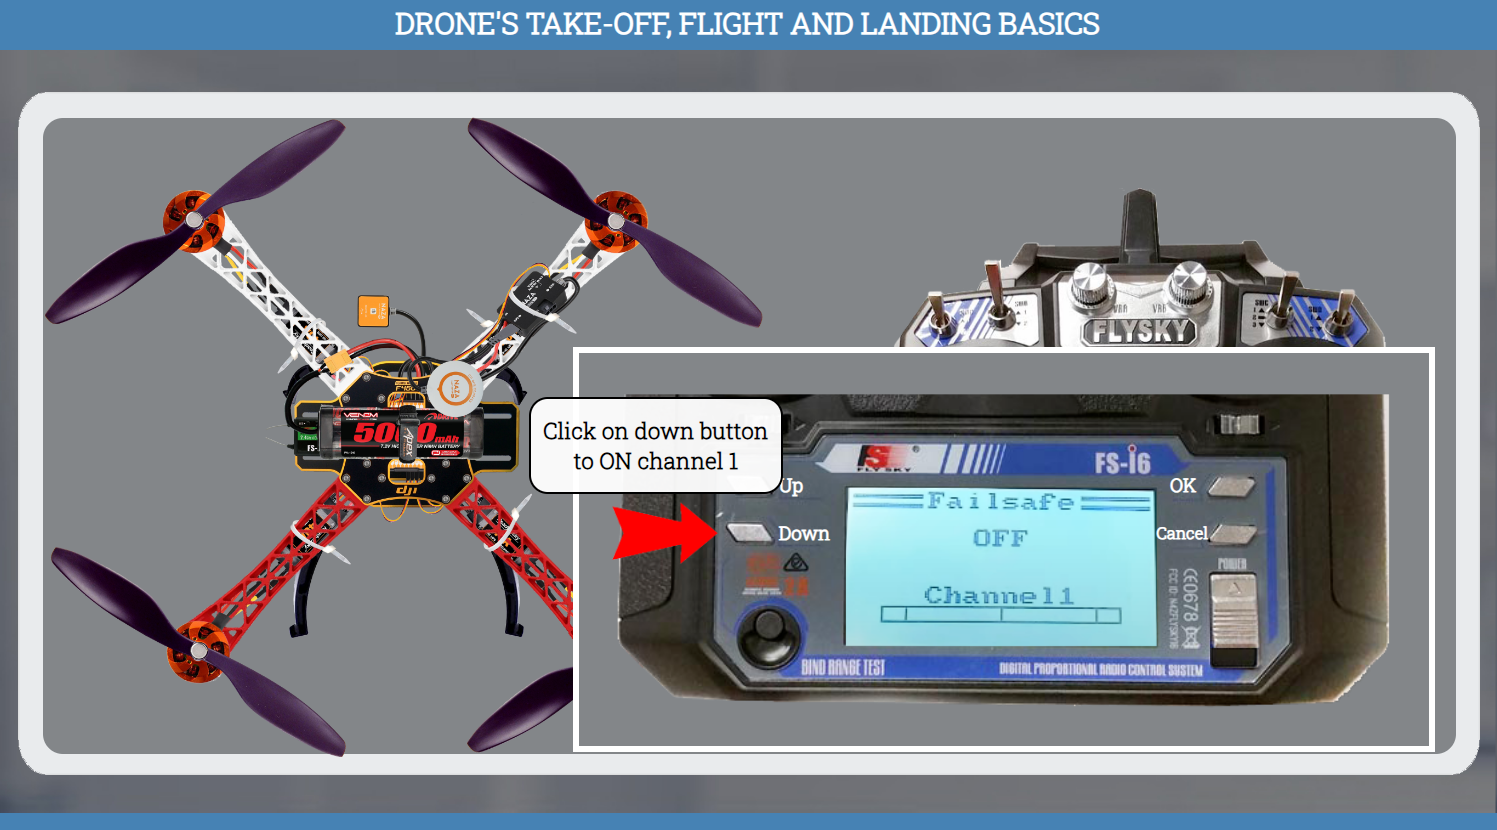
To select Channel1 click on OK button
Click on down button to ON channel 1
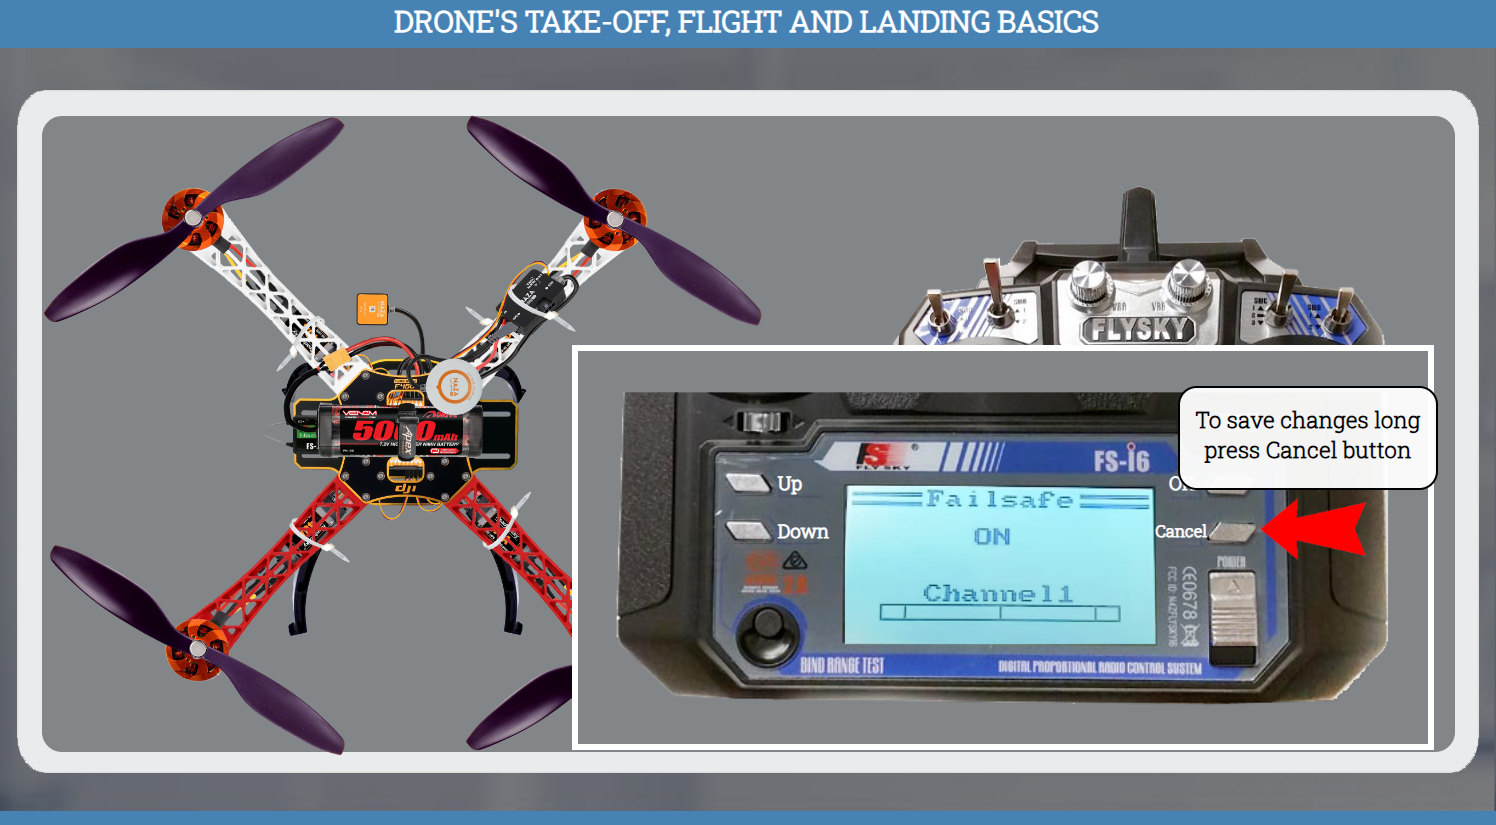
To save changes long press Cancel button
Repeat the same process with other channels
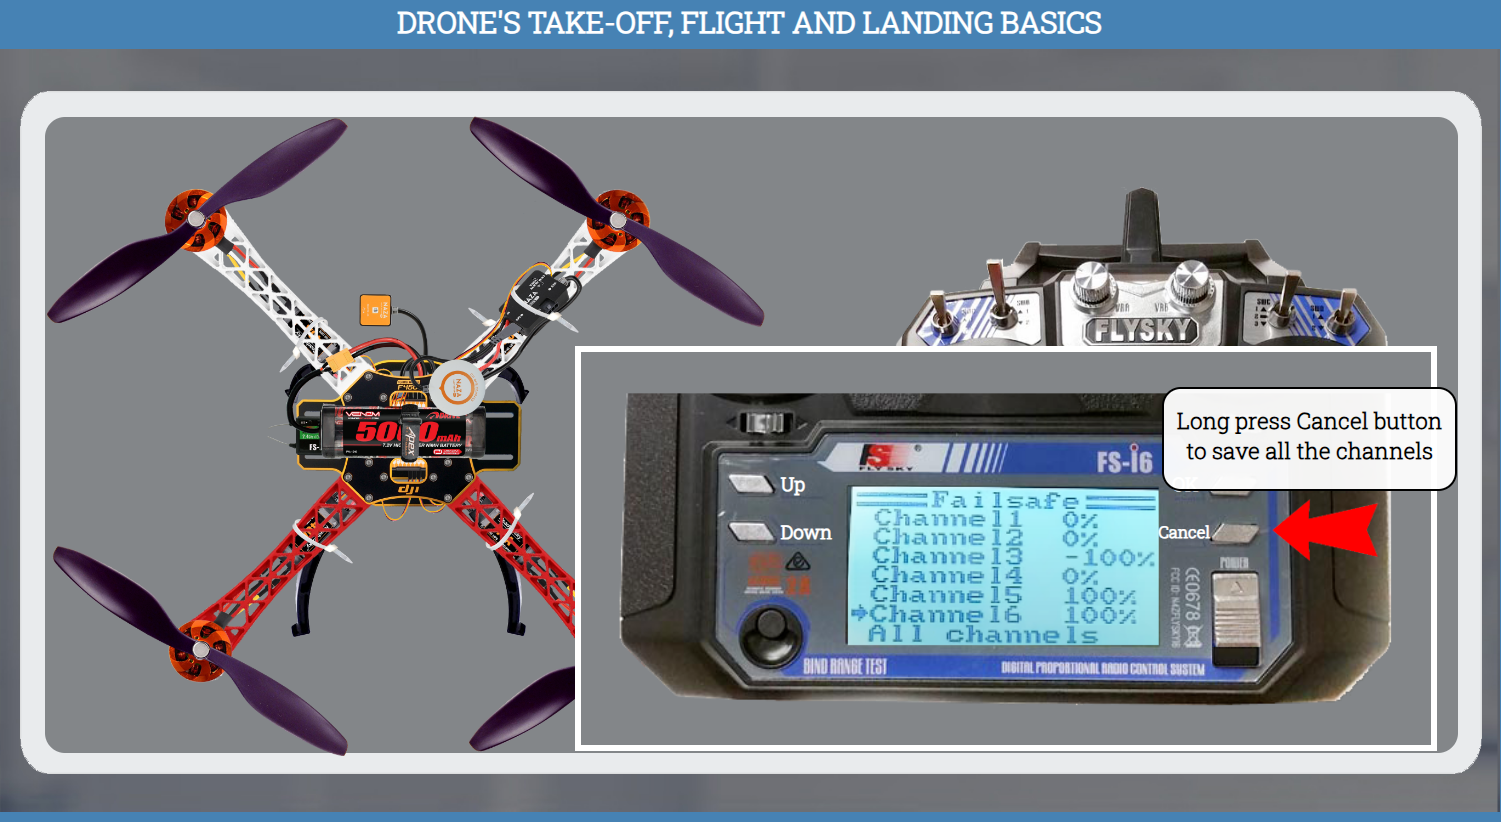
Long press Cancel button to save all the channels
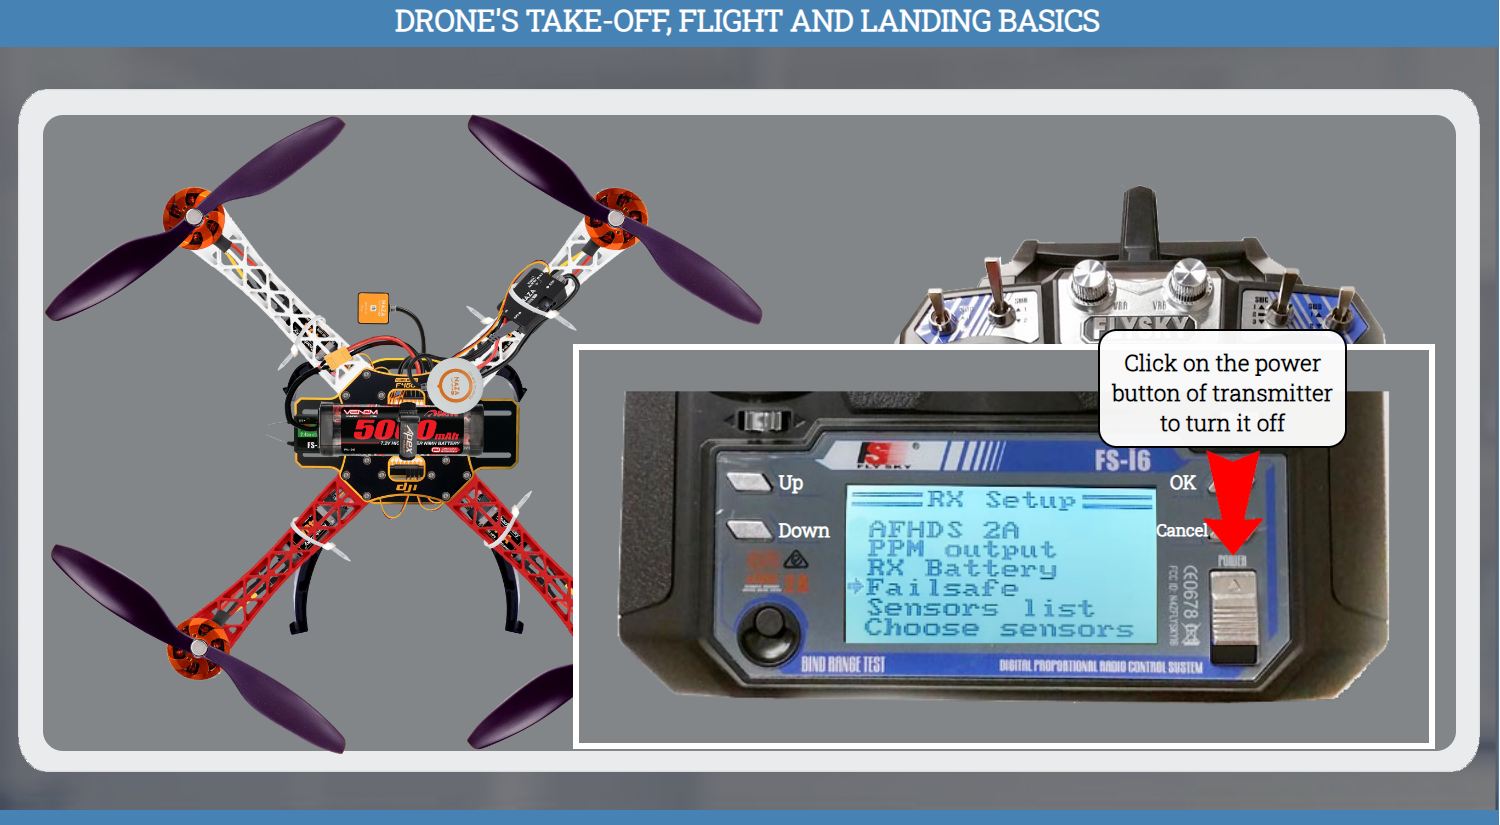
Click on the power button of transmitter to turn it off
Click the next button
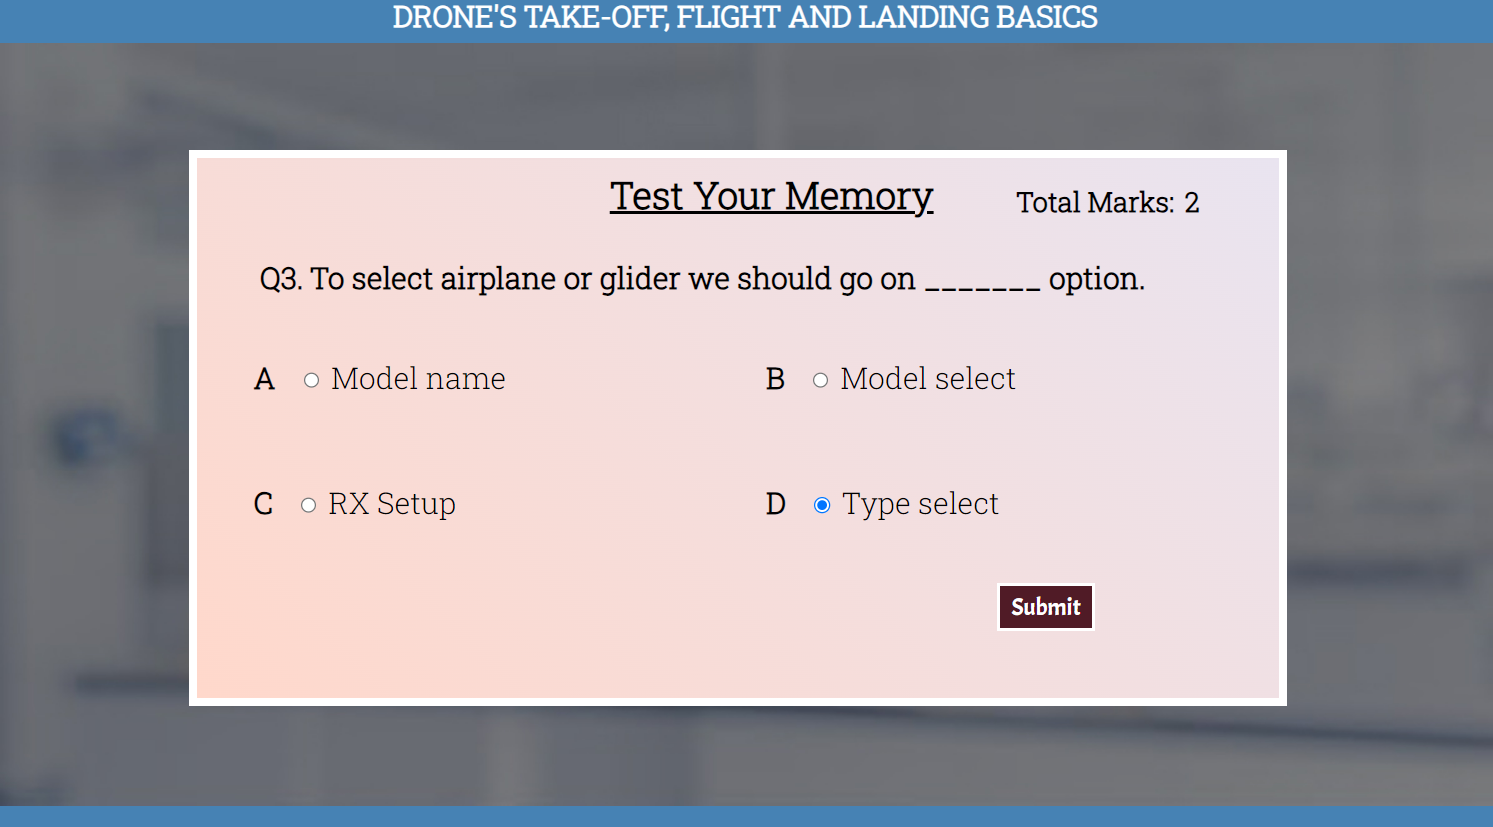
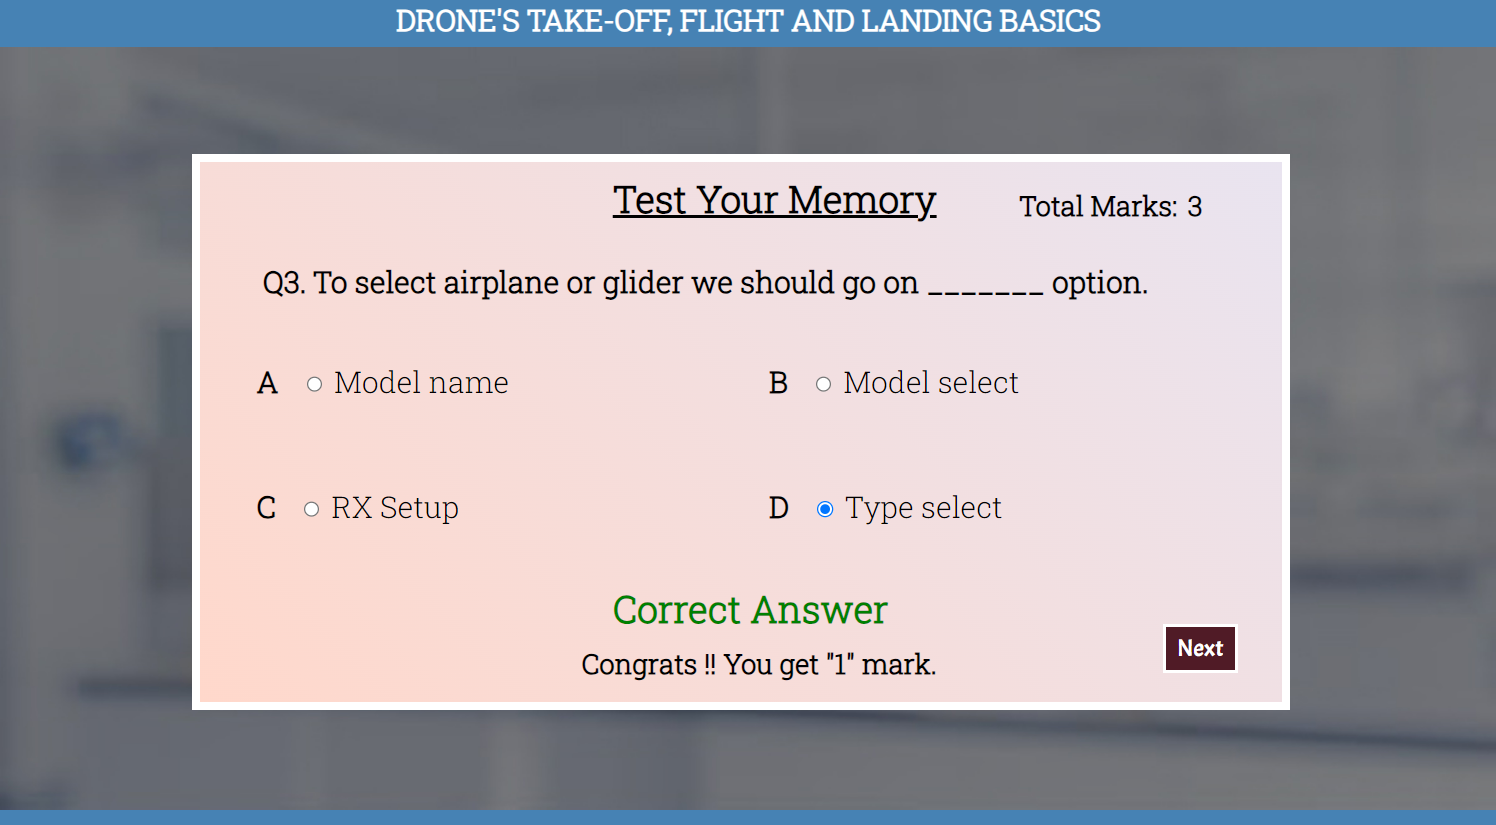
Test Your Memory
Choose the option and click on the submit button
Click the next button
Click the next button
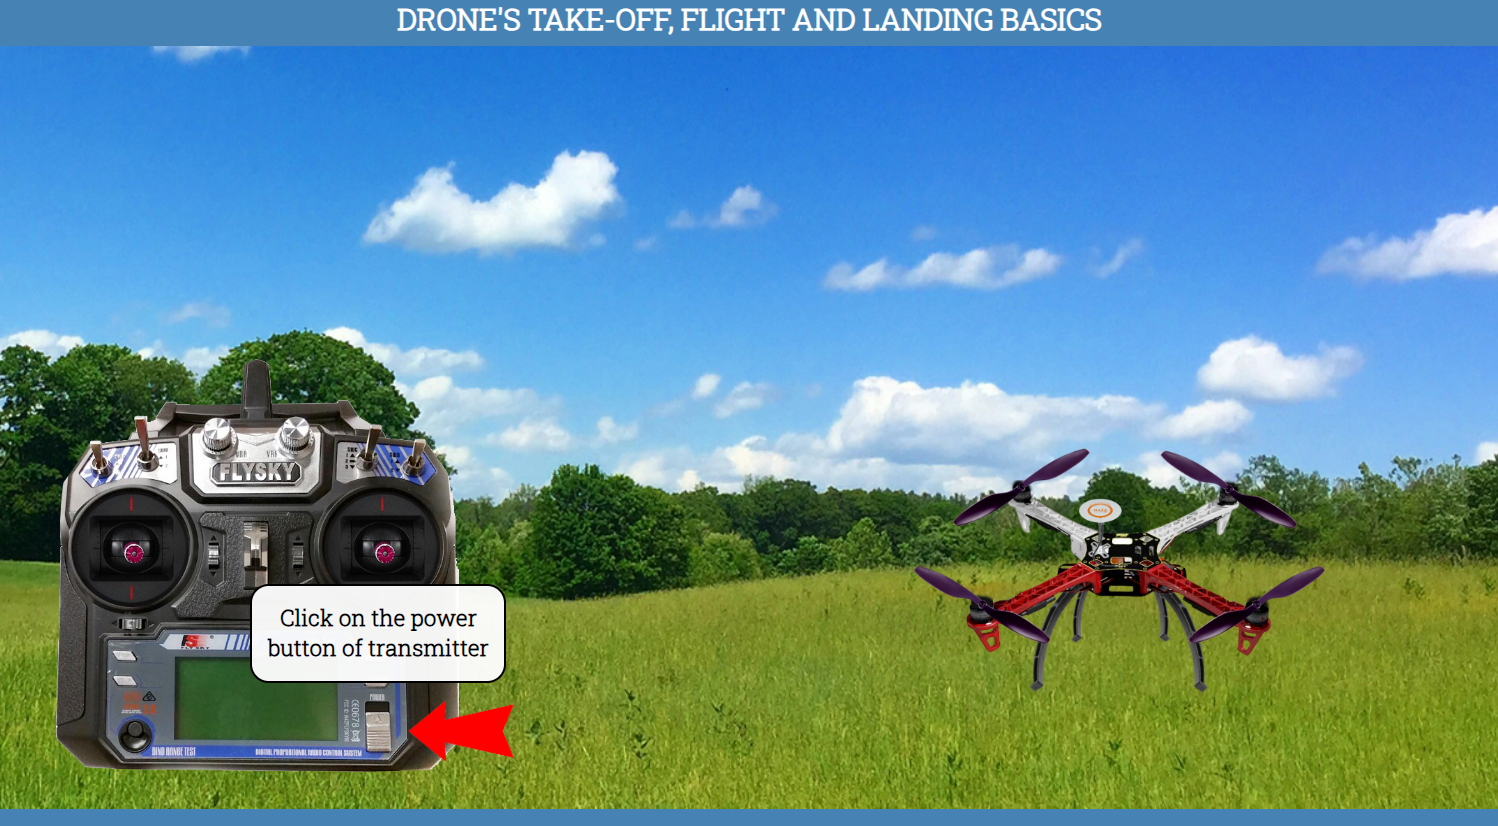
Click on the power button of transmitter
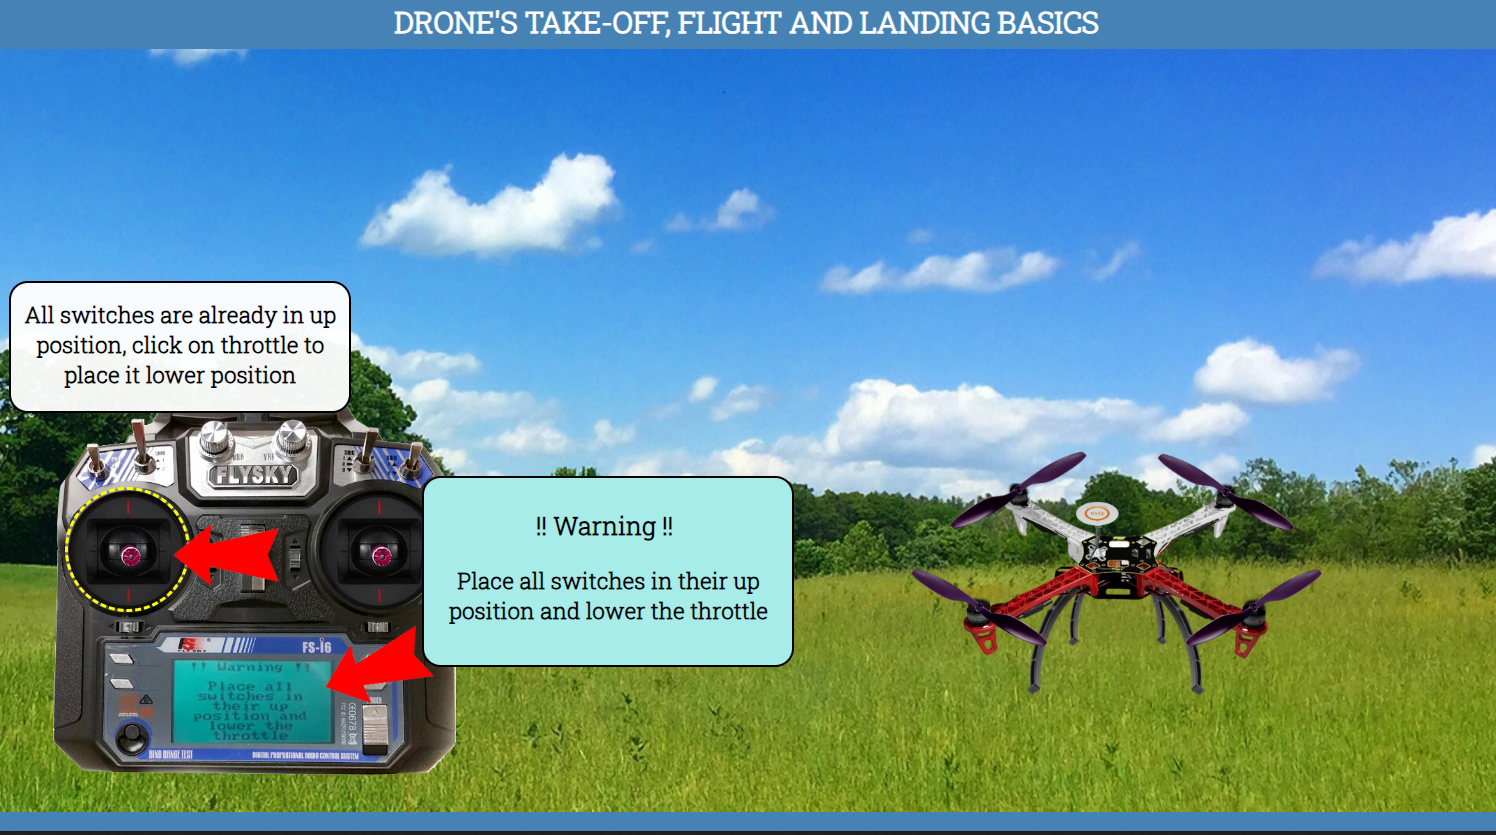
Place all switches in their up position and lower the throttle
All switches are already in up position, click on throttle to place it lower position
To arm the drone click on throttle or pitch
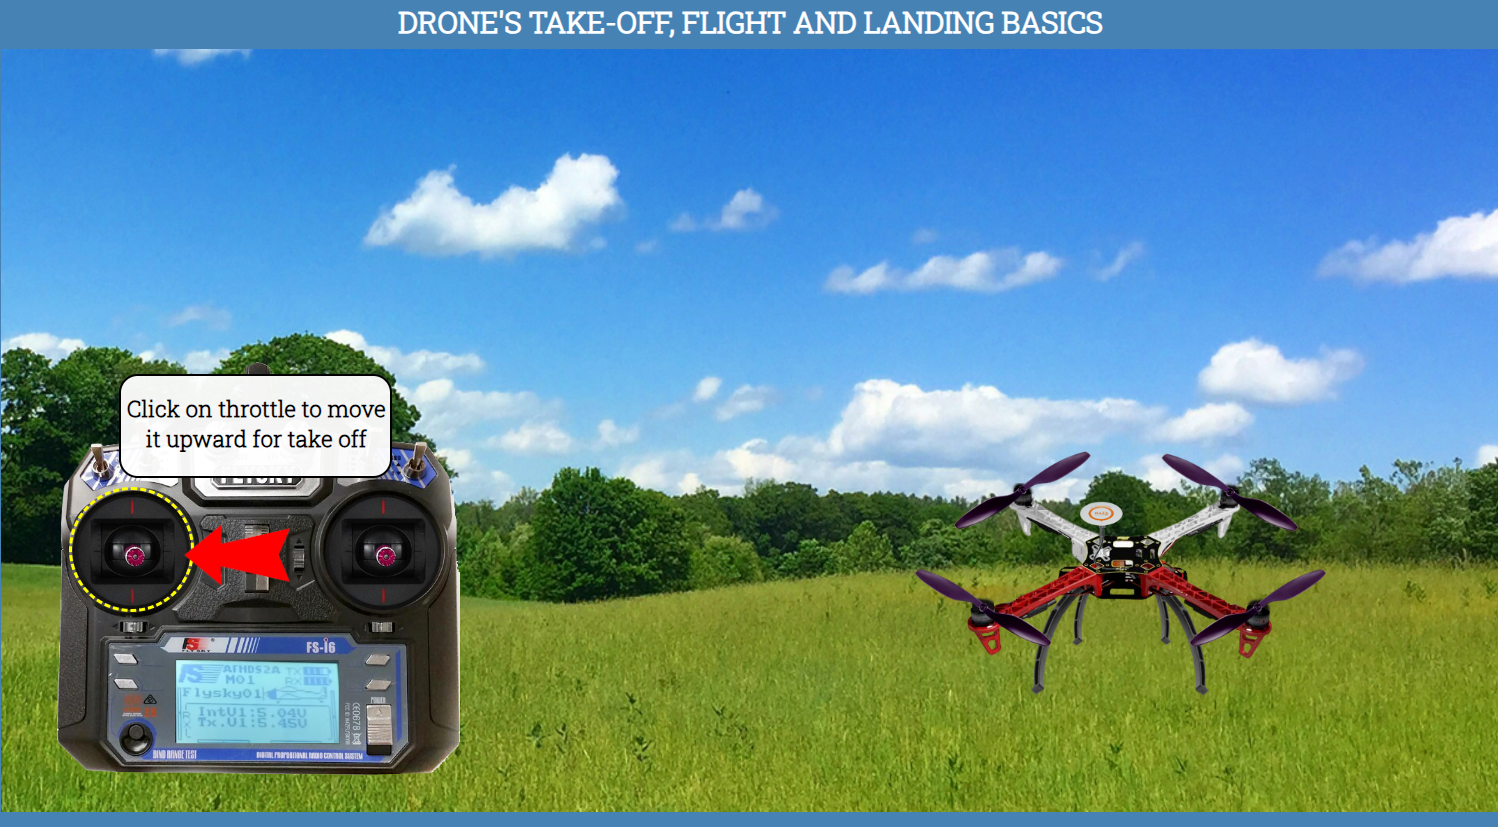
Click on throttle to move it upward for take off
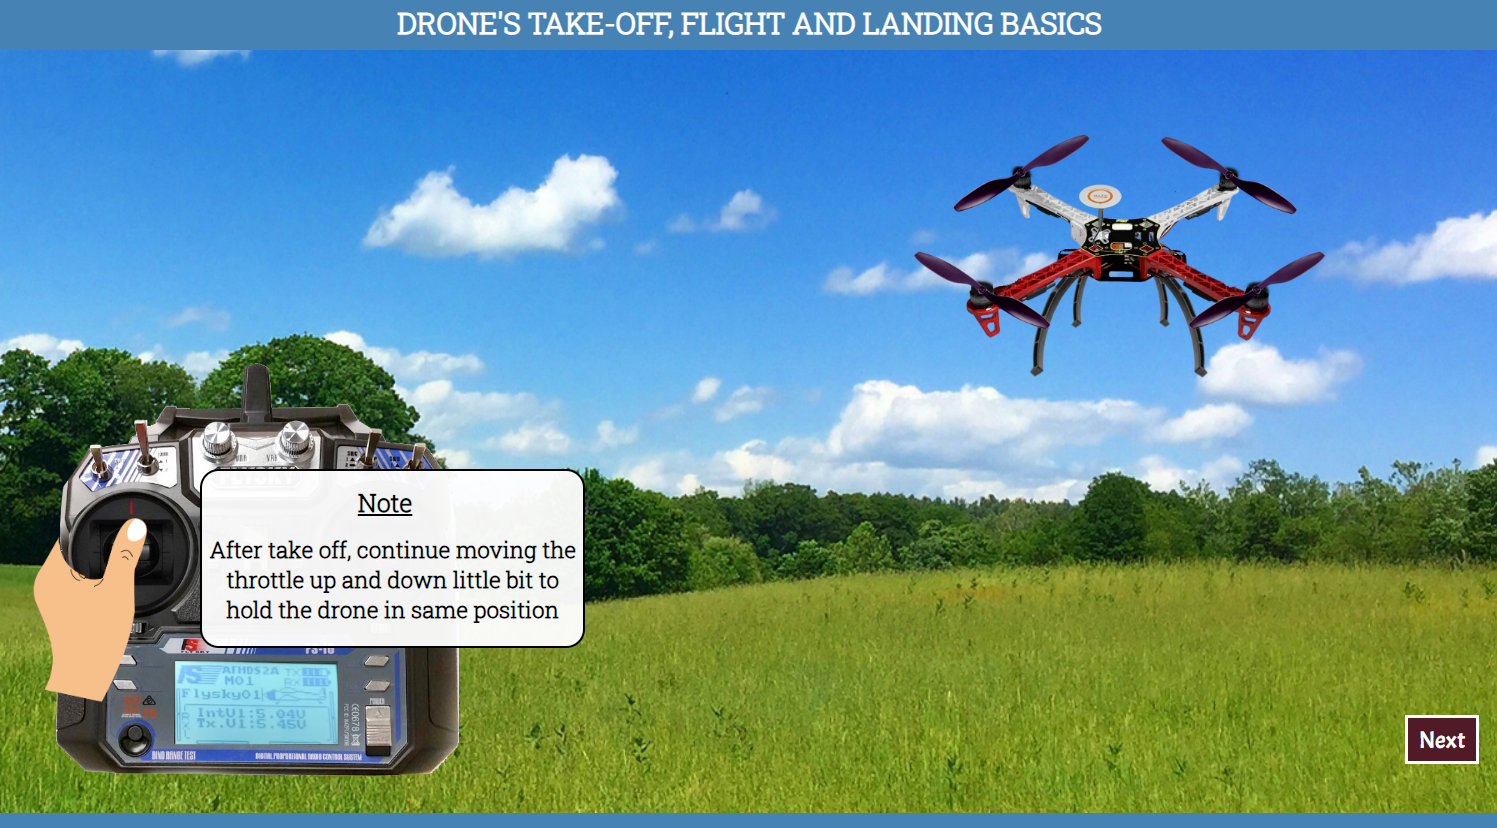
Note: After take off, continue moving the throttle up and down little bit to hold the drone in same position
Click the next button
Test Your Memory
Choose the option and click on the submit button
Click the next button
Click the next button
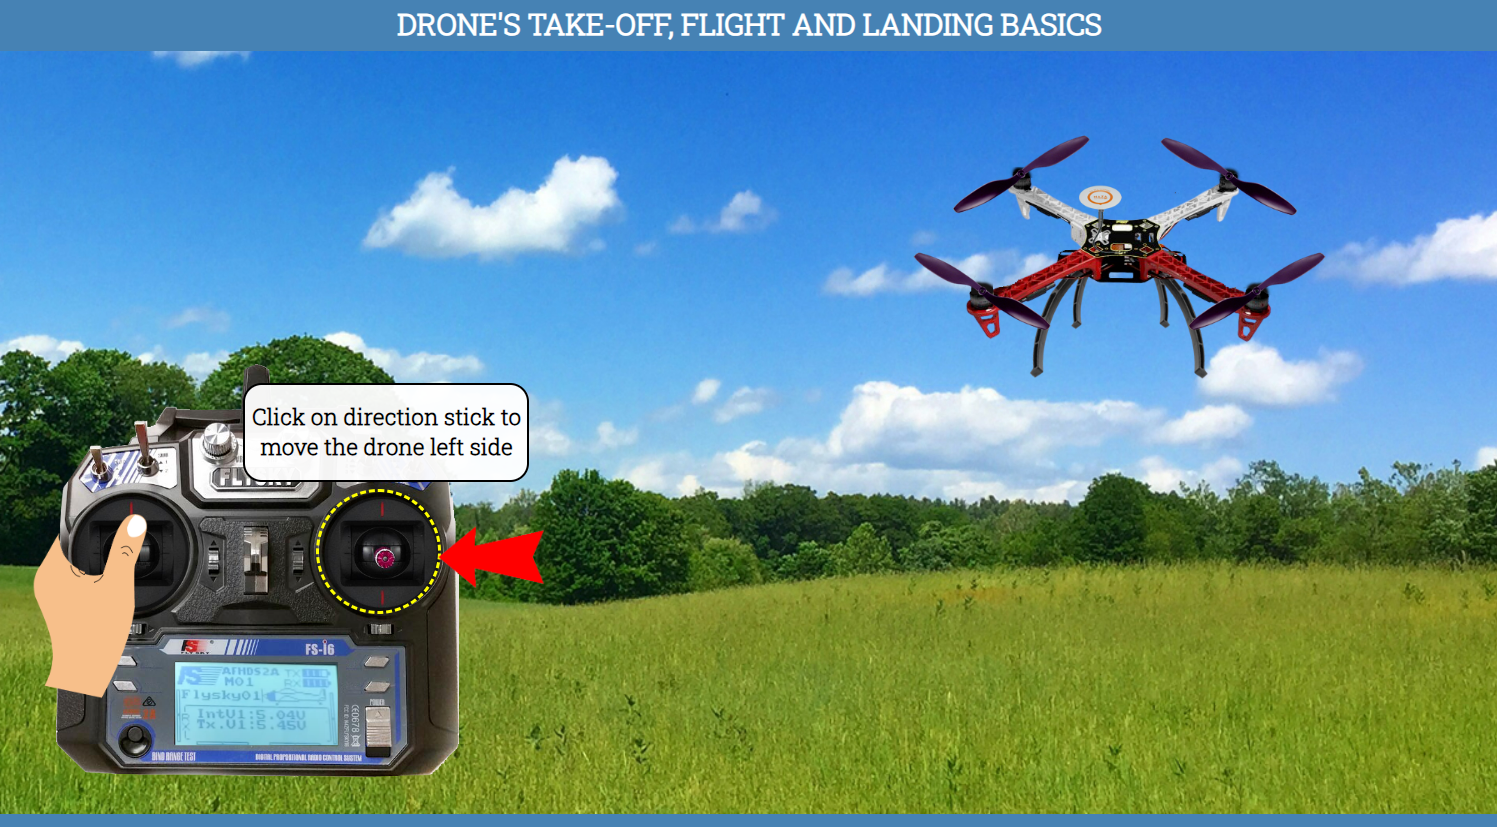
Click on direction stick to move the drone left side
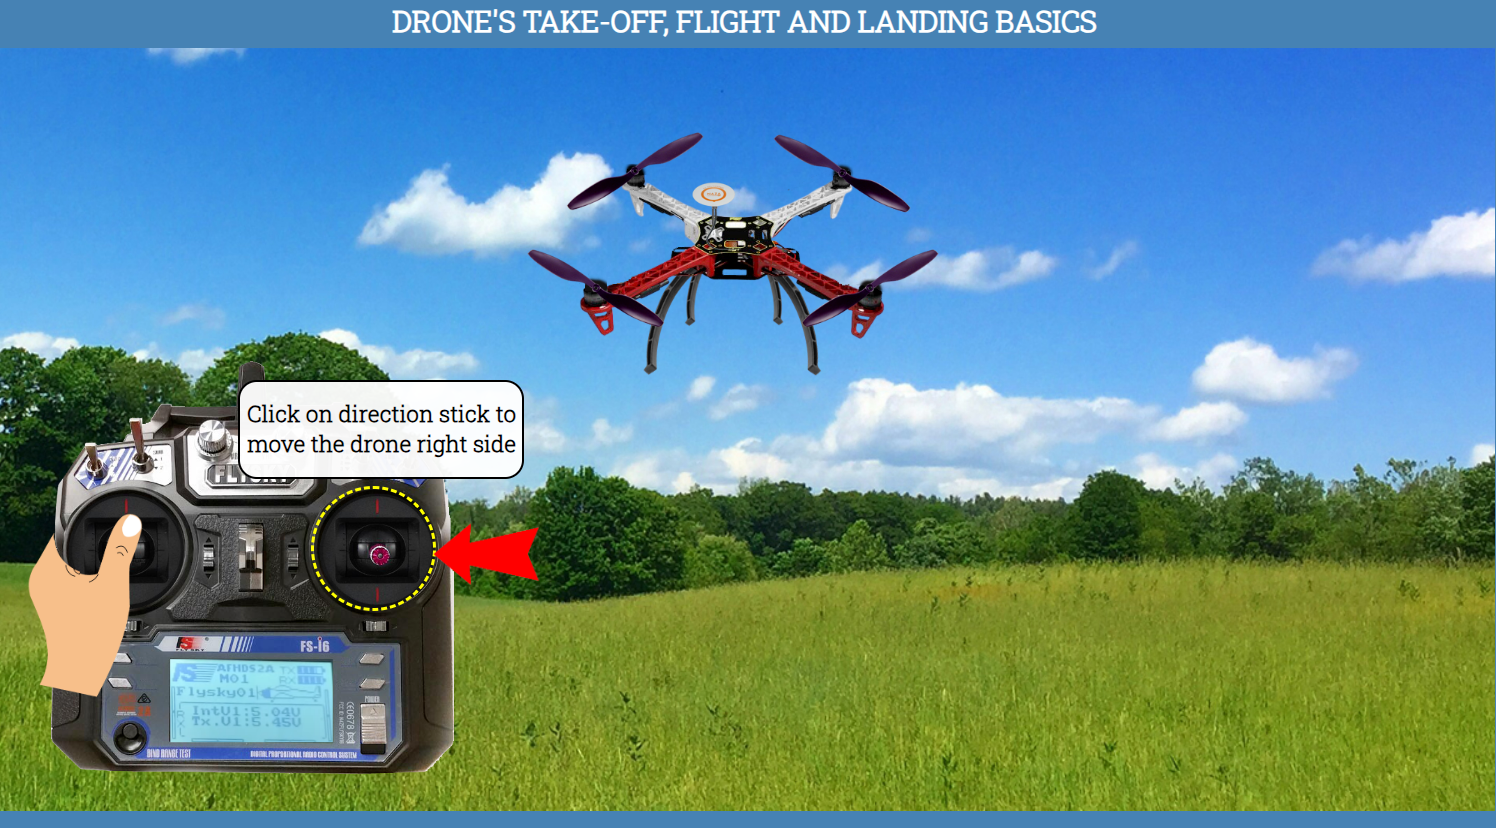
Click on direction stick to move the drone right side
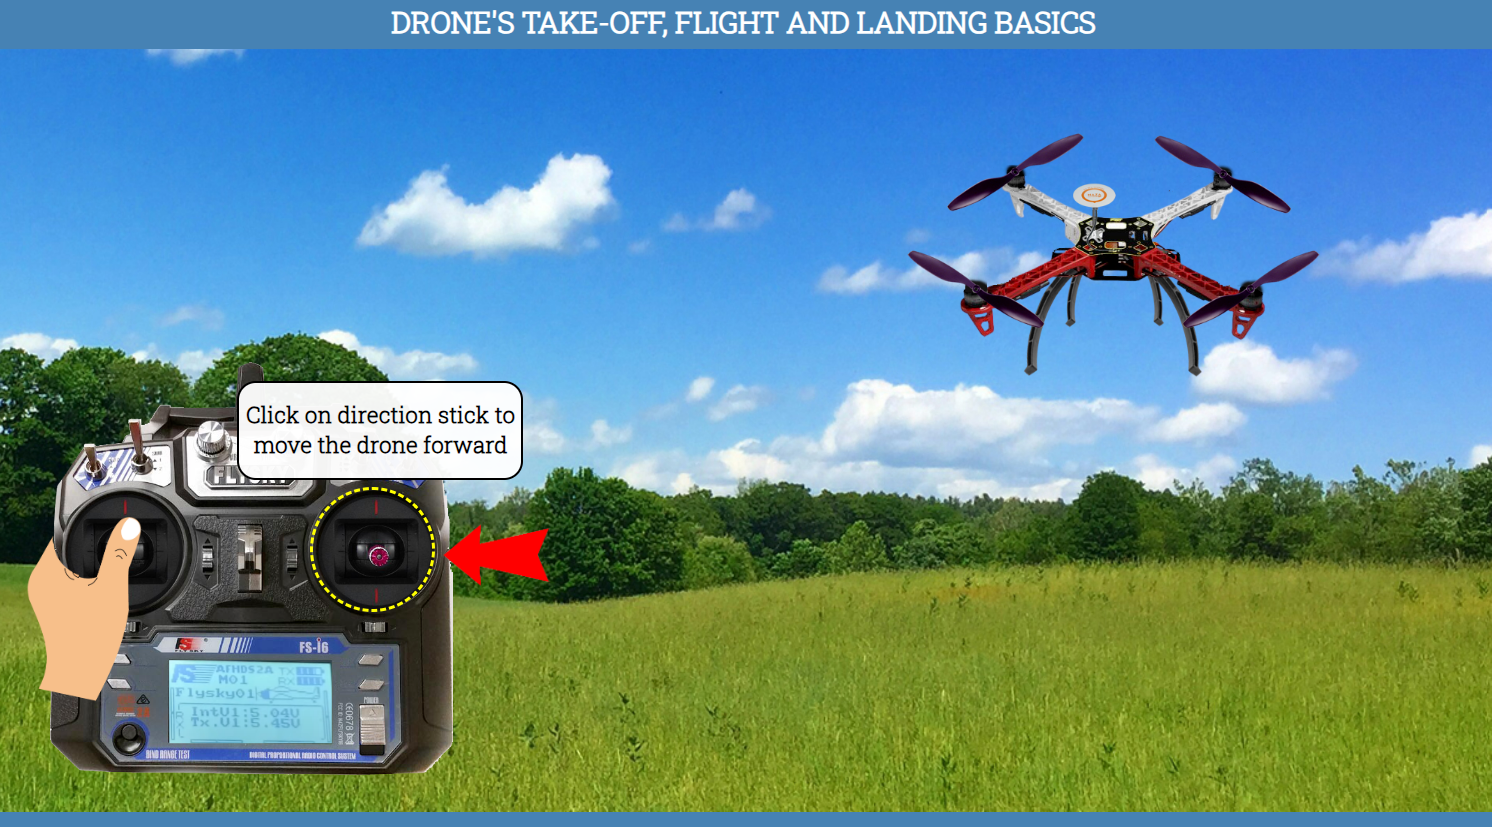
Click on direction stick to move the drone forward
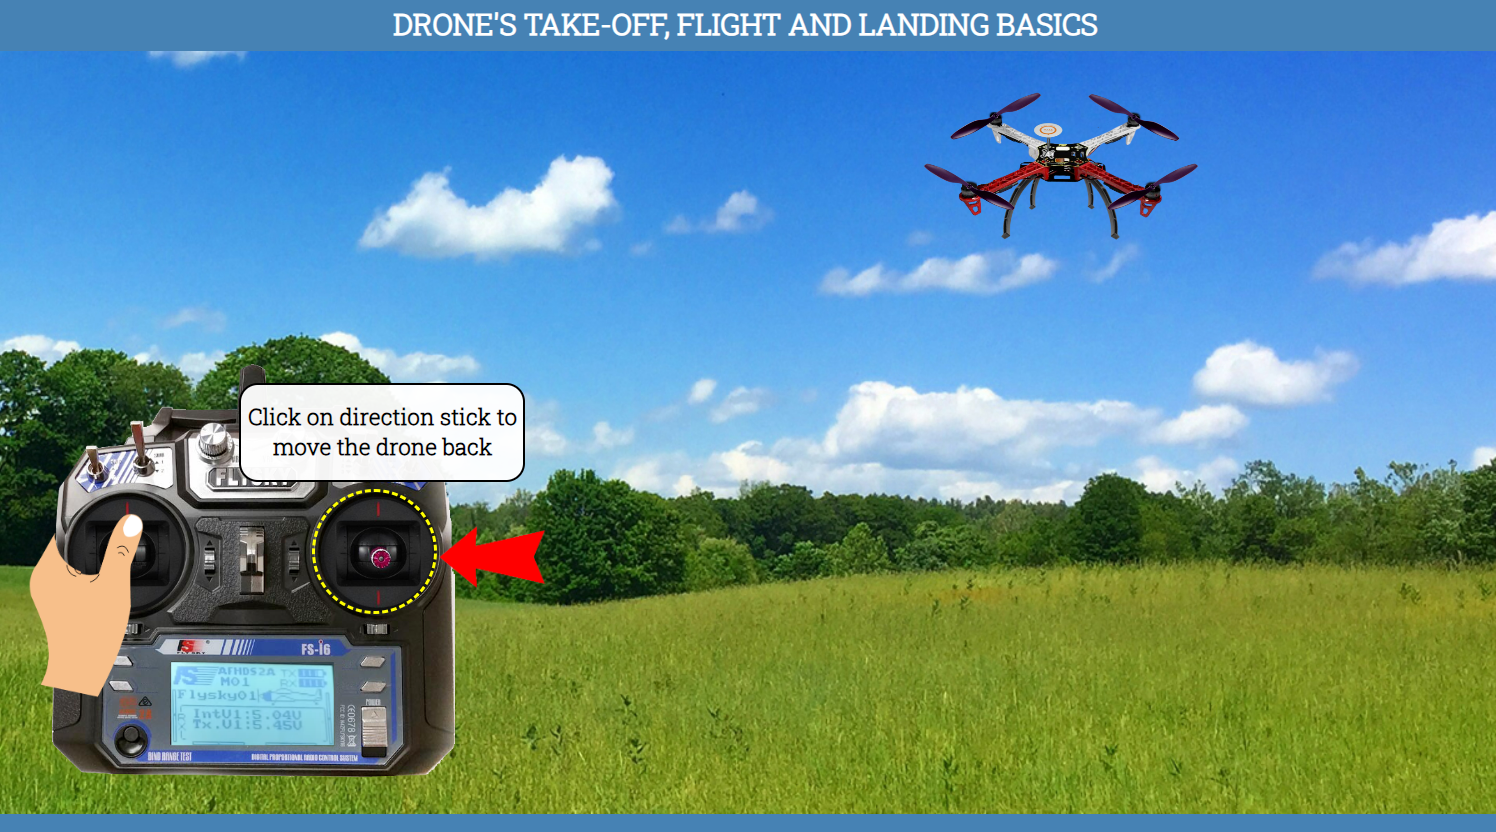
Click on direction stick to move the drone back
Click on the throttle to rotate the drone anti-clockwise
Click on the throttle to rotate the drone clockwise
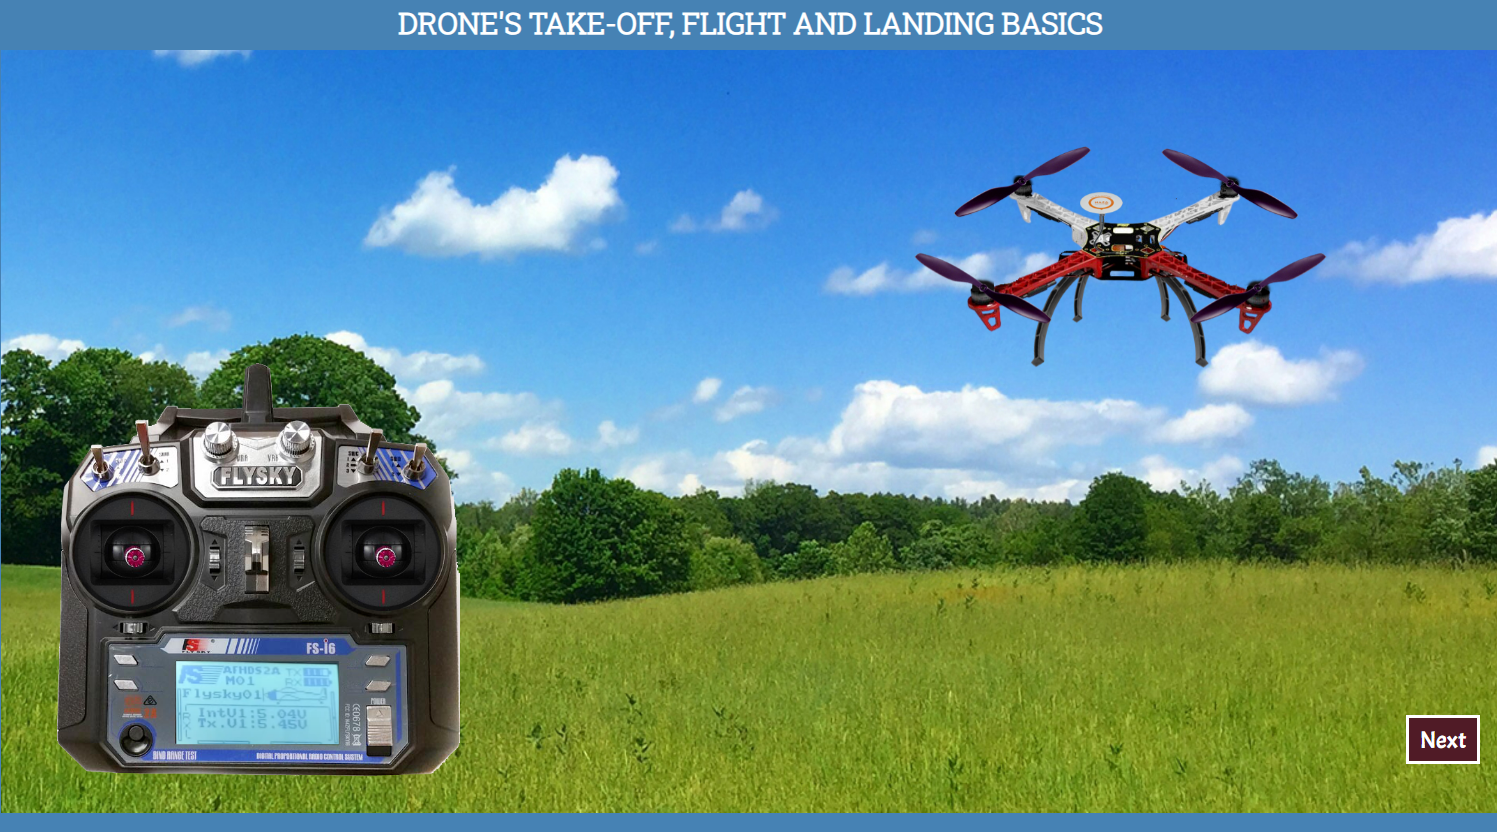
Click the next button
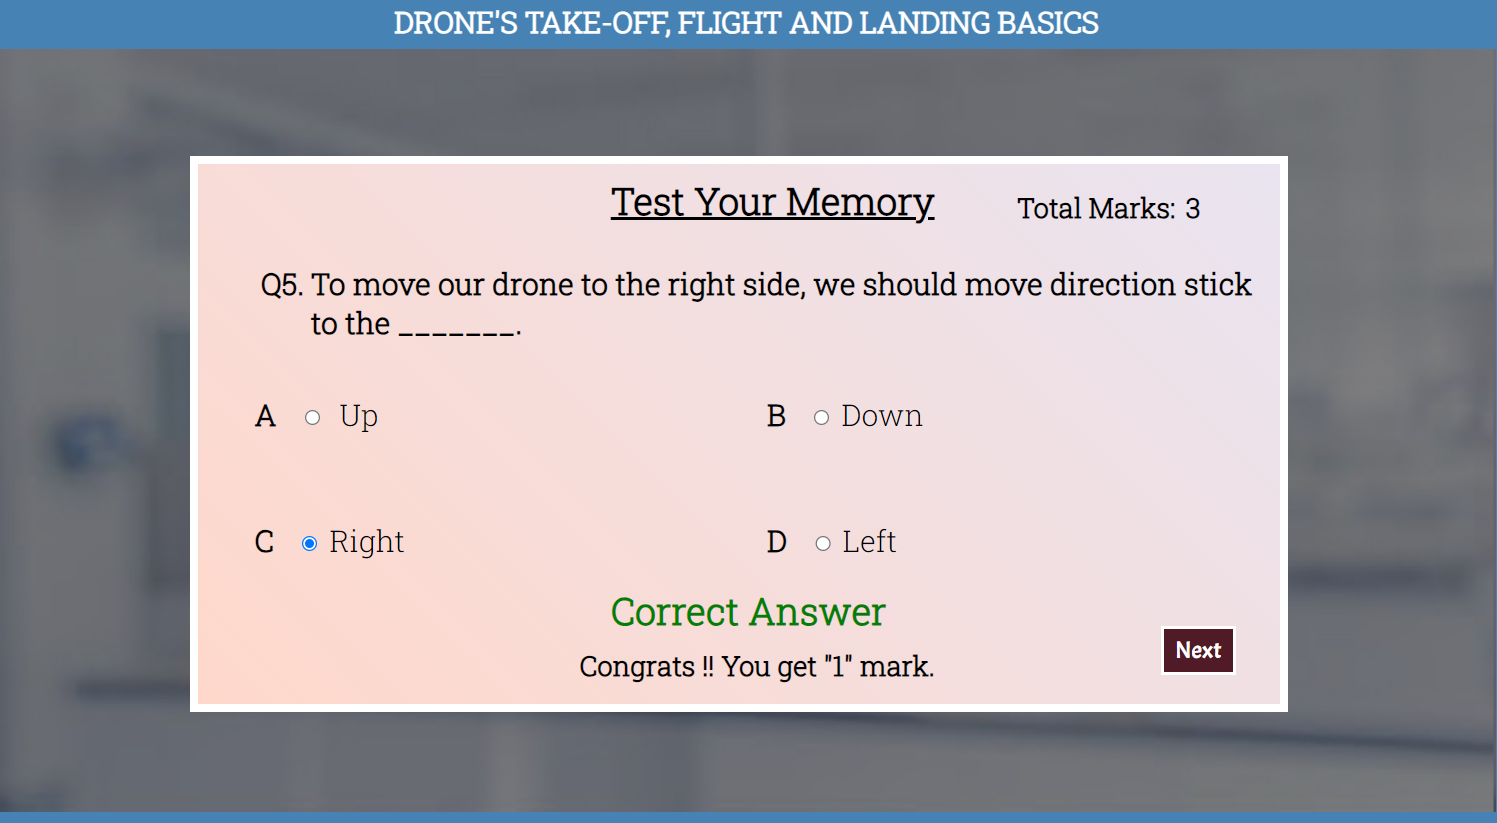
Test Your Memory
Choose the option and click on the submit button
Click the next button
Click the next button
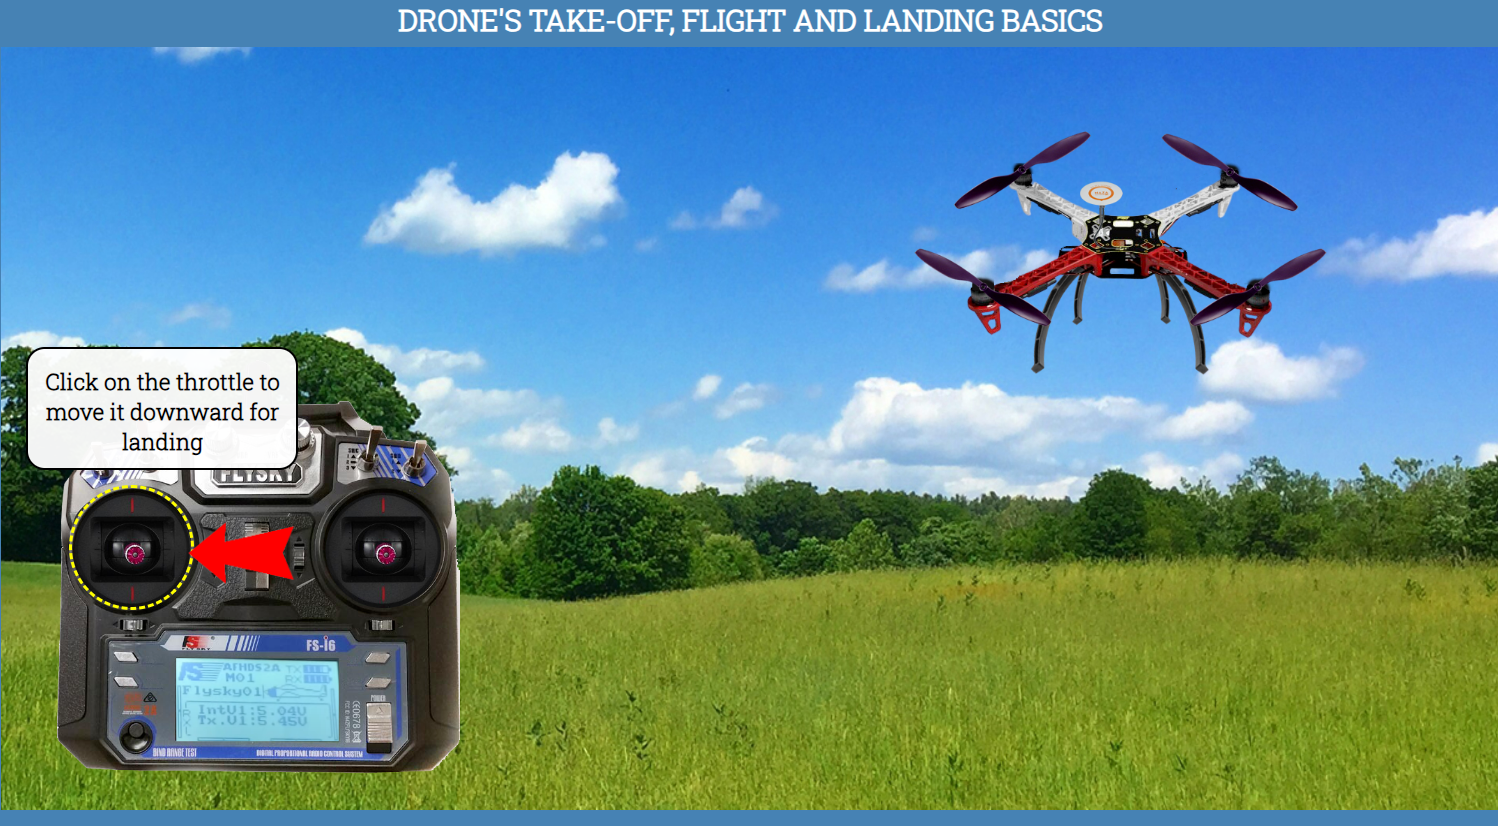
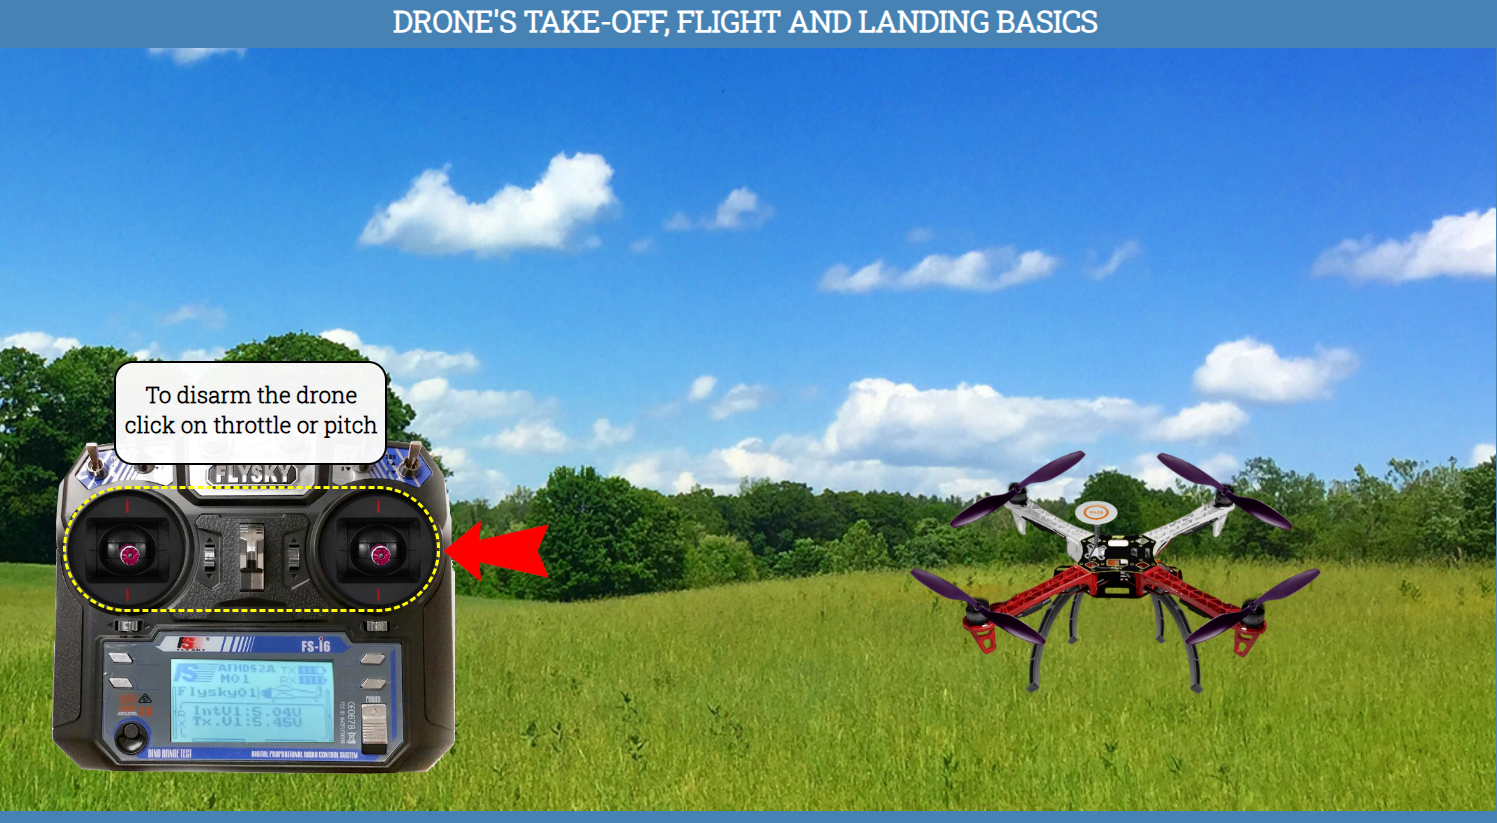
Click on the throttle to move it downward for landing
To disarm the drone click on throttle or pitch
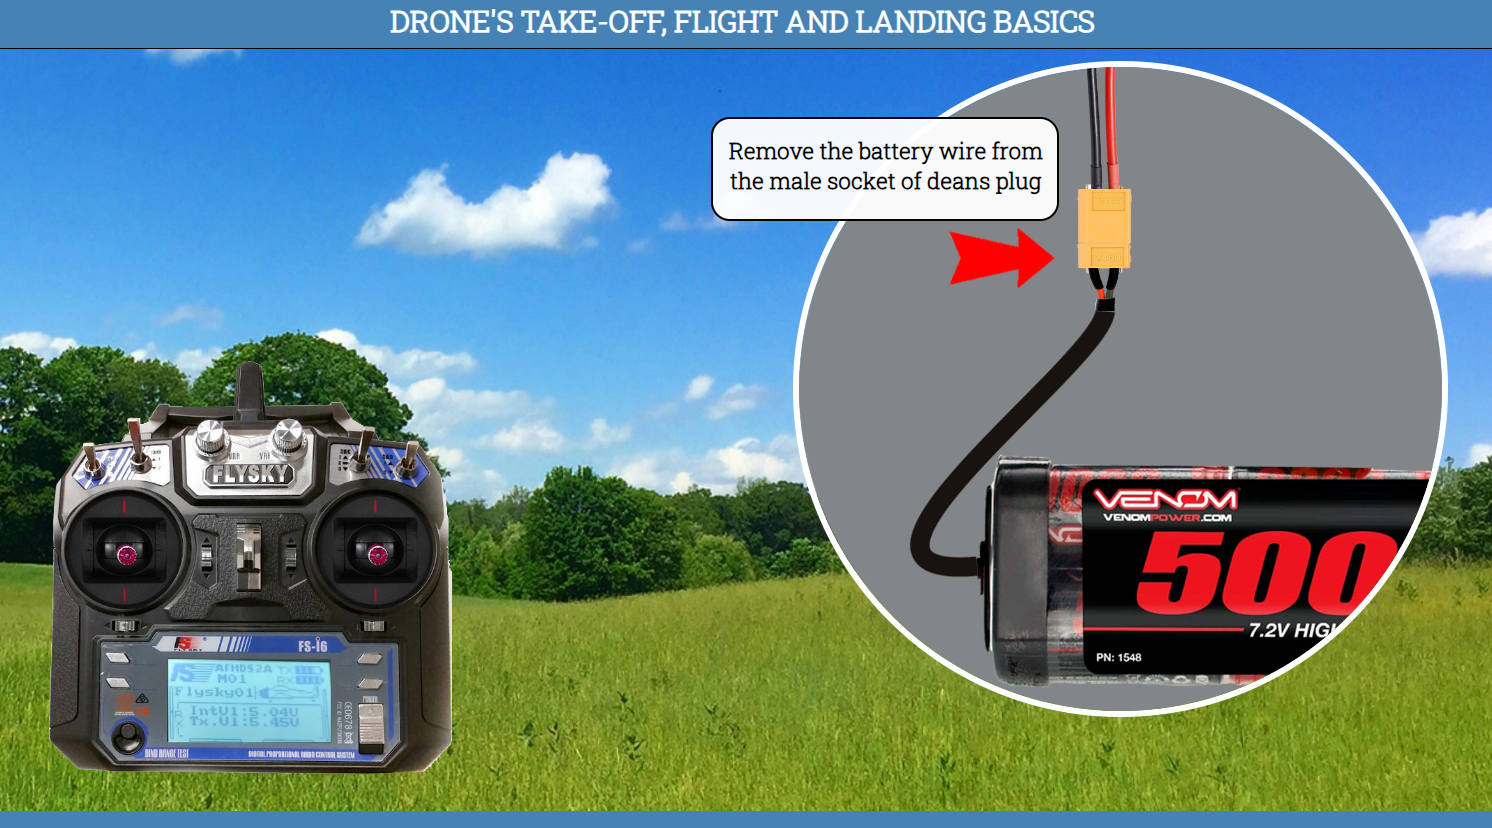
Remove the battery wire from the male socket of deans plug
Click on the power button of transmitter to turn it off
Click the next button
Thank You For Performing the Experiment