Access Control in Databases
Role-Based Access Control (RBAC)
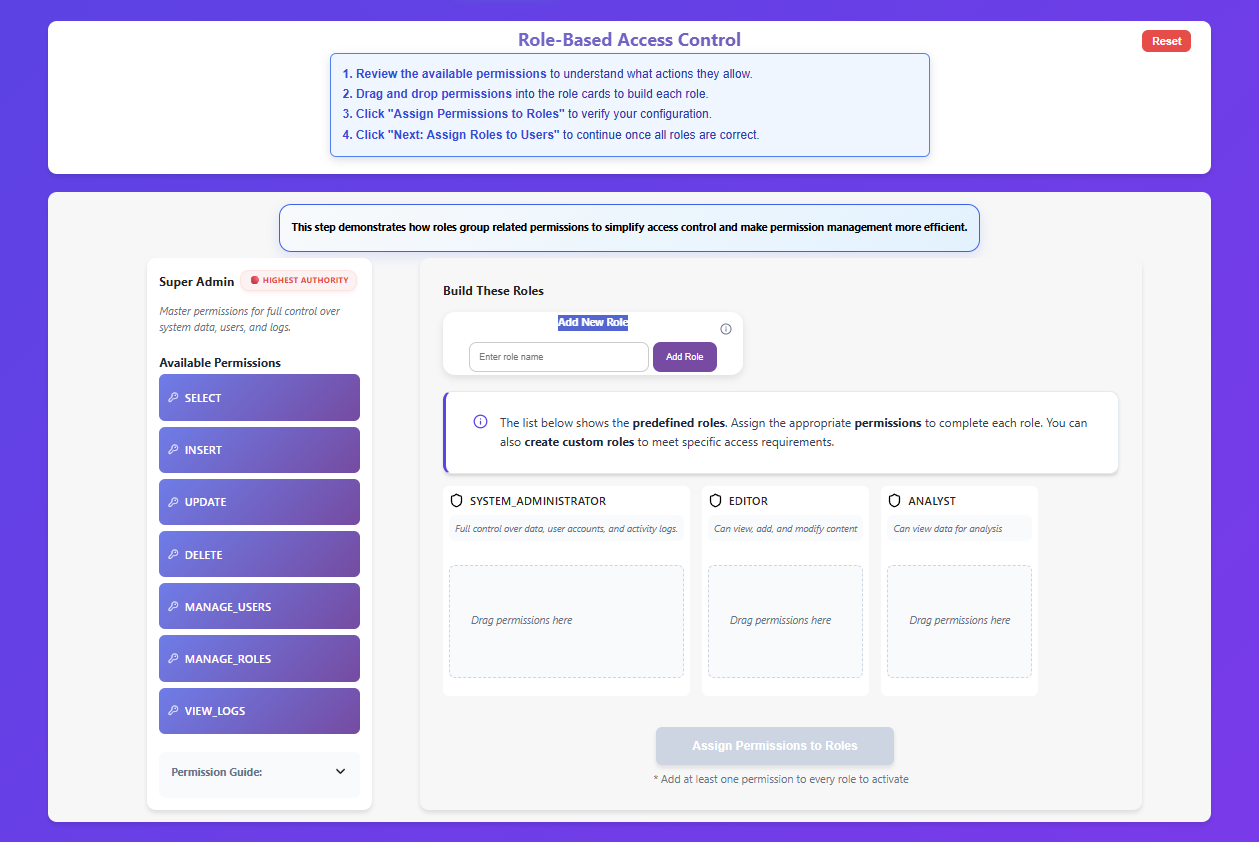
Step 1 — Build Roles
Review the available permissions defined by the Super Admin to understand what actions they allow.
Drag and drop permissions from the pool into the predefined role cards to build each role. (You can also create custom roles by entering a name and clicking Add Role).
Click "Assign Permissions to Roles" to verify your configuration. A green "Completed" status indicates success.
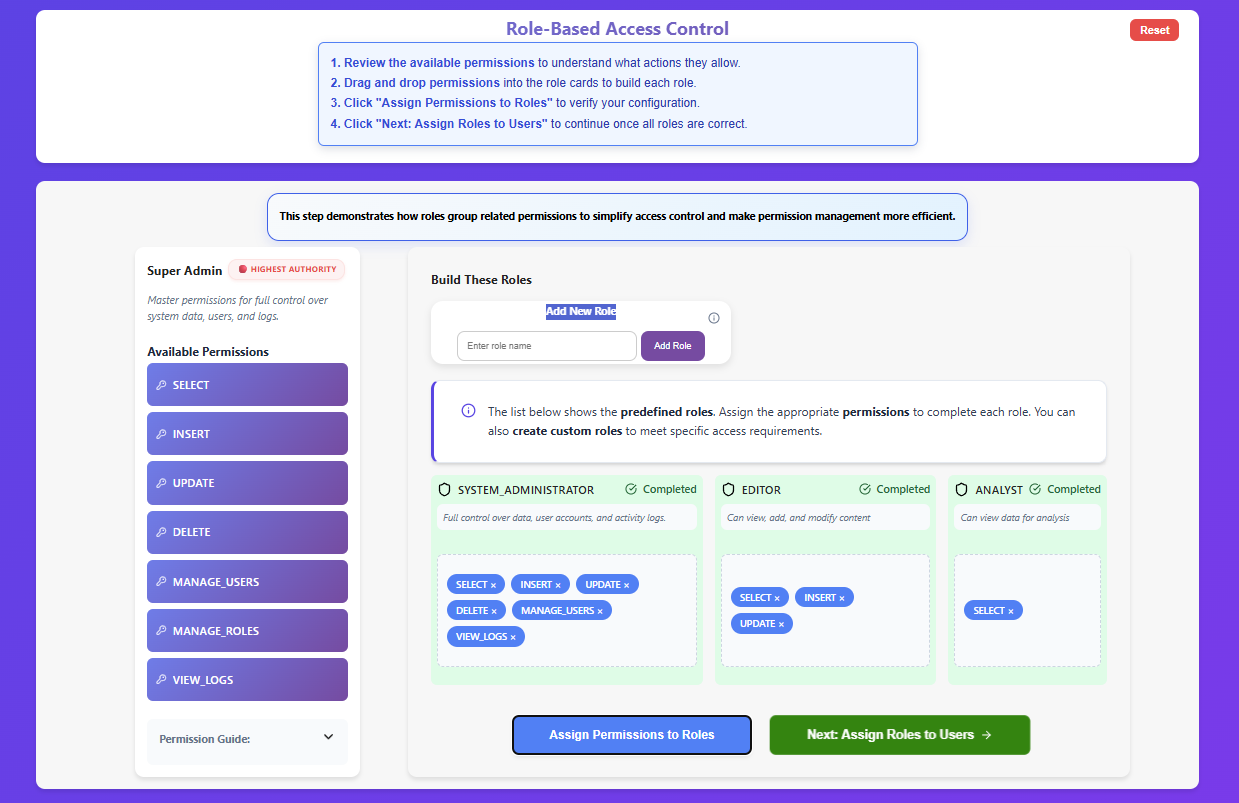
Click "Next: Assign Roles to Users" to continue once all roles are correct.
Step 2 — Assign Roles to Users
Review the users and their job responsibilities.
Assign an appropriate role to each user using the dropdown menu. (You can also add a new user from the left panel).
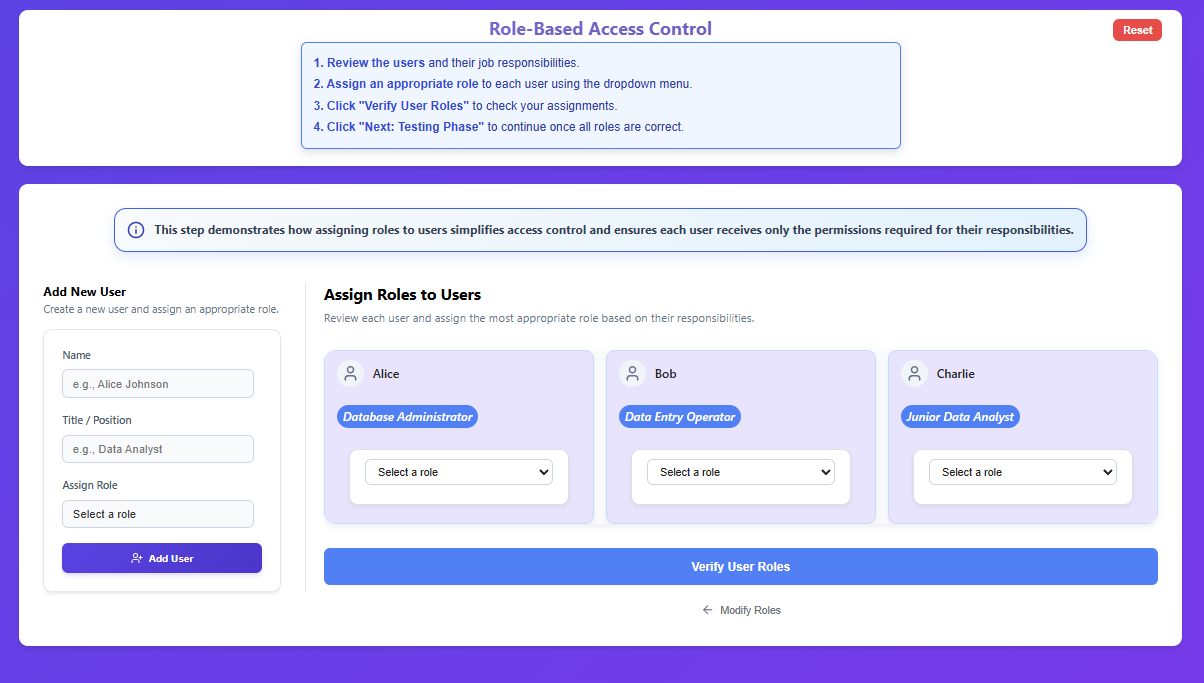
Click "Verify User Roles" to check your assignments.
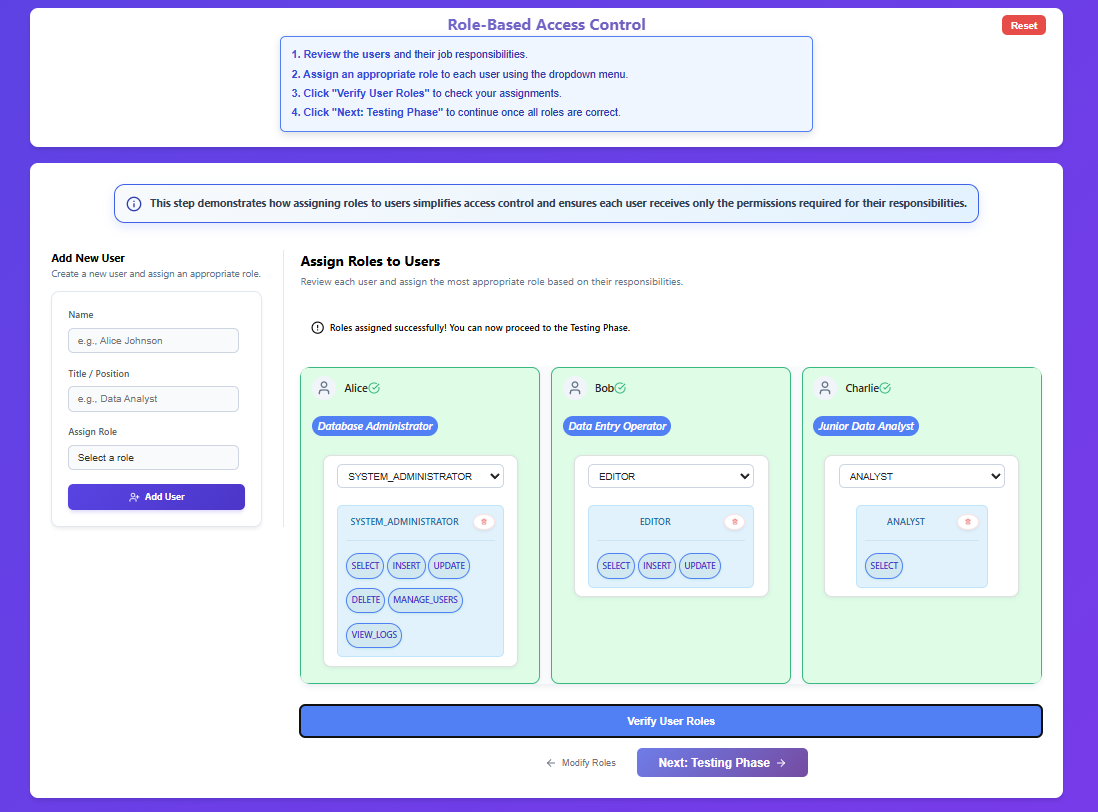
Click "Next: Testing Phase" to continue once all roles are correct.
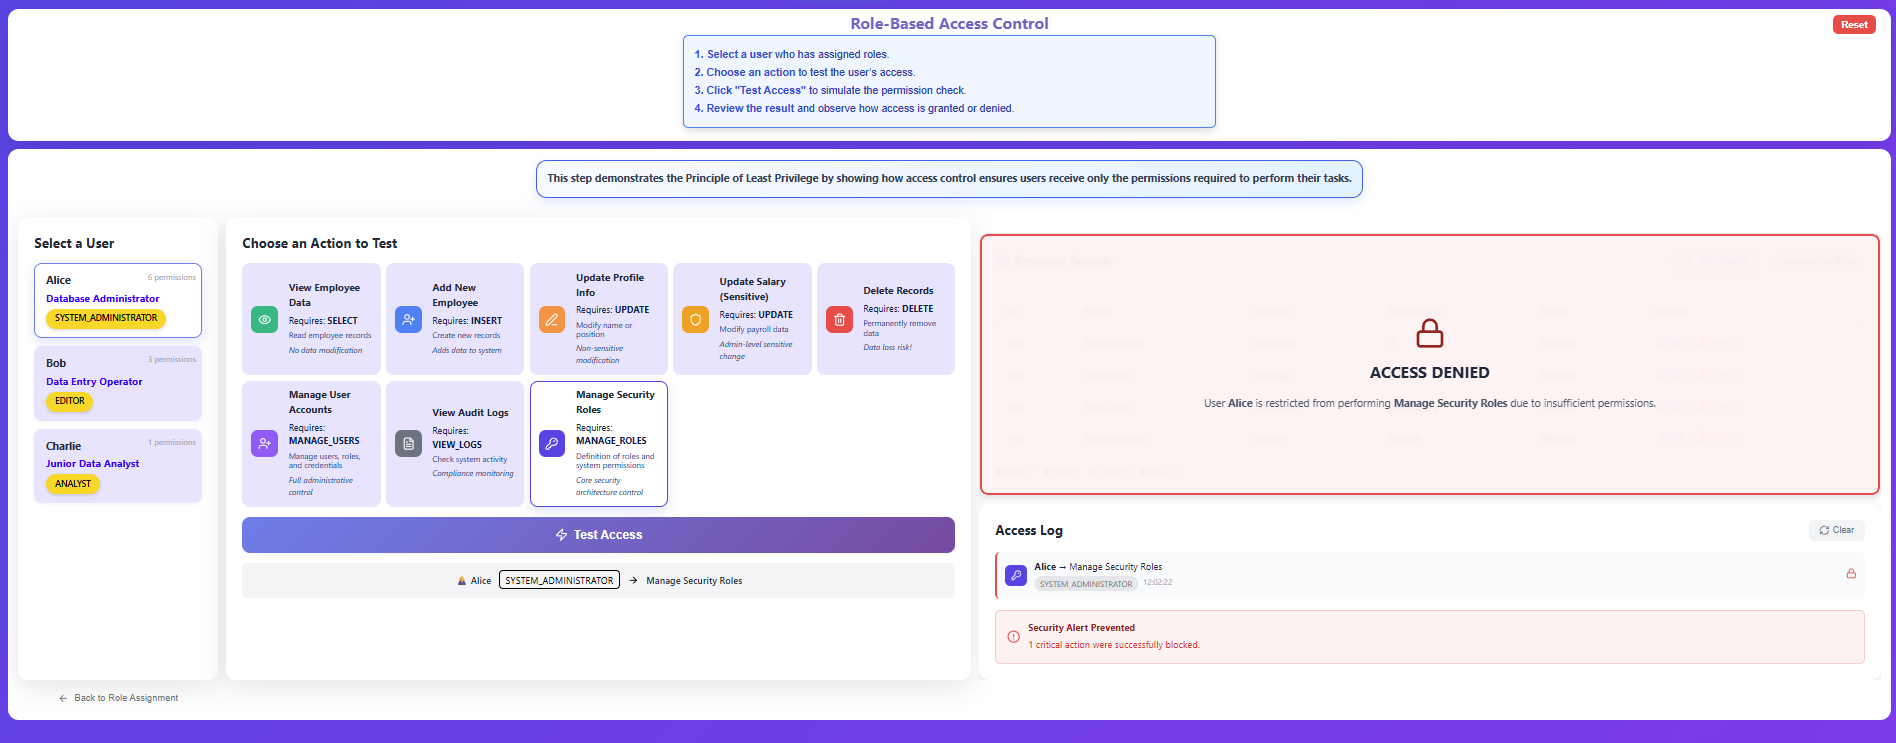
Step 3 — Test Access
Select a user who has assigned roles.
Choose an action from the grid to test the user's access against the Employee Records table.
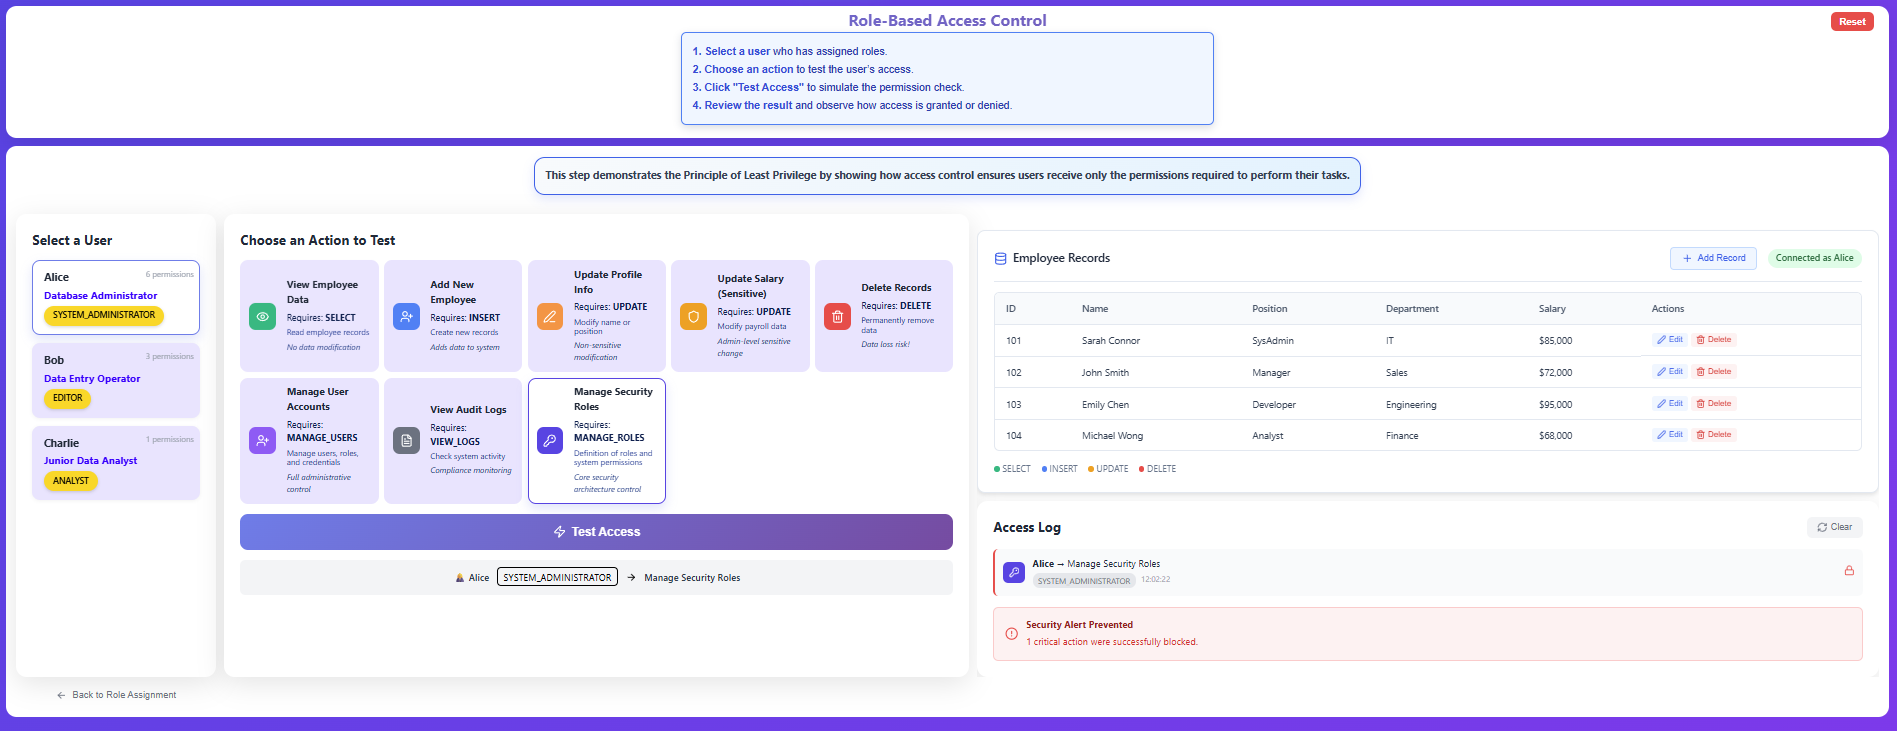
Click "Test Access" to simulate the permission check.
Review the result on the Employee Records preview panel (which will show 🔓 Access Granted or 🔒 Access Denied) and observe the action details recorded below in the Access Log.
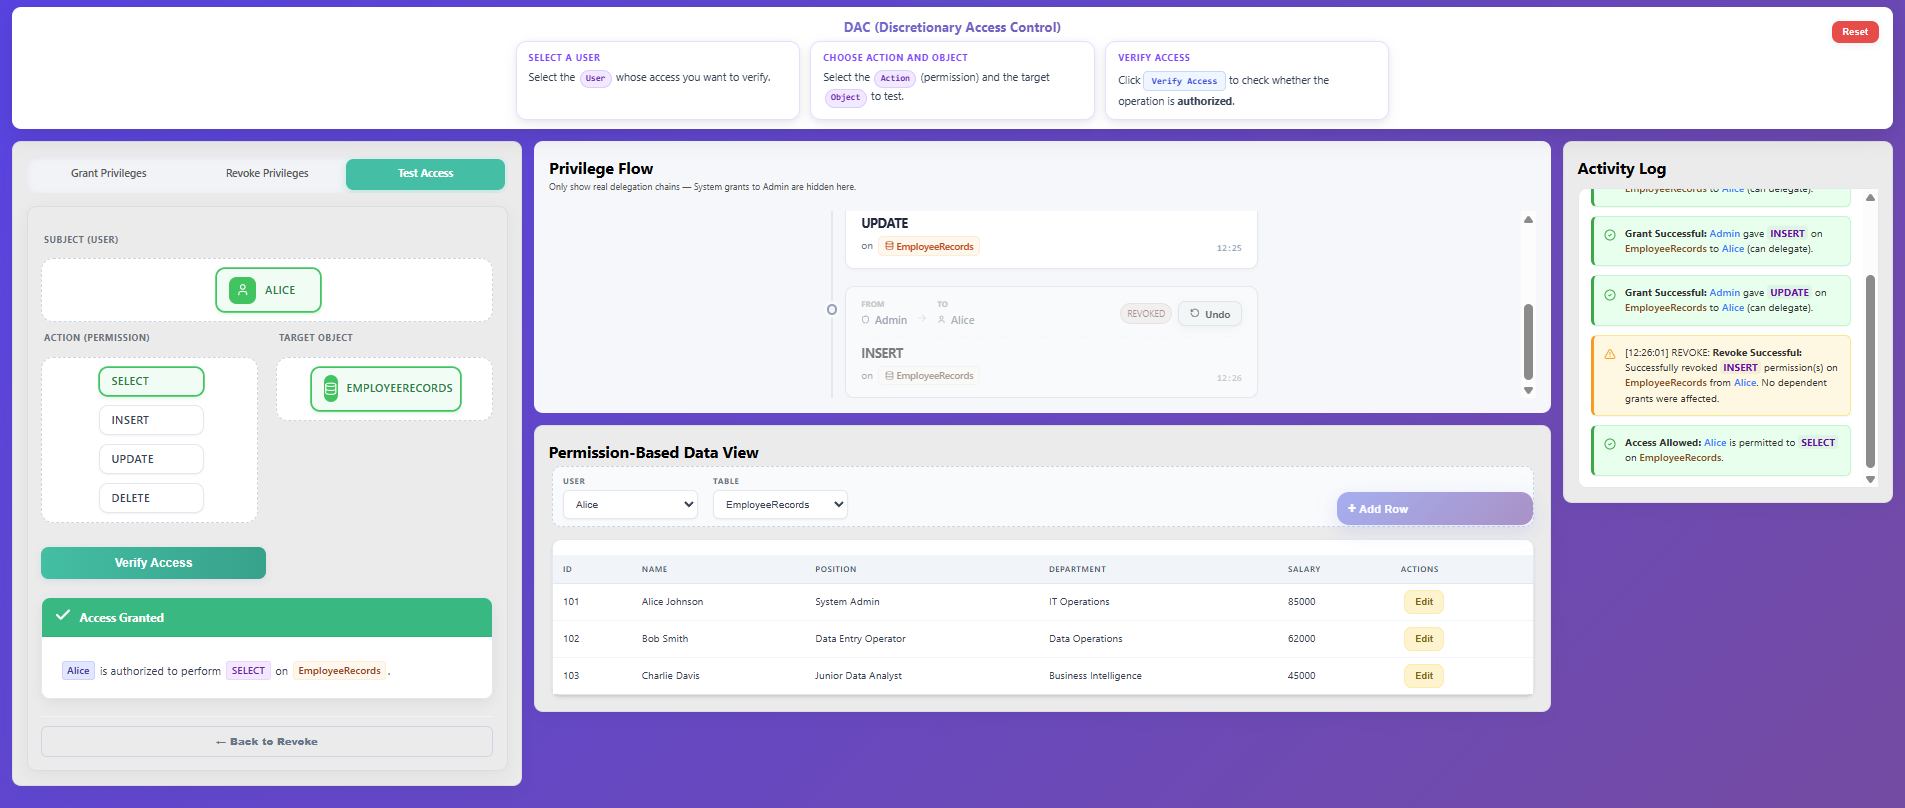
Discretionary Access Control (DAC)
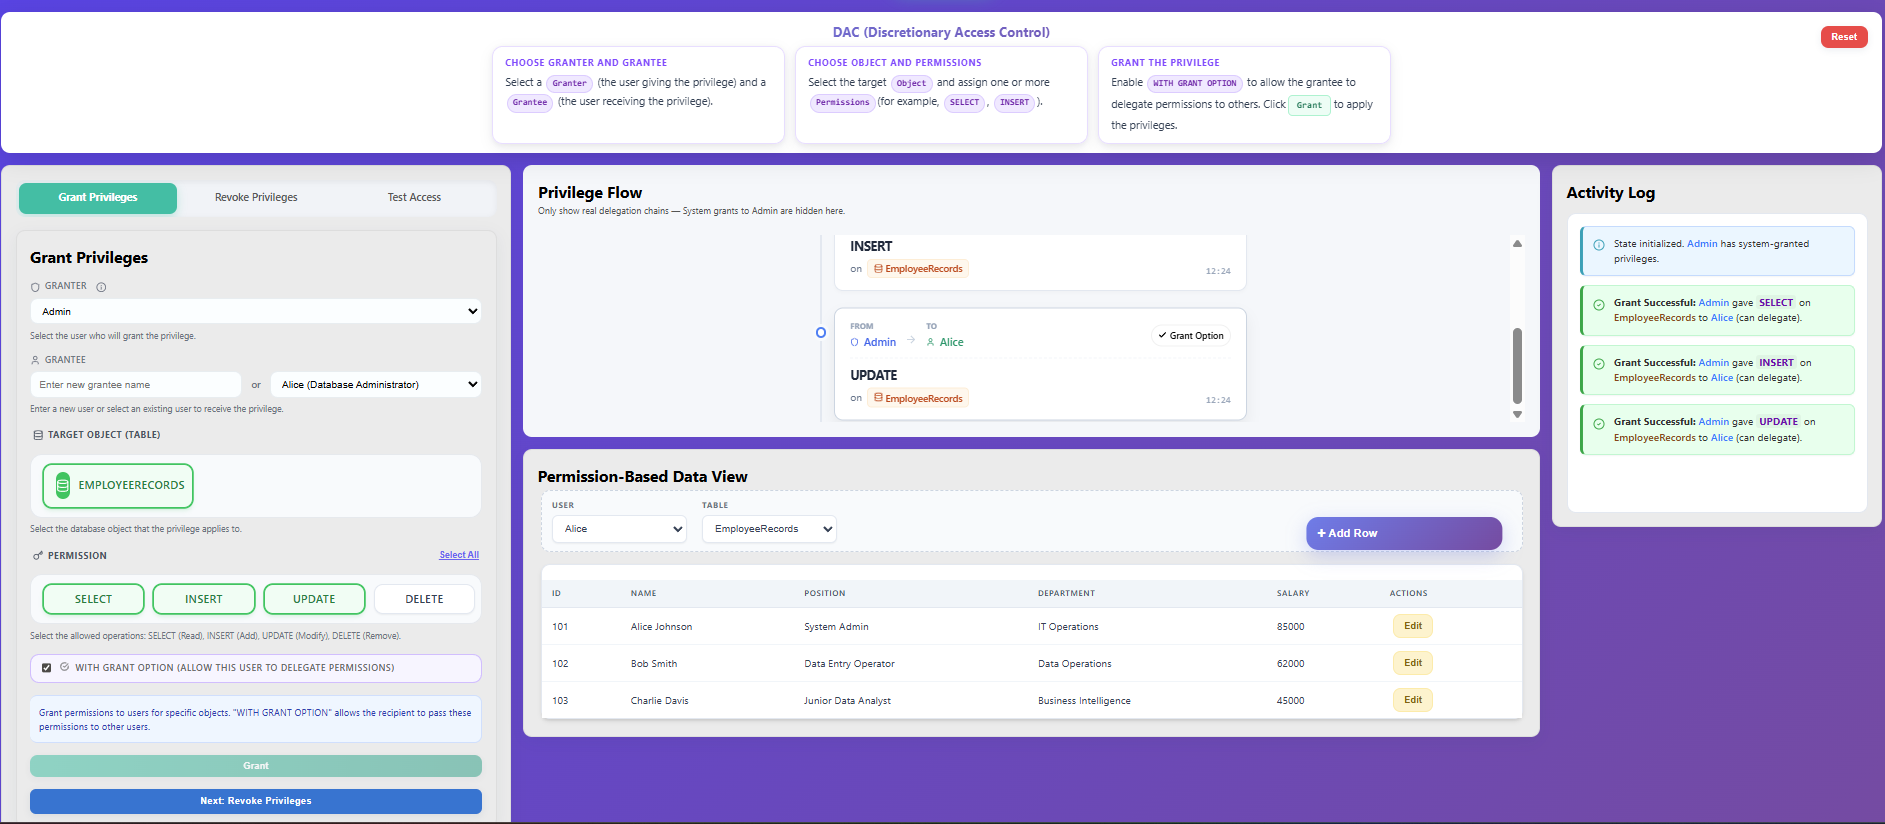
Step 1 — Grant Privileges
Open the Grant Privileges tab.
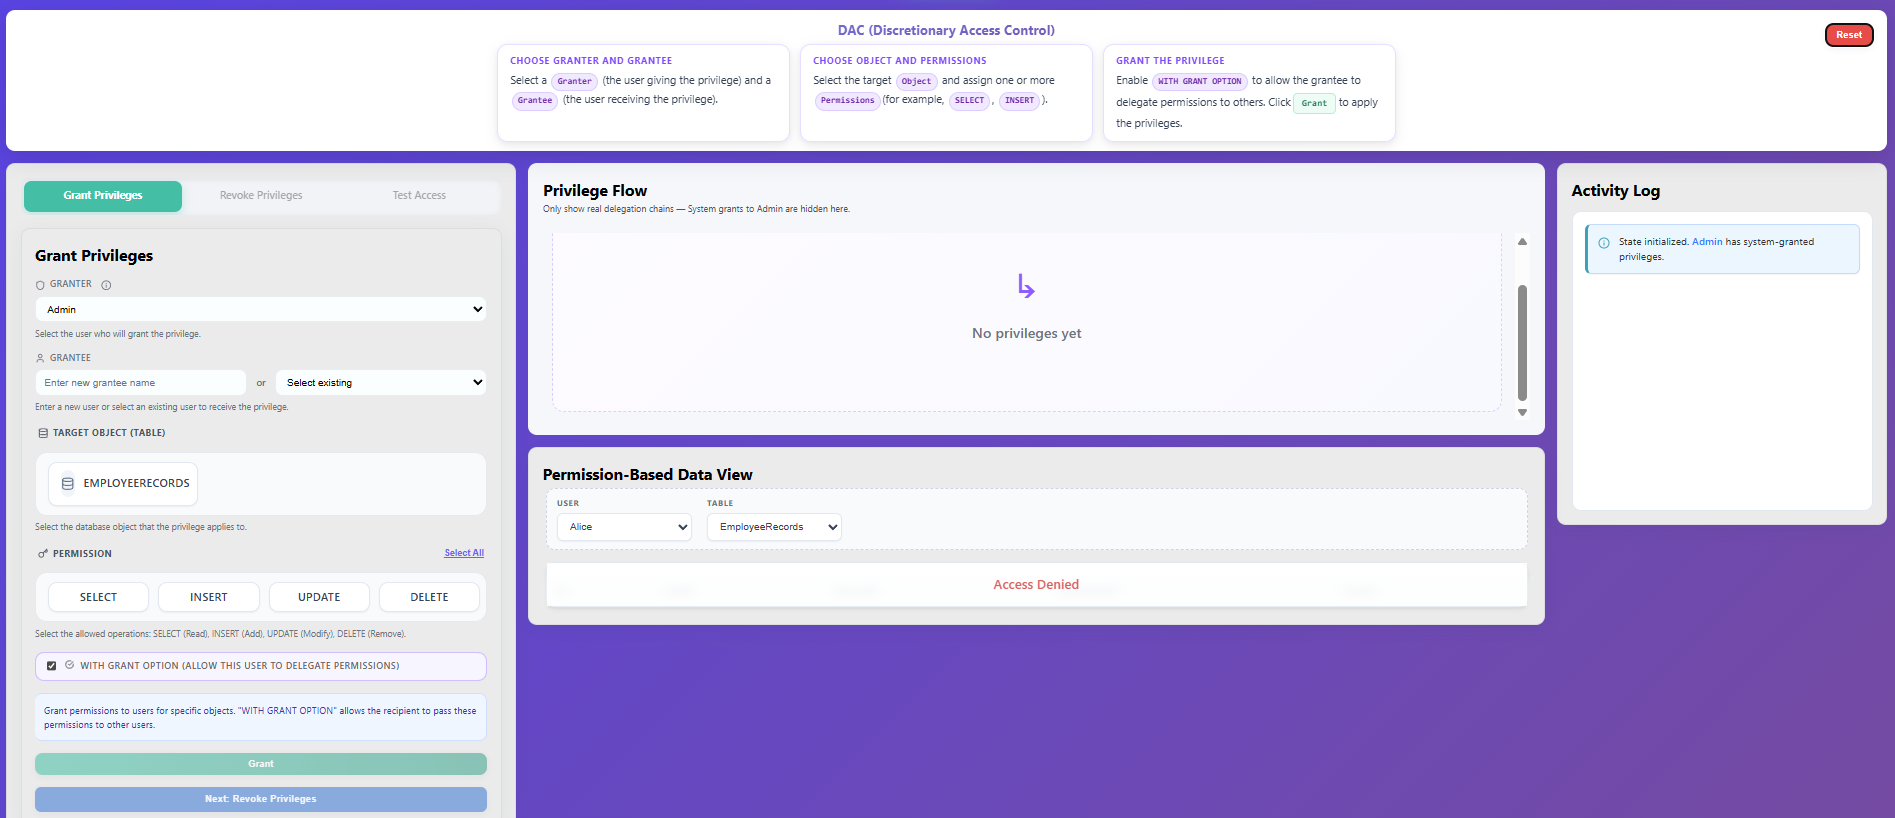
Select a Granter (the user giving the privilege) and a Grantee (the user receiving the privilege).
Select the target Object (e.g., Customers, Orders) and assign one or more Permissions (SELECT, INSERT, UPDATE).
Enable WITH GRANT OPTION if you want the grantee to be able to delegate these permissions to others.
Click Grant to apply the privileges.
The privilege assignment will immediately reflect in the Privilege Flow mapping and the Activity Log.
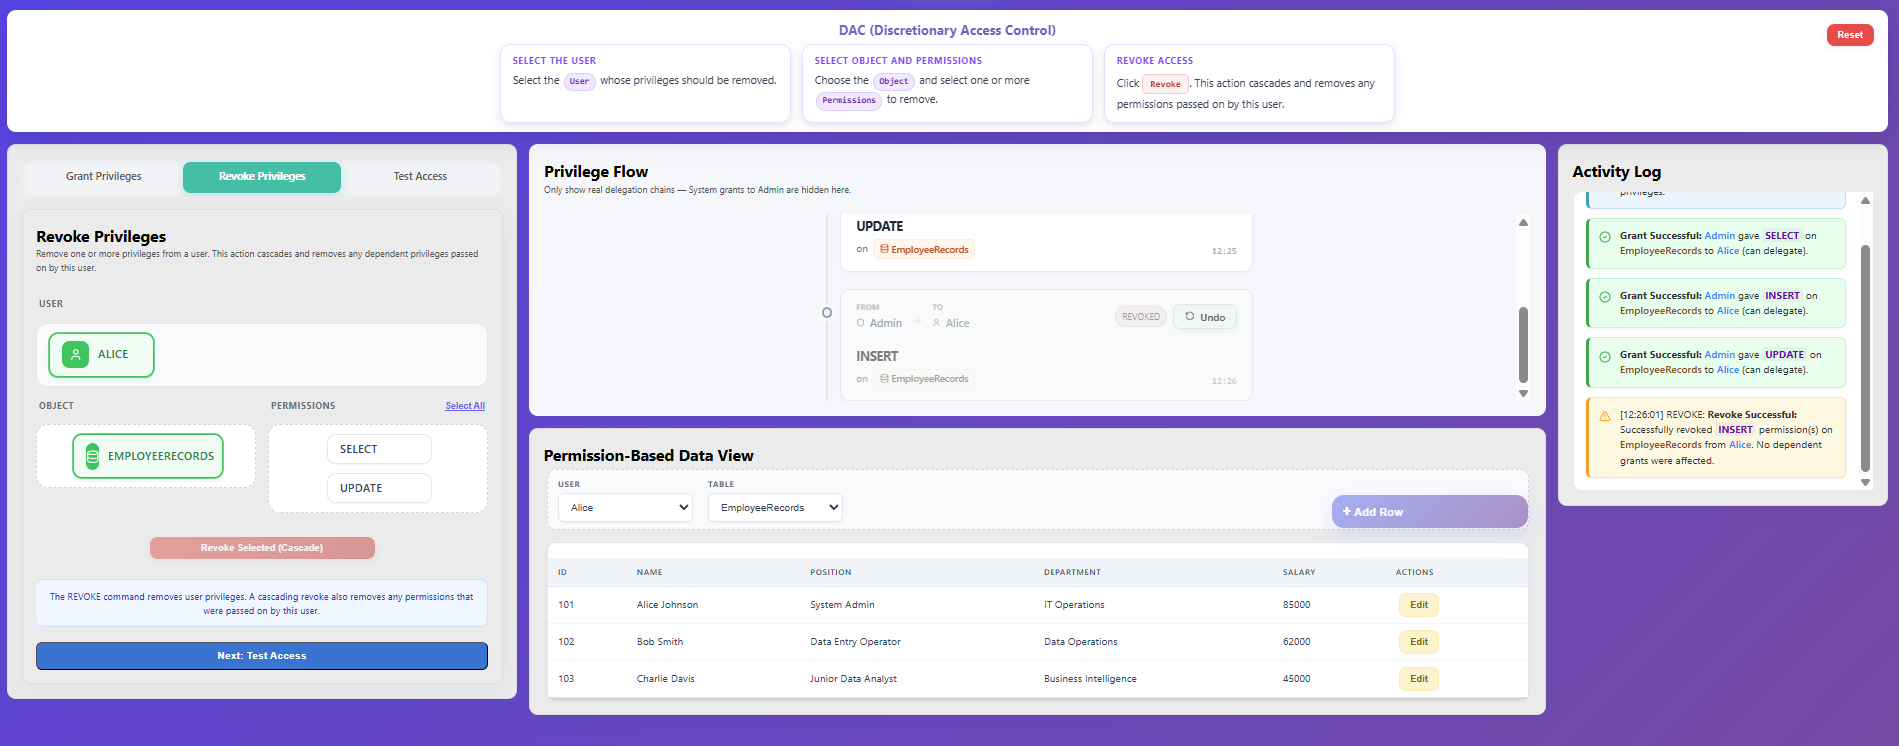
Step 2 — Revoke Privileges
Navigate to the Revoke Privileges tab.
Select the User whose privileges should be removed.
Choose the Object and select one or more Permissions to remove.
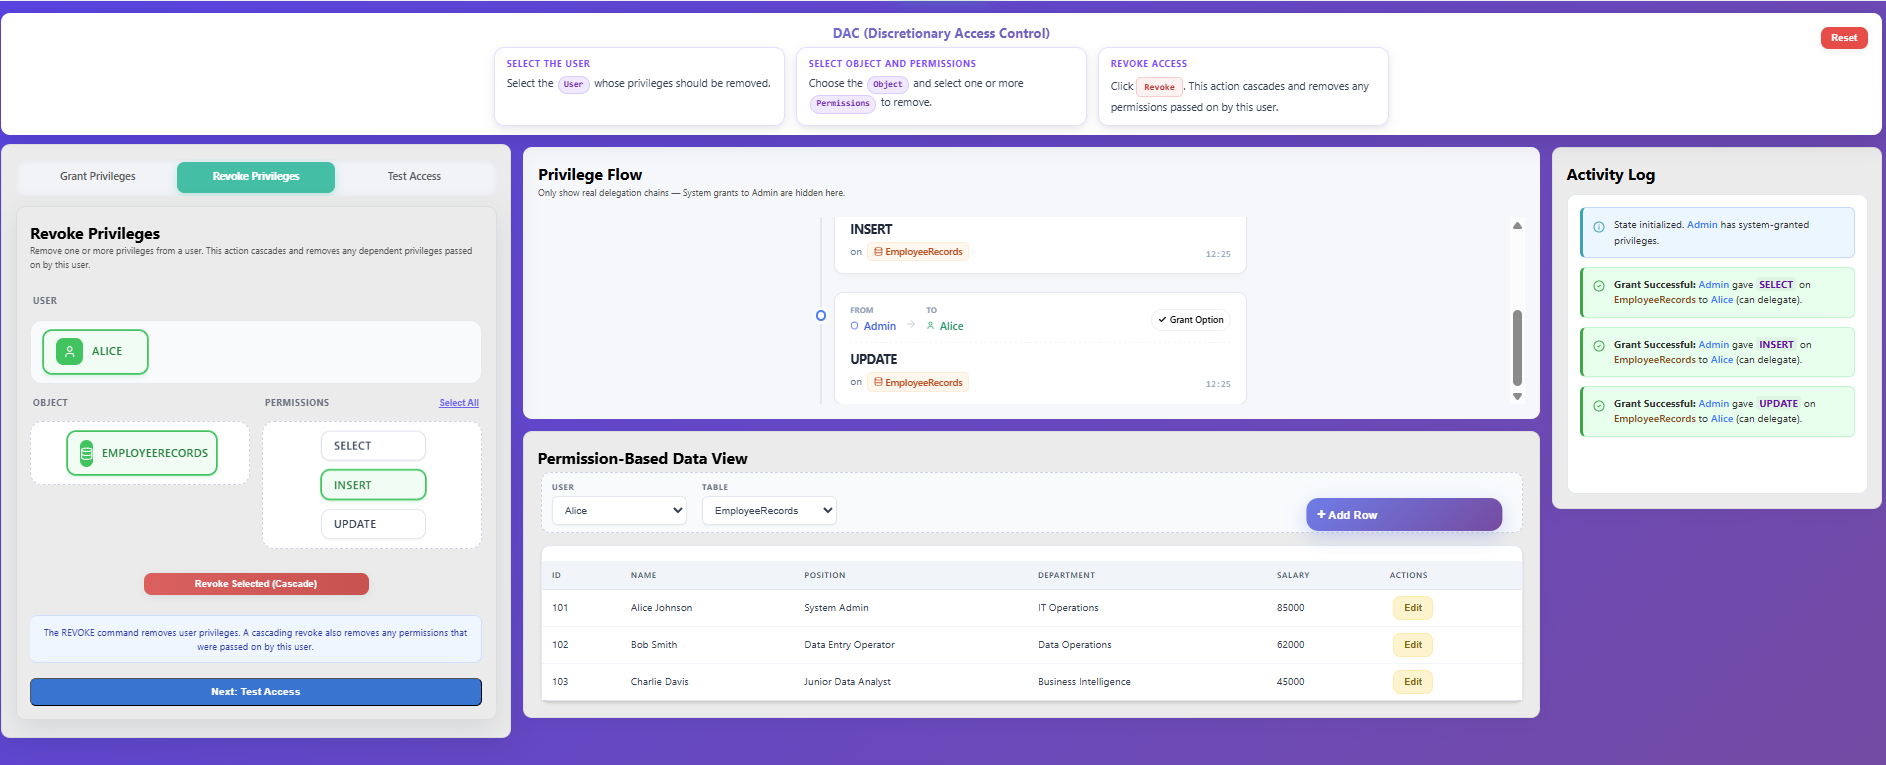
Click Revoke. This action naturally cascades, automatically removing any permissions that were passed on by this user.
Observe the changes in the Privilege Flow and Activity Log.
Step 3 — Test Access
Open the Test Access tab.
Select the User whose access you want to verify.
Select the Action (permission) and the target Object to test.
Click Verify Access to check whether the operation is authorized.
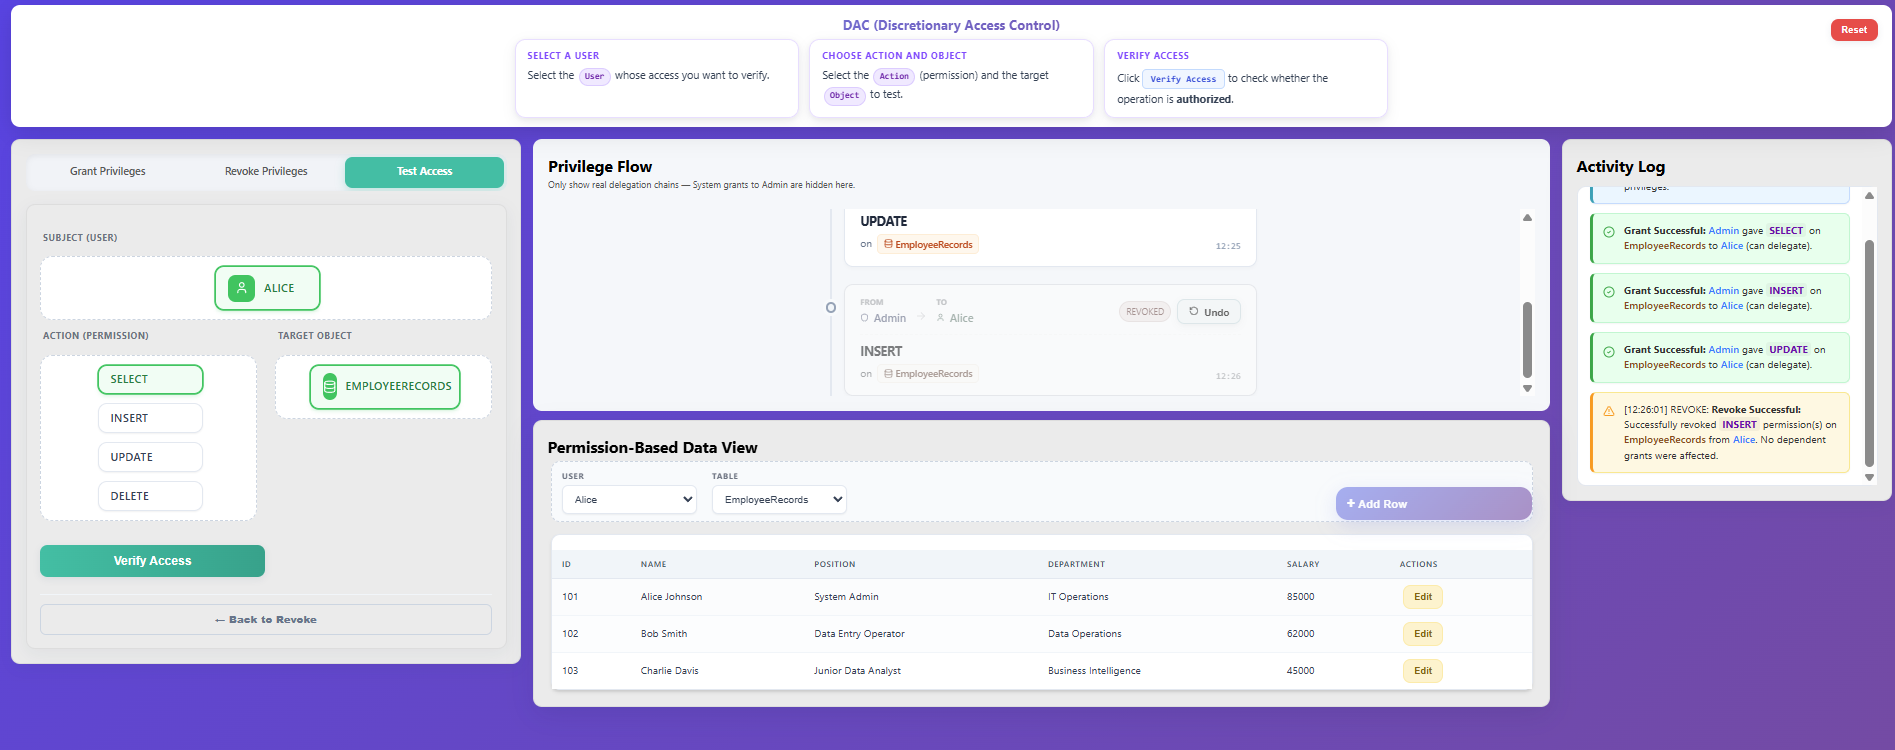
Observe the result in the Activity Log (Access Granted or Access Denied).
Mandatory Access Control (MAC)
Step 1 — Introduction to MAC
Read the instructions explaining how Clearance and Classification work.
Review the core rules of MAC based on the principle of dominance.
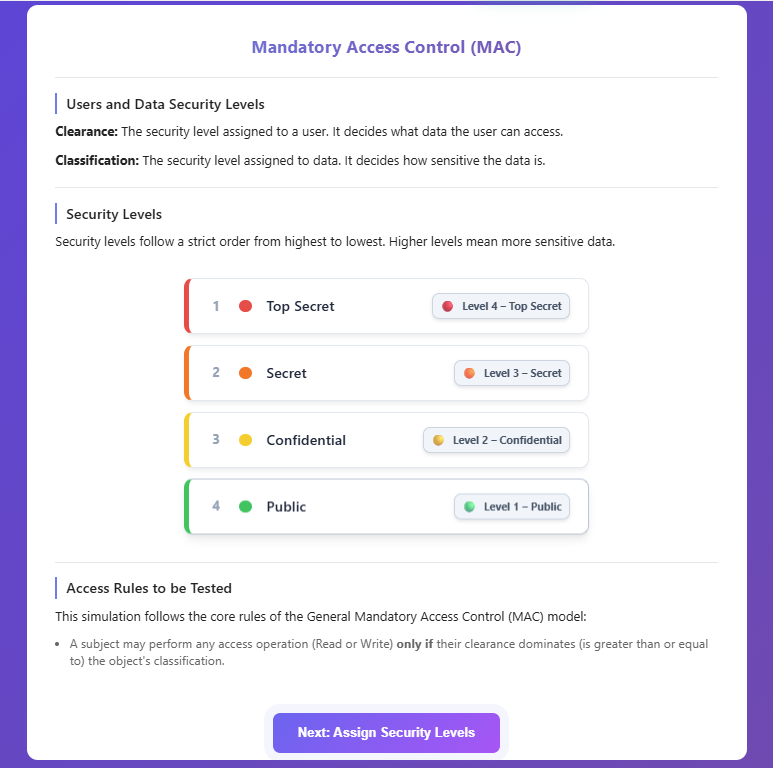
Click Next: Assign Security Levels to enter the assignment view.
Step 2 — Assign Security Levels
Drag a Security Level from the top palette and drop it onto a User card (to assign their Clearance).
Drag a Security Level and drop it onto a Data Object card (to assign its Classification).
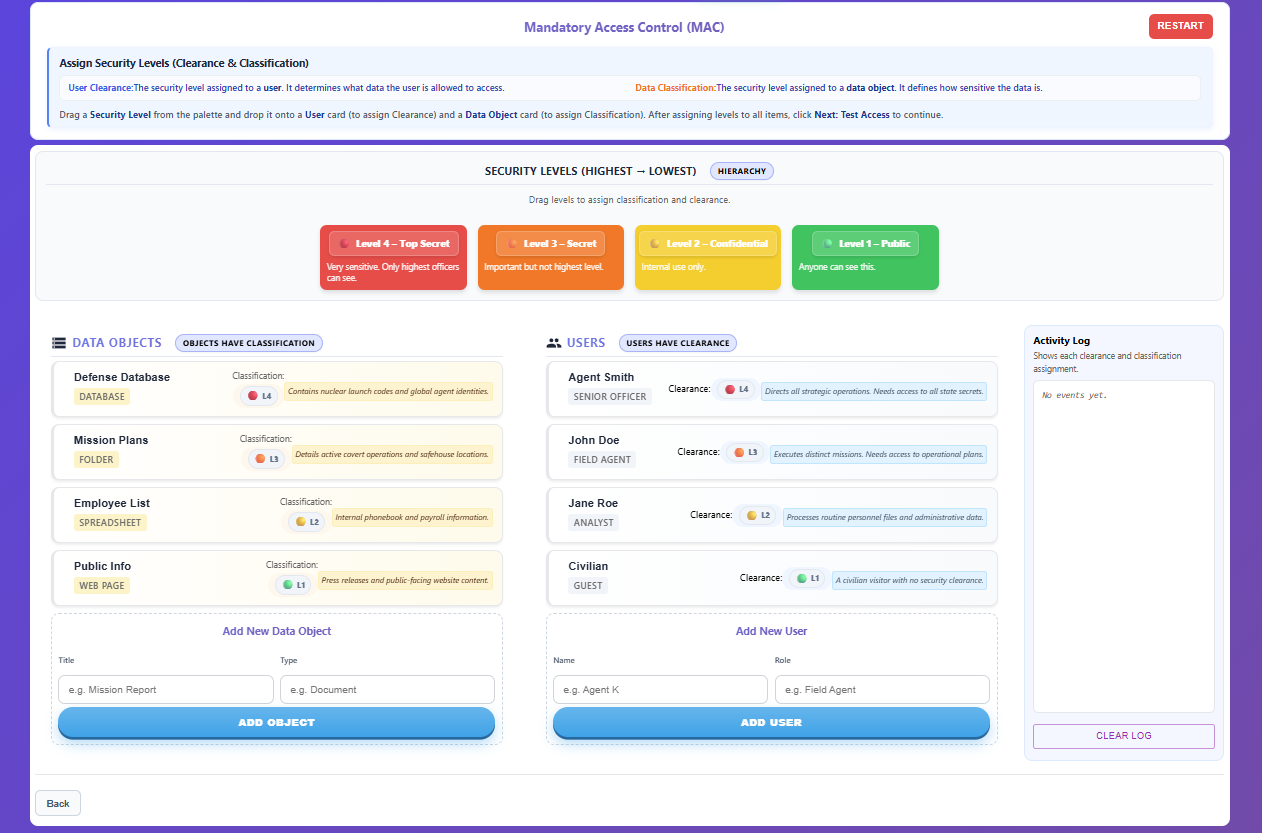
Ensure every user and data object has an assigned security level.
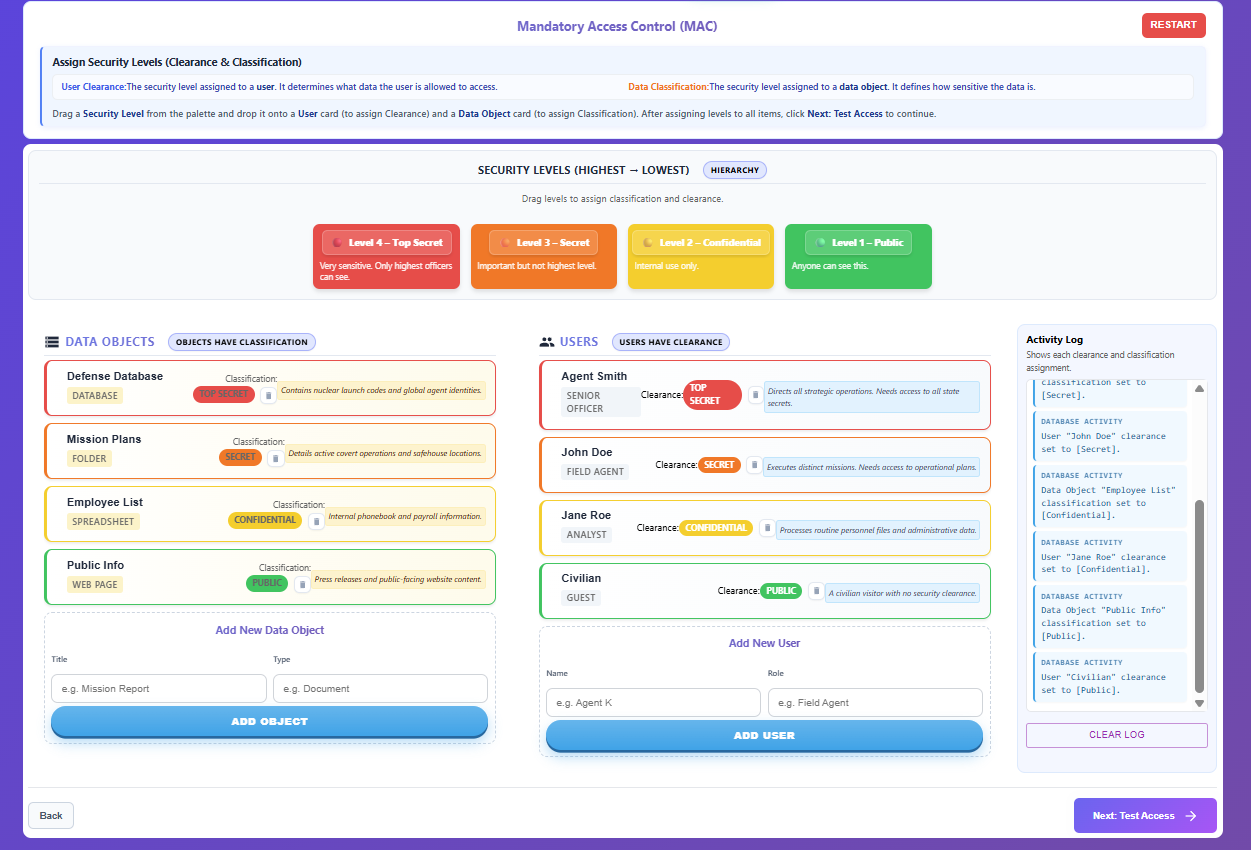
Click Next: Test Access to proceed.
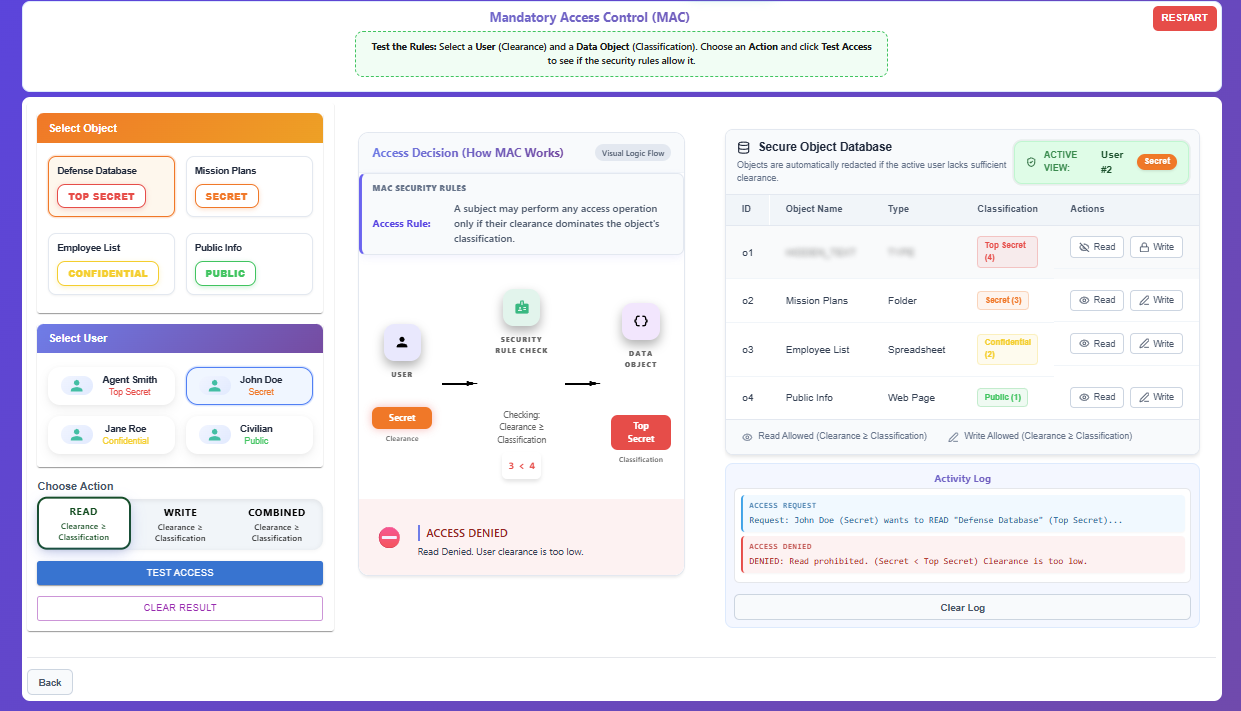
Step 3 — Test & Verify Access
Select a User (Clearance) to act as the active subject.
The Secure Object Database will update to display objects securely. If the selected user lacks sufficient clearance, sensitive object names and types are redacted (blurred out).
Choose an Action mode (Read or Write) directly from the Secure Object Database table for a target Data Object (Classification) or select a combination from the top panels and click Test Access.
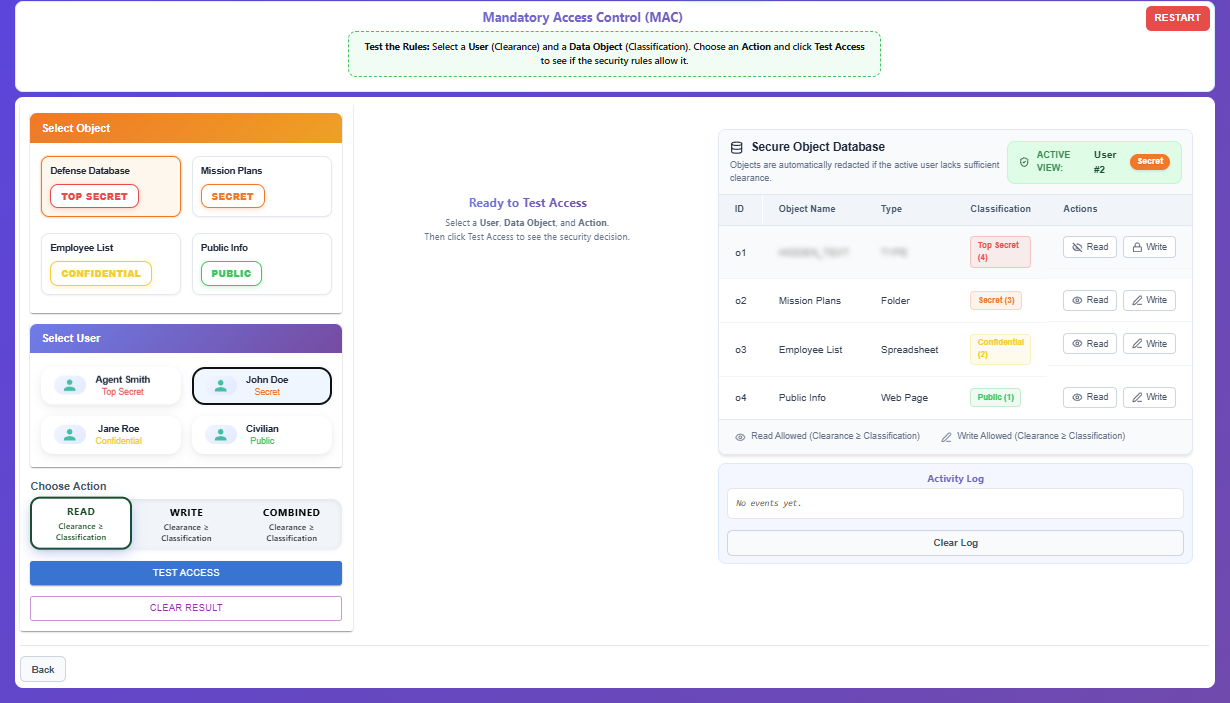
The system will evaluate the Access Decision:
- Read/Write Allowed: Requires Clearance ≥ Classification.
Review the visual access decision (✅ ACCESS GRANTED or ⛔ ACCESS DENIED) and read the explanation.
The decision history is recorded in the Activity Log.