
Implementation of Core Network (Cn) Function (NFV)
Step 1: Initialize the Service-Based Architecture (SBA) Dashboard
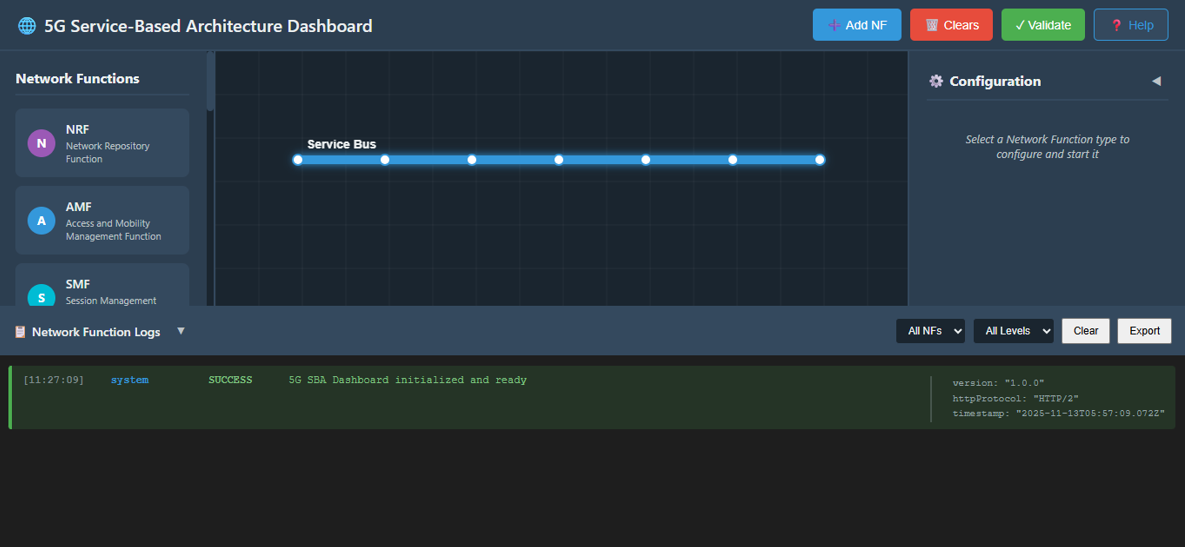
Open the SBA Simulator Dashboard: Launch the dashboard where all 5G Core Network Functions (NFs) are displayed and managed.
Verify Initialization: Once the dashboard loads, ensure all essential panels (NF List, Configuration Panel, Logs, Terminal) are visible and active.
You should now be ready to start configuring and launching NFs.
Step 2: Start Network Functions (NF)
Network Functions can be deployed using either the Terminal (Docker Compose) or the GUI-based configuration panel. Both methods result in the same NF topology and services.
Method A: Deploy Network Functions Using Terminal (Docker Compose)
This method allows you to deploy Network Functions using predefined Docker Compose configurations.
2.1 Launch Network Functions one by one
Click on the terminal button to open the terminal then from the project root directory, execute the following command:
docker compose -f docker-compose.yml up -d nf_name
Example:
docker compose -f docker-compose.yml up -d oai-nrf
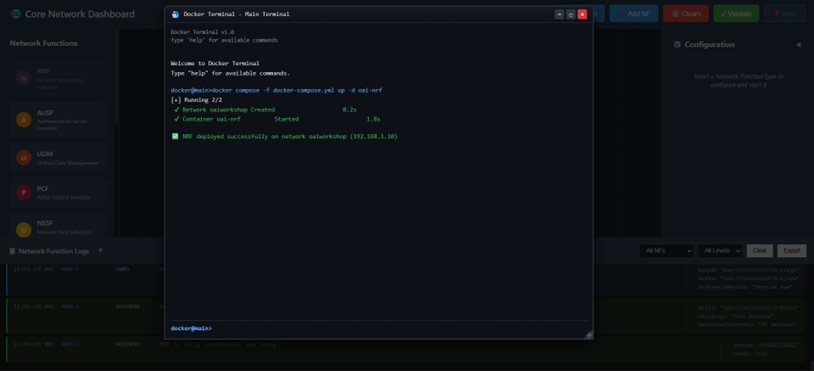

This confirms that NRF deployed successfully.
2.2 Launch All Network Functions in just one command
Click on the terminal button to open the terminal then from the project root directory, execute the following command:
docker compose -f docker-compose.yml up -d

This confirms that all core NFs and supporting services are running successfully.
2.3 Verify Docker Network Creation
List available Docker networks:
docker network ls
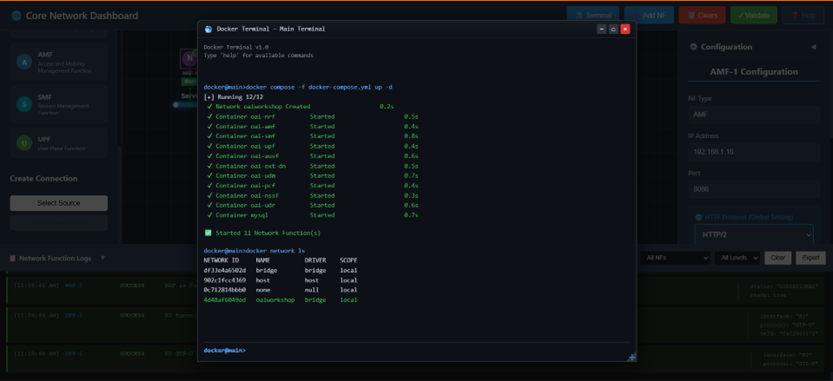
You should see the oaiworkshop network:
NETWORK ID     NAME          DRIVER    SCOPE
          5a7a4f1ebed2   oaiworkshop   bridge    local
2.4 Inspect Network and NF IP Assignment
Inspect the OAI network to verify IP allocation:
docker network inspect oaiworkshop
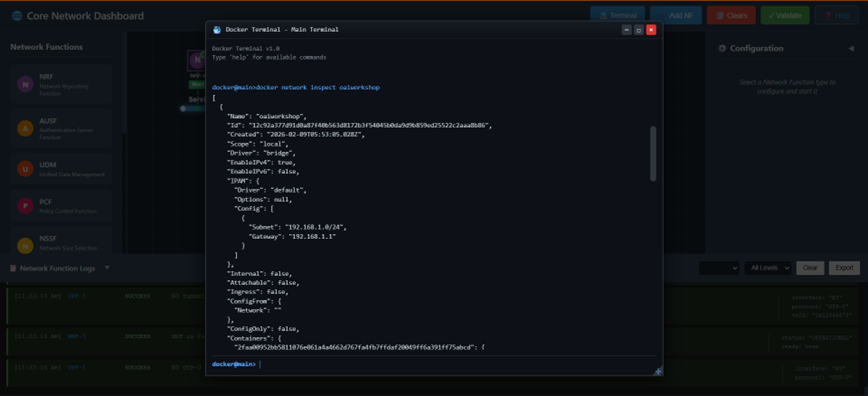
This confirms successful NF deployment and network stabilization.
2.5 Stop and Remove All Network Functions
To stop and clean up all running containers and networks:
docker compose -f docker-compose.yml down

Method B: Deploy Network Functions Using GUI
This method allows individual NF configuration and startup via the graphical interface.
1. Select an NF to Configure
Click on the NF icon from the NF list that you want to start (e.g., AMF, SMF, UPF, NRF, etc.). This will open its Configuration Panel on the right side.
2. Enter NF Configuration Details
In the configuration panel, fill in the required fields:
IP Address: Provide a valid IPv4 address for the NF (e.g., 192.168.1.10).
Port Number: Enter the port on which the NF will run (e.g., 8080 or any defined port).
Protocol: Select HTTP/1 or HTTP/2 depending on your NF requirement. (Some NFs may auto-select based on preset settings.)
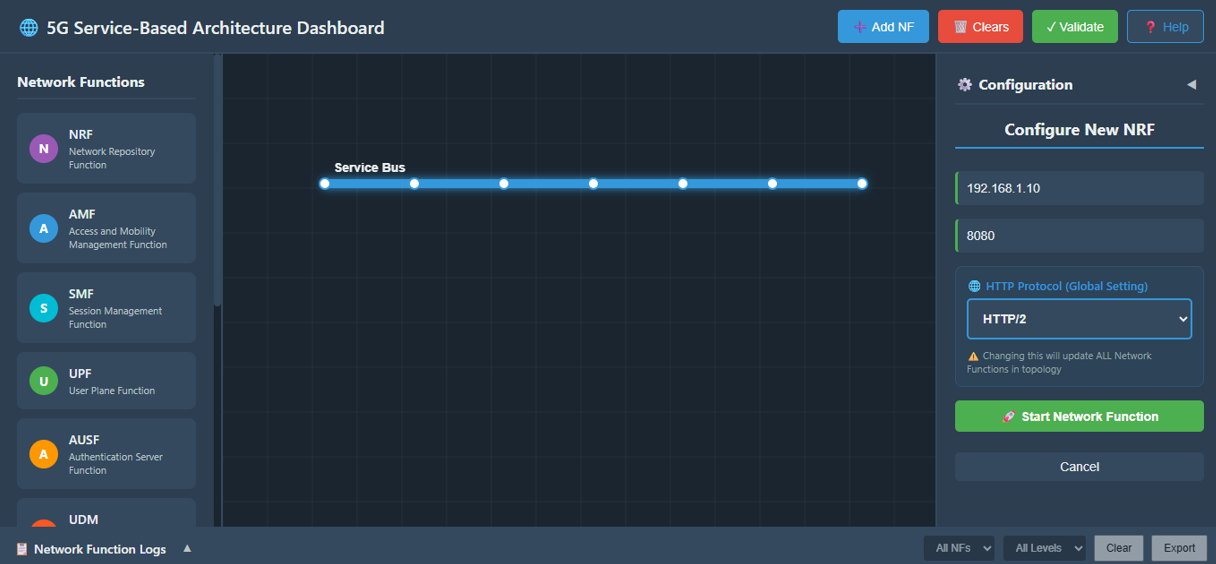
3. Start the NF
Click the Start NF button to launch the service.
4. Wait for NF Stabilization
Once you click Start NF:
- The NF begins initializing.
- Allow approximately 5 seconds for the NF to become stable.
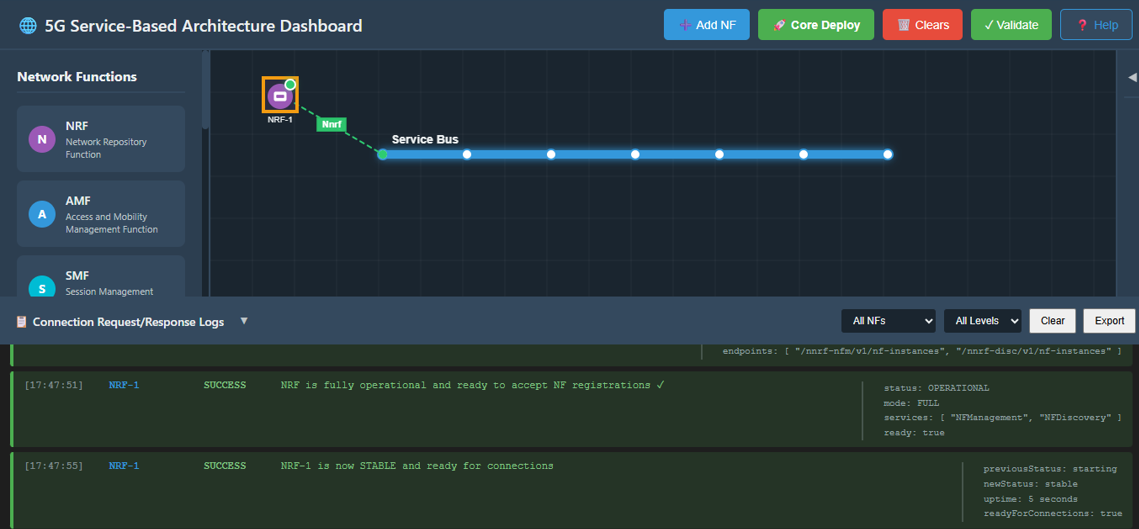
5. Verify NF Startup Logs
Scroll down to the NF Logs section. A successful startup will display logs such as:
- "NF started successfully"
- "Service registration complete"
- "NF ready to accept connections"
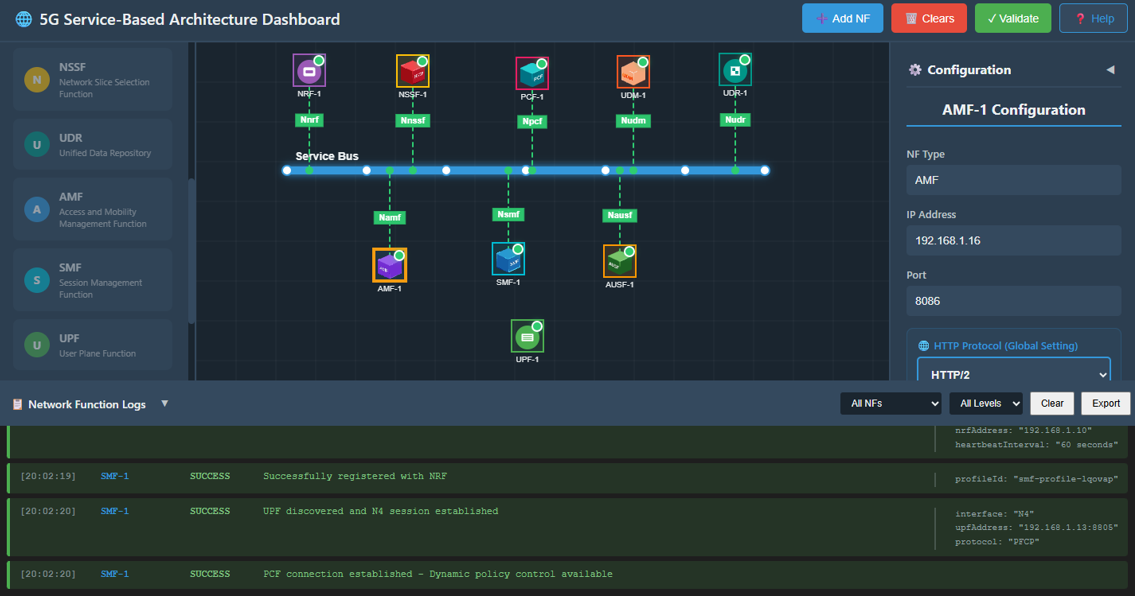
6. Repeat for All Remaining NFs
Follow the same configuration and startup process to start each NF in the architecture:
- AMF
- SMF
- UPF
- UDM
- AUSF
- NRF
- PCF
- etc.
Make sure each one stabilizes and shows successful log entries.
Step 3: Troubleshooting & Connectivity Validation
1. Test Network Connection Between NFs
If you want to verify whether two NFs are connected and reachable, you can use the Ping Test through the terminal.
Step 3.1: Open NF Terminal
Select the NF You Want to Test: Click on the NF icon (e.g., AMF).
Open Terminal: In the Configuration Panel, scroll down and click the Open Command Prompt / Terminal button. This opens a terminal window showing:
- NF name
- NF IP address
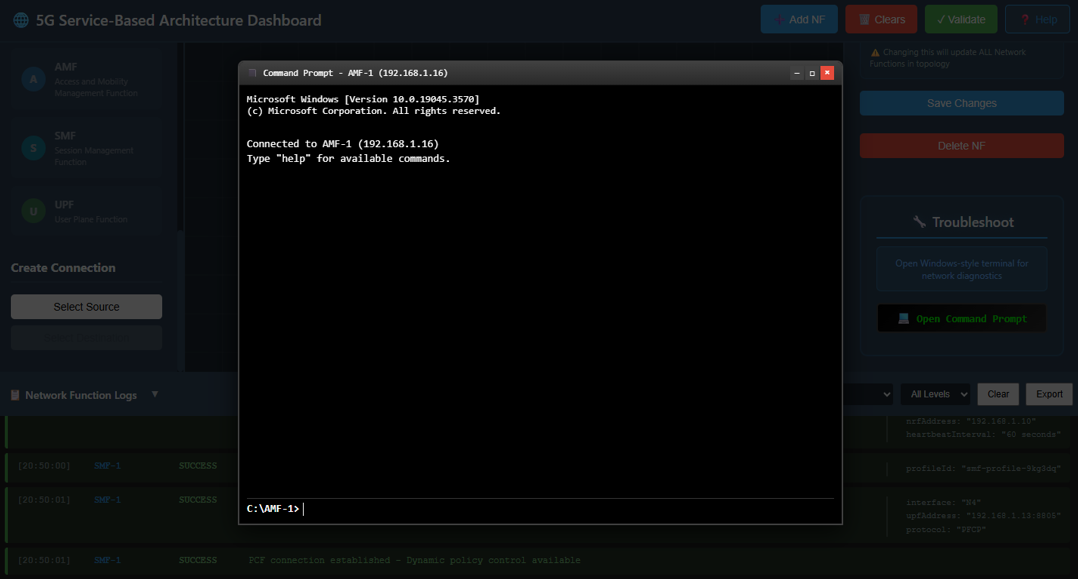
Step 3.2: Perform Ping Test
- Enter the Ping Command: In the terminal input box, type:
ping <target_NF_IP>
Example:
ping 192.168.1.11
Send the Command: Click the Send button to execute the command.
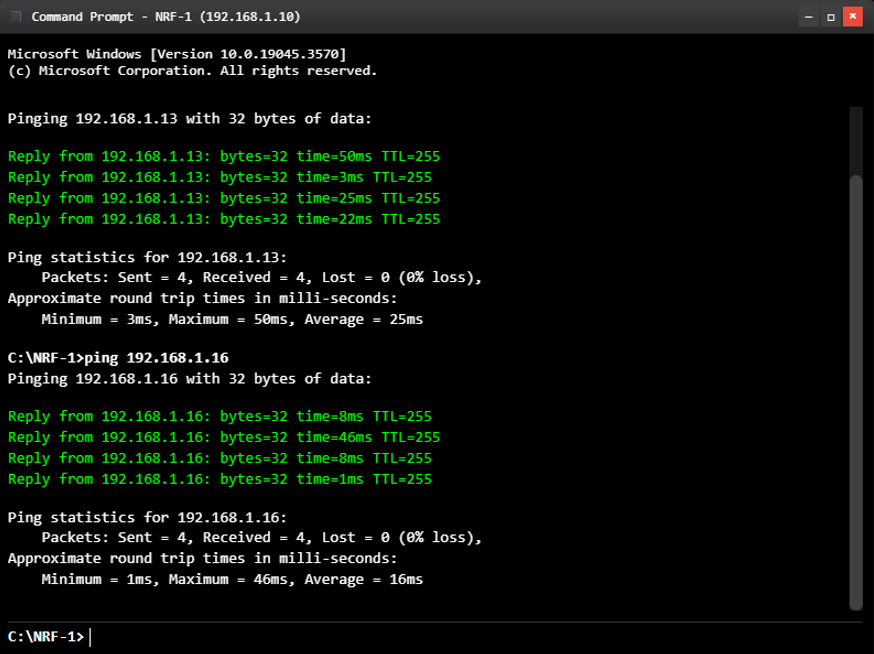
Check Ping Output: The terminal will display a series of responses such as:
- Reply from 192.168.1.11: bytes=32 time<1ms
- Reply from 192.168.1.11: bytes=32 time=2ms
- Analyze the Results: When the ping completes, a summary will appear:
- Packets Sent: 4
- Packets Received: 4
- Packet Loss: 0%
This confirms that both NFs are successfully connected and can communicate with each other within the simulated network.