
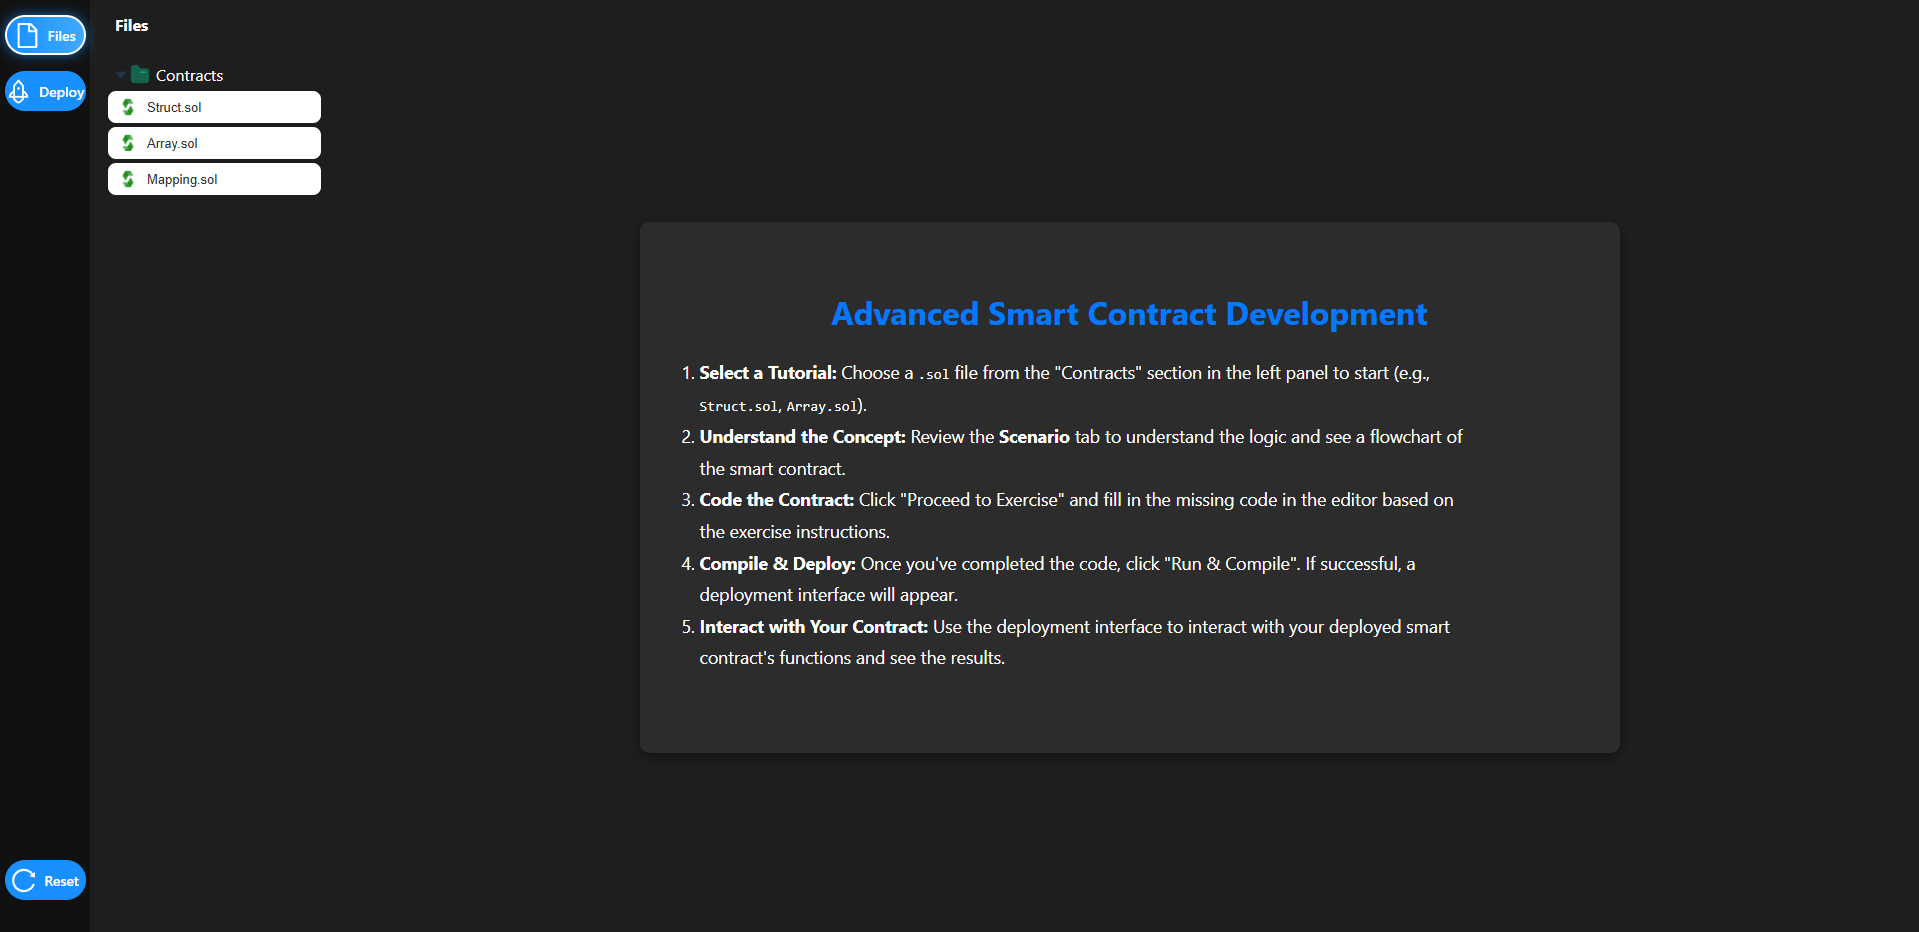
Advanced Smart Contract Writing
This simulation introduces advanced smart contract writing by demonstrating the implementation of structs, arrays, and mappings to organize and manage on-chain data. Learners will define structured data, store multiple records, and interact with deployed smart contracts.
Step 1: Select a Tutorial (Struct.sol)
- Click the Files button in the left sidebar.
- Under the Contracts section, select
Struct.sol. - The Advanced Smart Contract Development welcome screen is displayed, confirming the tutorial is loaded.
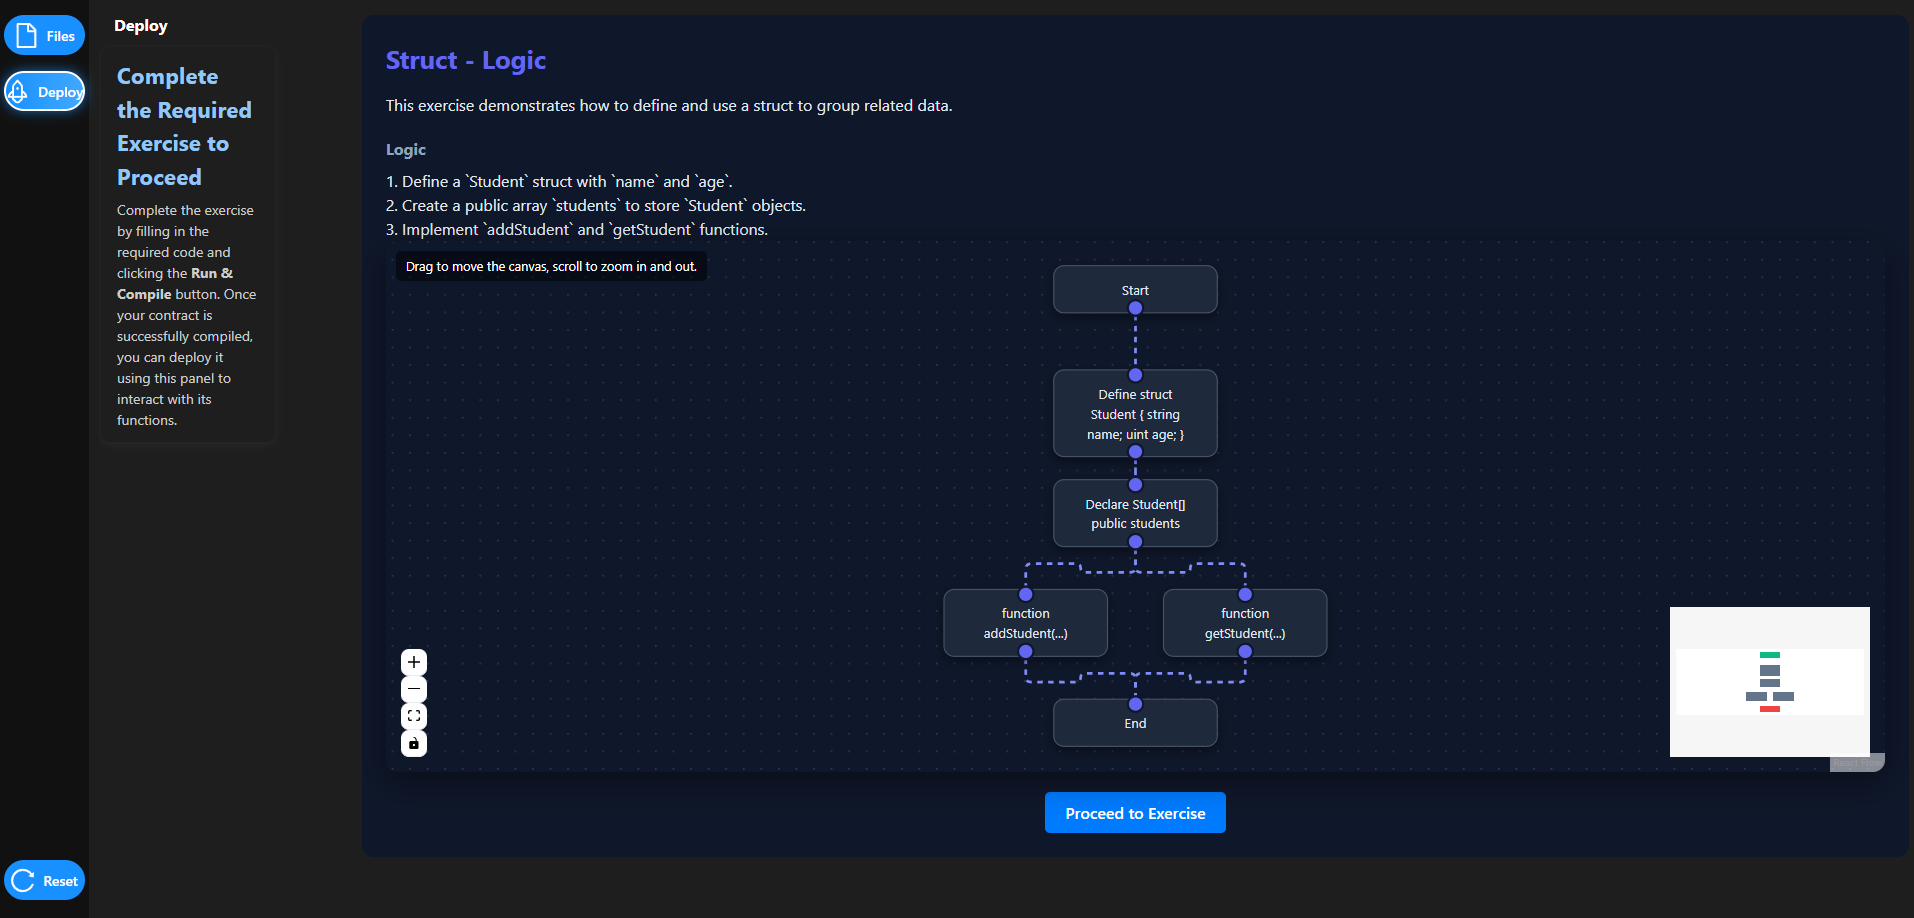
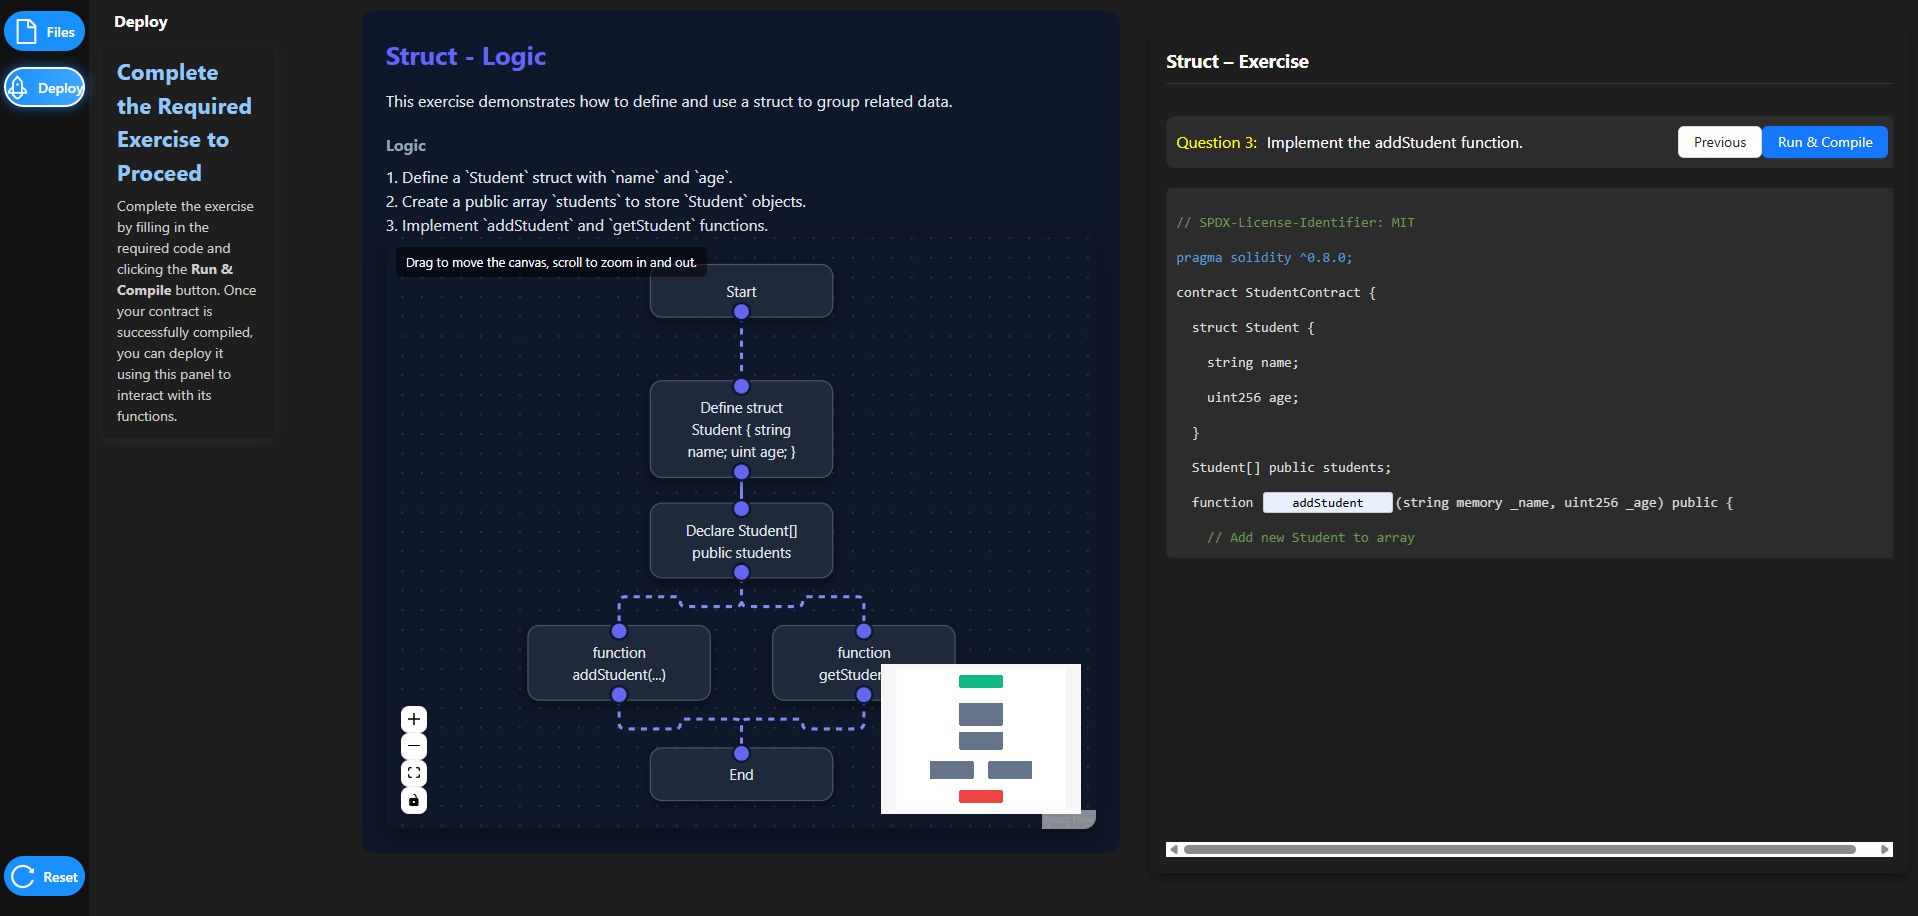
Step 2: Review Logic and Flowchart
- After selecting
Struct.sol, the Struct – Logic page opens. - Observe the interactive flowchart that visually represents the conditional execution flow:
- You can drag the canvas to move the flowchart.
- Scroll to zoom in or out for better visibility.
- Click Proceed to Exercise after understanding the execution flow.
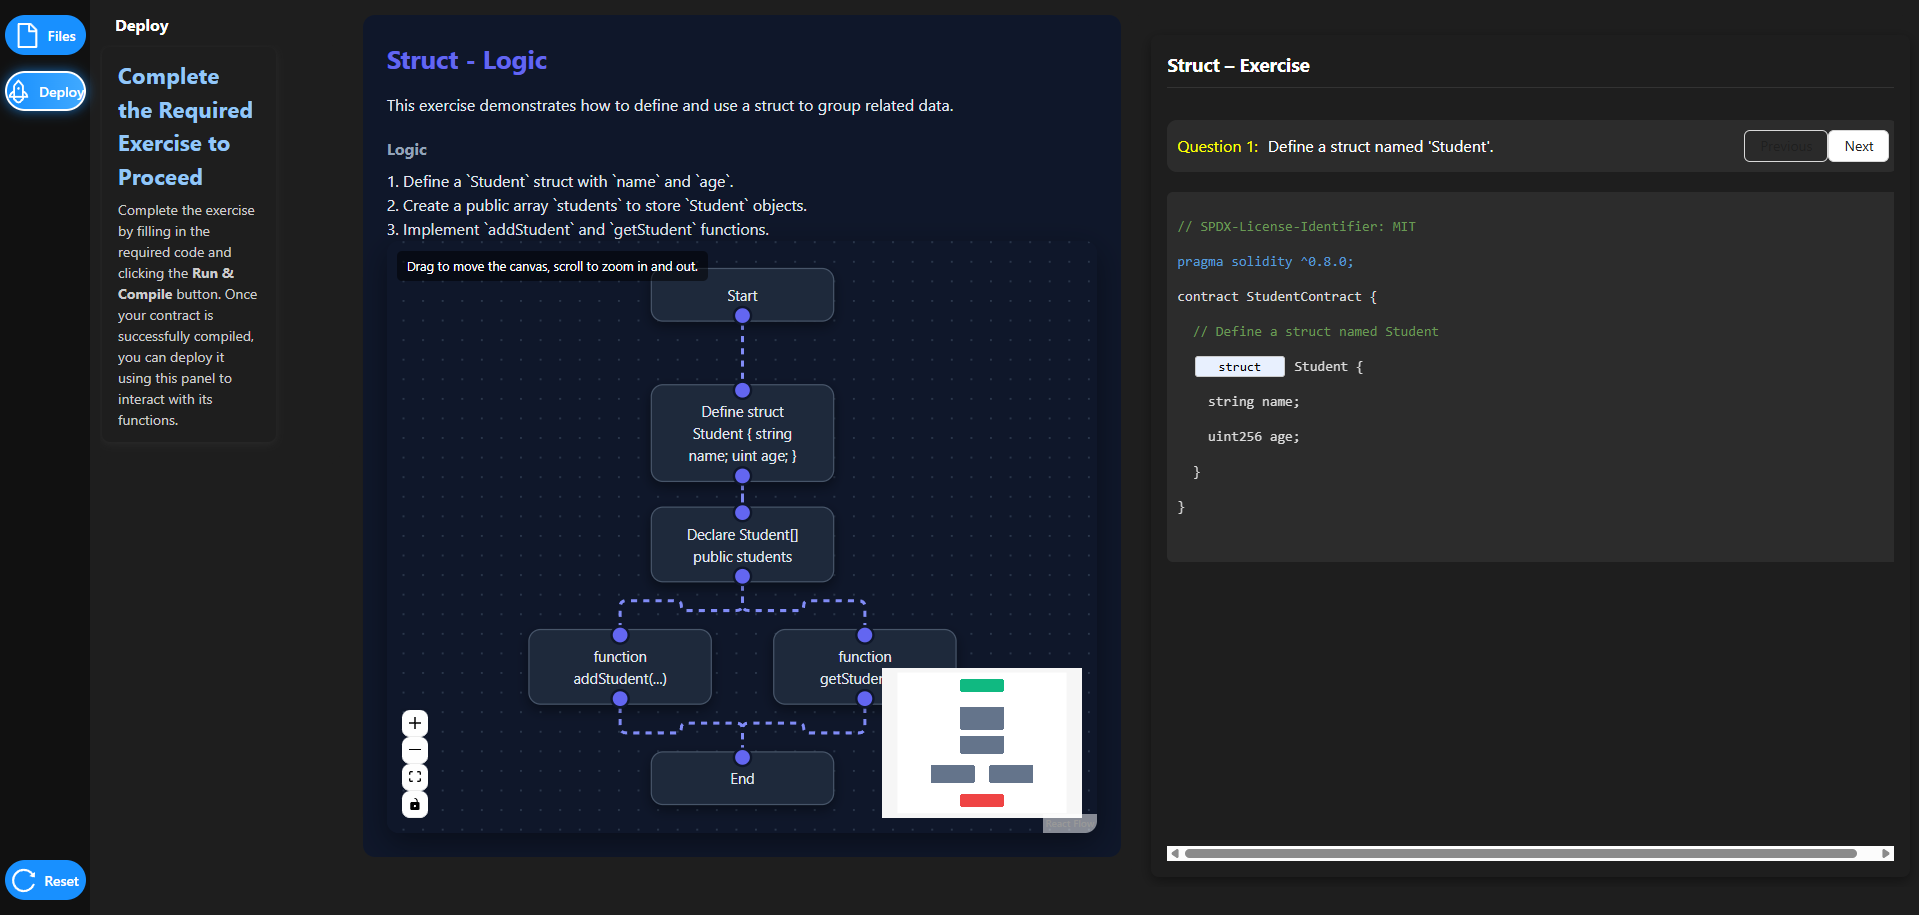
Step 3: Define the Student Struct (Exercise – Question 1)
- The Struct – Exercise panel appears on the right side of the screen.
- Question 1 asks you to define a struct named Student.
- Enter the required
structkeyword to complete the struct definition as shown. - Click the Next button to proceed to the next exercise.
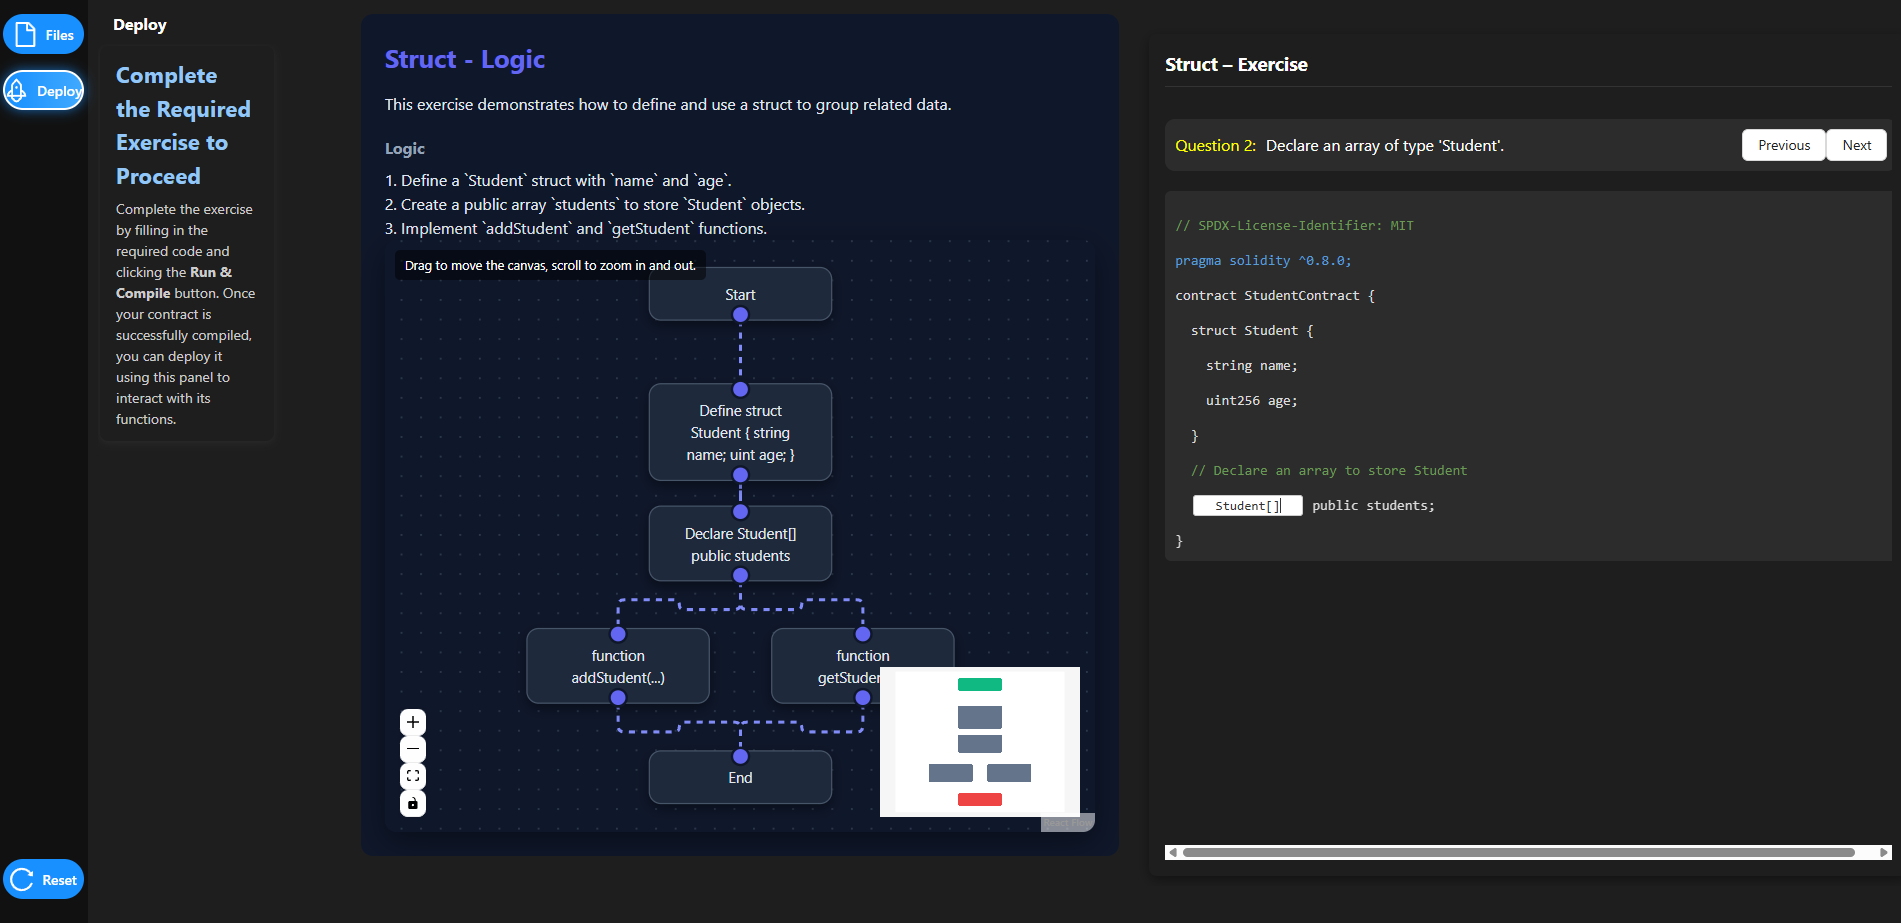
Step 4: Declare the Student Array (Exercise – Question 2)
Question 2 asks you to declare an array of type
Student.Add the following declaration to store multiple student records:
Student[] public students;Click Next to proceed.
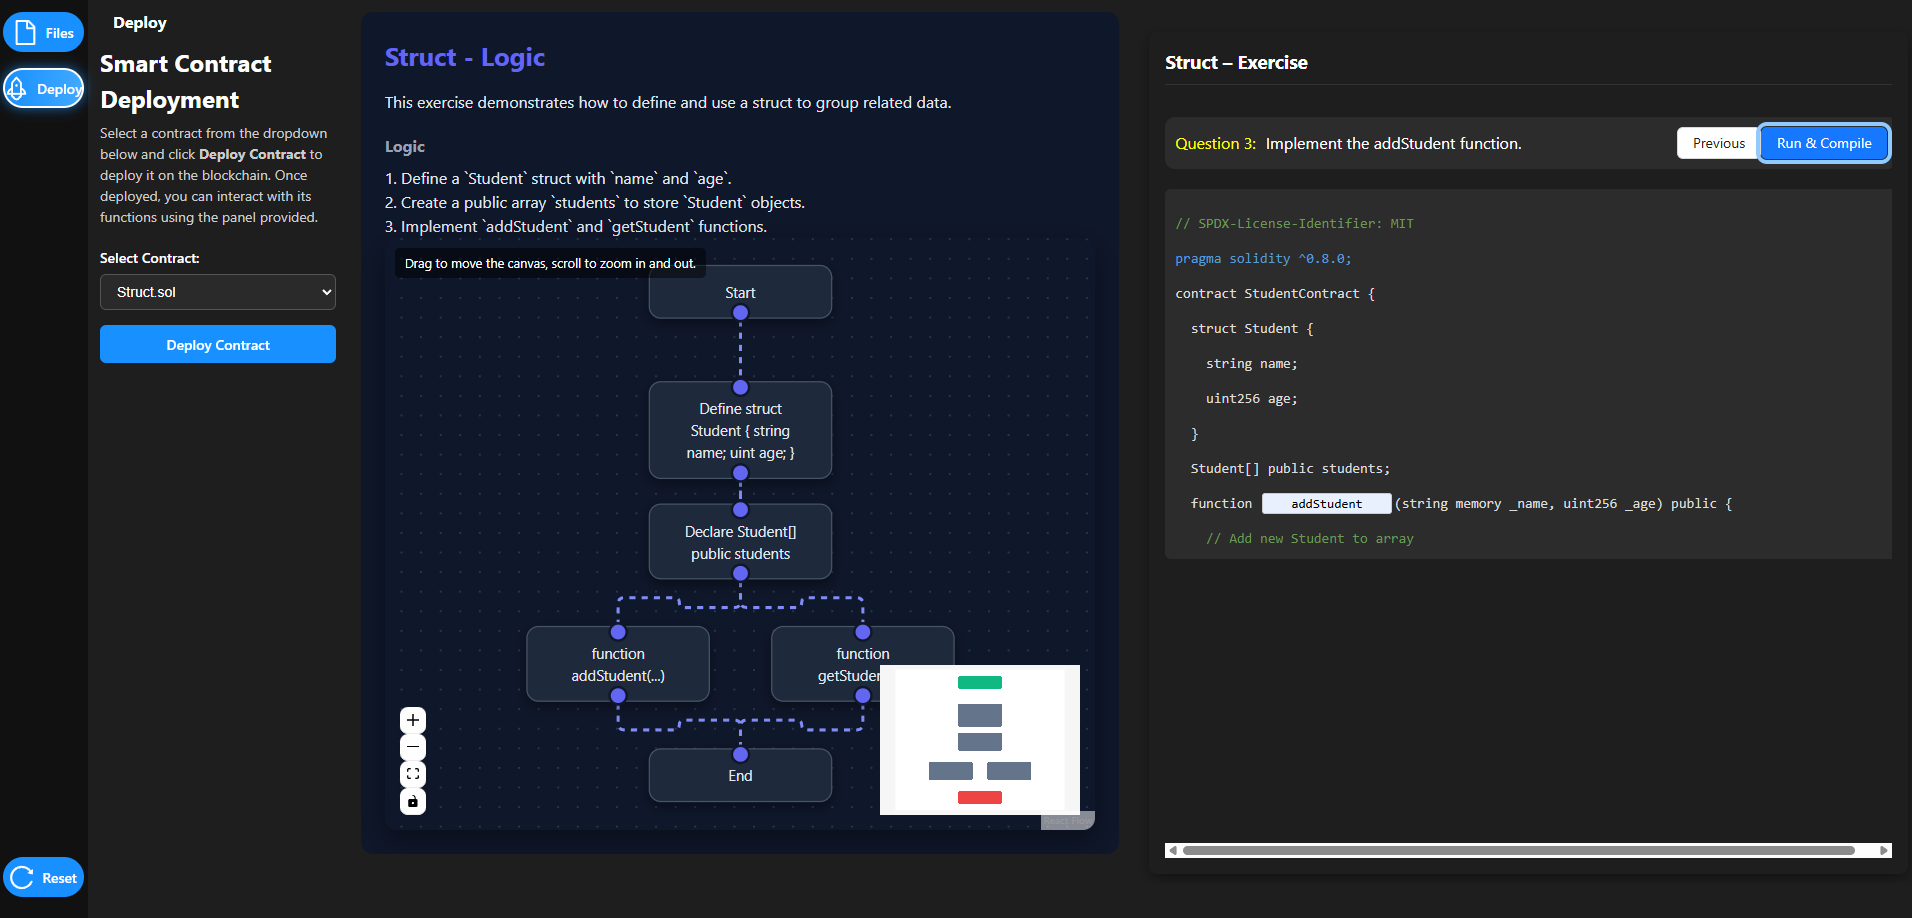
Step 5: Implement the addStudent Function (Exercise – Question 3)
- Question 3 requires implementing the
addStudentfunction. - Click Run & Compile.
- If the code is correct, the compilation will succeed.
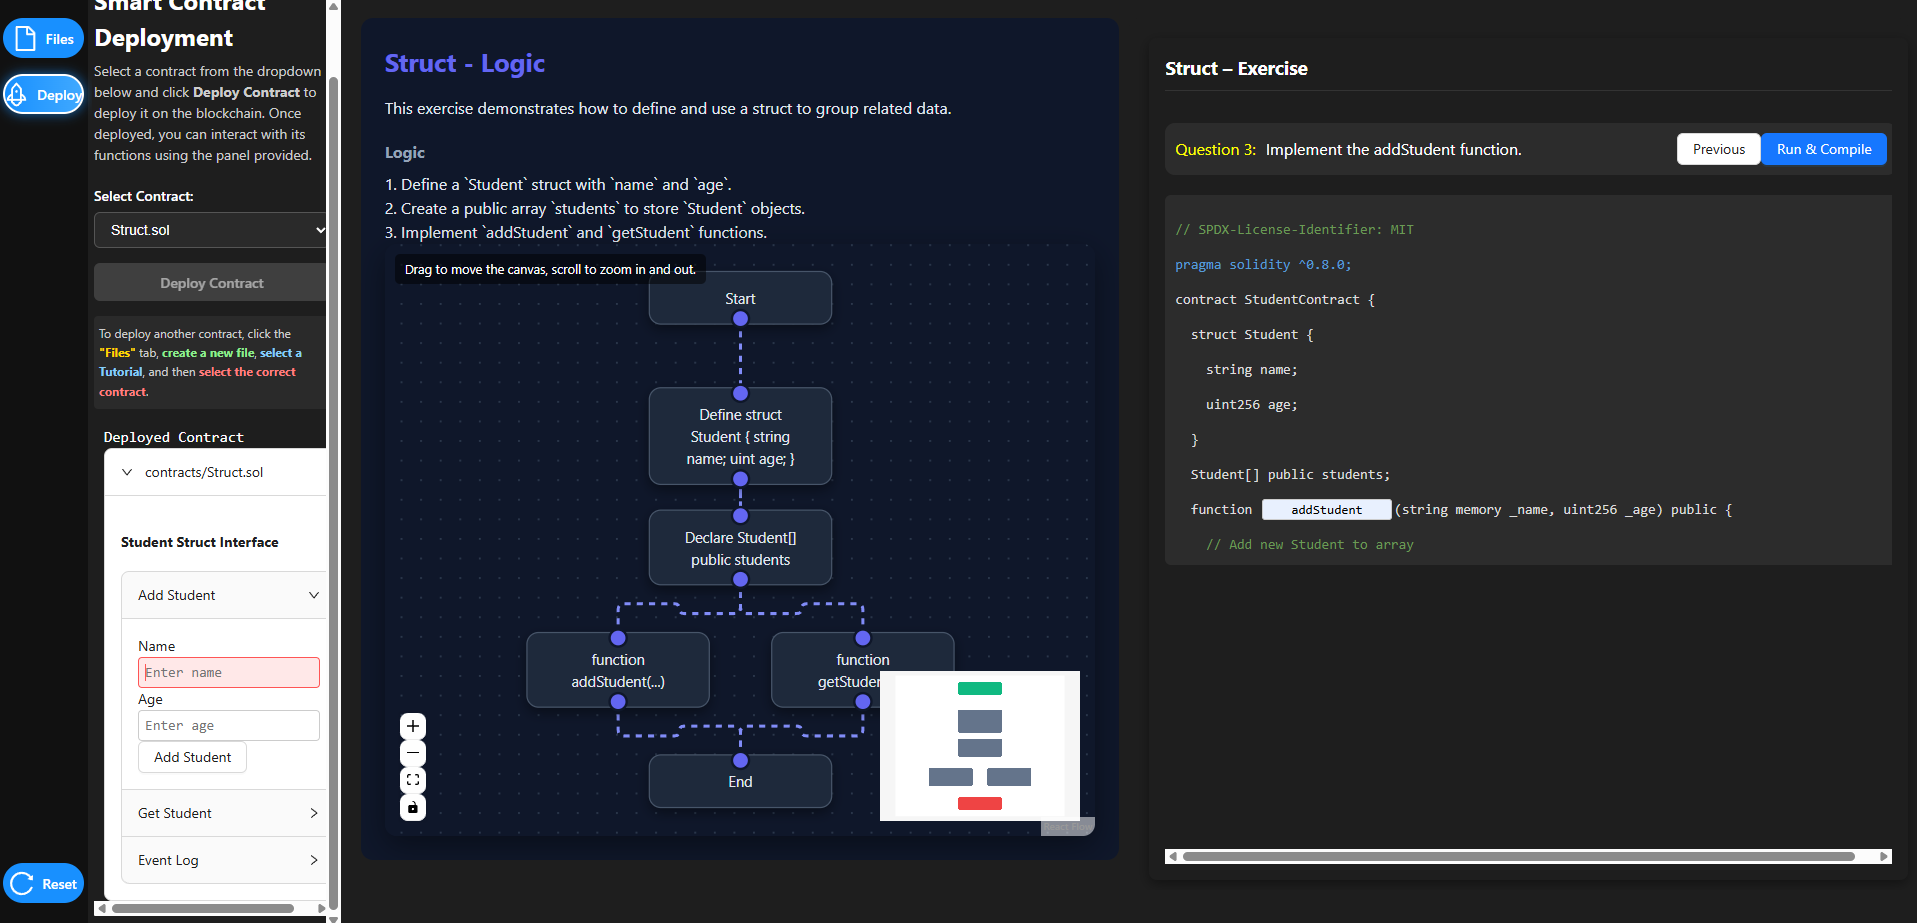
Step 6: Deploy the Smart Contract
- After successful compilation, the Smart Contract Deployment panel becomes active.
- Select
Struct.solfrom the contract dropdown. - Click Deploy Contract.
- A Deployed Contract section appears, confirming successful deployment.
Step 7: Interact with the Deployed Contract
- In the Student Struct Interface:
- Enter a Name.
- Enter an Age.
- Click Add Student to store the data on-chain.
- Use Get Student to retrieve stored student details.
- Observe the returned values and event logs.
Continuing with the Remaining Smart Contract
After successfully completing the Struct tutorial, repeat the same procedure for the remaining tutorials:
- Select Array.sol to practice working with dynamic and fixed-size arrays, including looping constructs such as for and while loops.
- Select Mapping.sol to explore key-value storage, advanced mapping patterns, and their use in creating efficient data retrieval structures.