Interfacing Soil Moisture Sensor with Arduino
Instructions
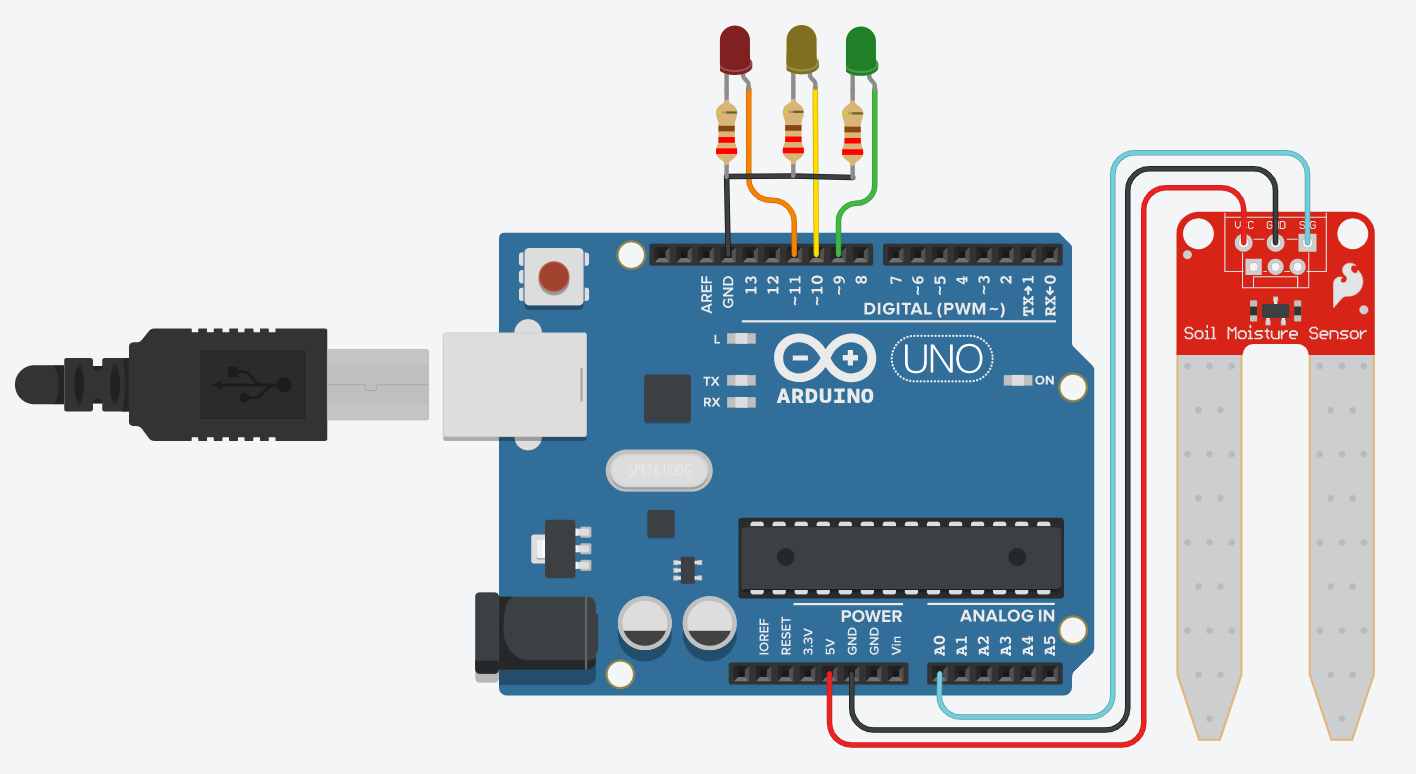
Objective:
Learn to use the Soil Moisture Sensor to measure soil humidity levels and control RGB LED indicators based on moisture content, enabling automated plant watering systems.
Steps to Perform:
- Click 'Start Simulation' to power the Arduino and enable the moisture sensor
- Use the slider to adjust soil moisture levels from 0% (dry) to 100% (wet)
- Observe the RGB LED color changes:
- Red LED: Dry soil (0-39% moisture) - needs watering
- Yellow LED: Moderate moisture (40-55% moisture) - optimal level
- Green LED: High moisture (56-100% moisture) - overwatered
- Monitor the moisture percentage displayed below the slider
- Notice how the sensor reading maps to 0-255 Arduino analog values
- Click 'Stop Simulation' to turn off the power and reset the sensor
Key Concepts:
- Soil Moisture Sensor: Measures soil water content using resistance between two probes
- Analog Reading: Arduino reads sensor values (0-1023) and maps to 0-255 range
- RGB LED Indication: Visual feedback system with three states (dry/moderate/wet)
- Threshold Logic: if-else conditions control LED based on moisture ranges
- Automated Irrigation: Can trigger water pumps when moisture drops below threshold
- Applications: Smart agriculture, garden automation, greenhouse monitoring