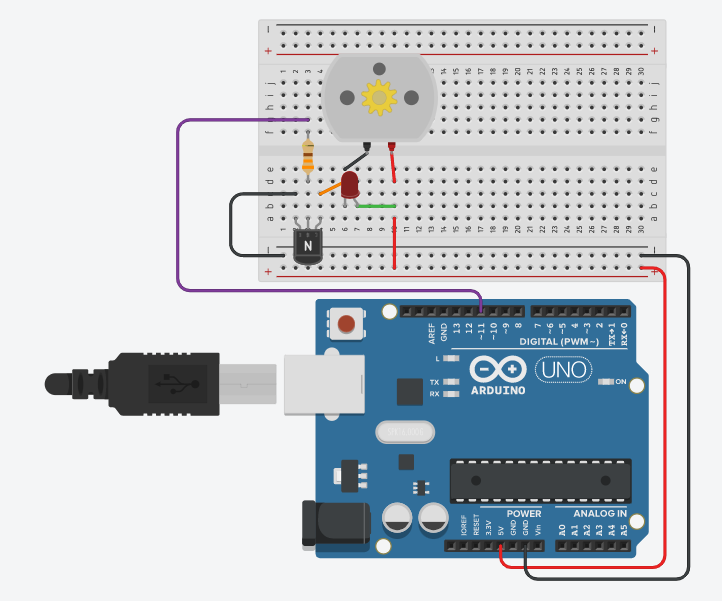
Interfacing DC Motor with Arduino:
Instructions
Objective:
Learn how to control a DC motor using Arduino with PWM (Pulse Width Modulation) for speed control.
Steps to Perform:
- Look at the Arduino Code in the code editor below
- Find Line 8:
analogWrite(11, 20);- this controls motor speed - Click on line 8 and change the value to any number between 0-255
- Click "Apply Code" button to update the motor speed
- Click "Start Simulation" to power up and see the motor rotate
- Observe how the motor shaft rotates at the speed you set
- Try different values: Higher = faster, Lower = slower, 0 = stopped
- Click "Stop Simulation" to turn off the motor
Key Concepts:
- DC Motor: Converts electrical energy to mechanical rotation
- PWM Control: Uses analogWrite() to control motor speed (0-255)
- Pin 11: PWM-enabled pin connected to motor driver circuit
- Speed Range: 0 = stopped, 255 = maximum speed
- Editable Code: Modify line 8 directly to change motor behavior
- Motor Driver: Circuit amplifies Arduino signal to drive motor
- Real-time Testing: Edit code and apply changes to see immediate results
Arduino Code - main.ino